Today I learnt how to animate a moving pencil making a line as it goes.
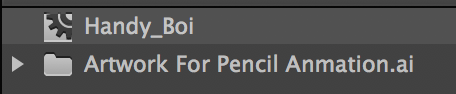
Right off the bat, I decided that I didn’t want to make a pencil. So I made my alternative artwork on Adobe Illustrator and imported it into Adobe Animate.
I then made the hand into a symbol.
I then added a Classic Motion Guide to the symbol. These allow you to draw the path that you want your symbol to follow.
This is what it looked like.
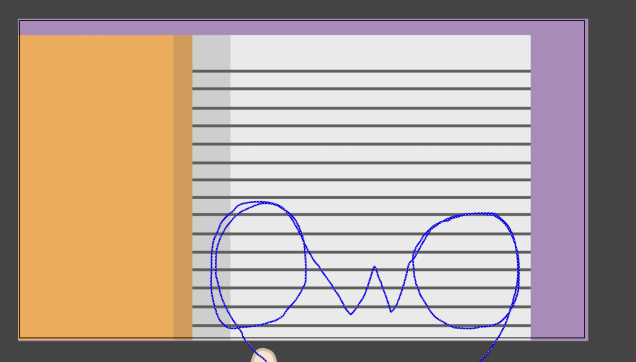
I selected the pen tool, with the ink option because I wanted a somewhat smooth line.
I proceeded to draw a spectacular continuous line drawing.
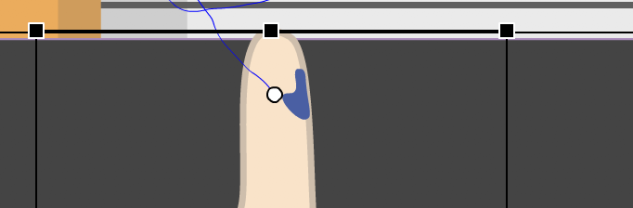
I placed the pivot point in the tip of the finger so that the finger would follow the line, not the middle of the forearm.
I created about 70 frames, and added a Classic Motion Tween to that bad boy, then moved the red slider on the timeline to the end, and placed the hand on the end of the line, and it snapped to it, creating a keyframe.
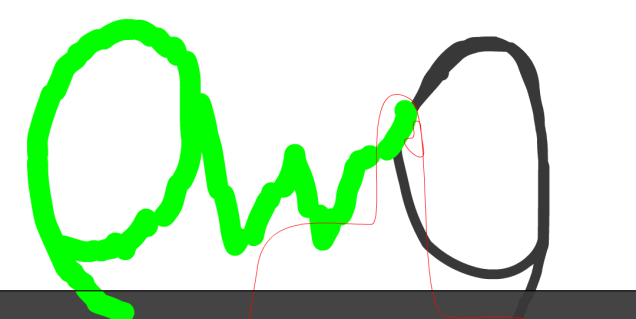
When I played the animation, the hand followed the OwO, finger first. But the line was not visible.
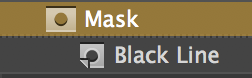
Next up was masking. I made a copy of the OwO and changed its colour. I then made a mask of it.
This is what it looked like.
I then selected the mask layer and went to the first keyframe. I selected the brush tool and painted along the line behind the finger, went to the next frame, where the finger had moved, and painted the line behind it, and went on like this for the whole animation.
This made sure that the line didn’t appear on screen until after the finger had passed it. This made it look as if the finger was finger painting the OwO on the page.
I then went home, and big surprise, I edited it for several hours.
Today I learnt how to make a bouncing ball animation in Adobe Animate.
Instead of being a normal, functioning human being, I decided to make it more complicated, so instead of it taking me an hour at most, it ended up taking me around 5 hours. Yay me…
I started off by making my ball, stairs and background in Adobe Illustrator, and imported it into Animate.
I then made the stairs and ball into symbols.
I proceeded to make a keyframe on the stairs symbol, then one at 20 frames, with the stairs positioned further down, threw a Classic Motion Tween in, and a painful amount of time later I had a flight of stairs that moved up, which made it look like the camera was moving down. This is what it looked like.
I then made the head symbol into another symbol, so that I had two head symbols. One would be for the movement, and one would be for the rotation.
I started with the rotation. I used the same technique as I did with the clock animation. I made four evenly spaced keyframes, with the head rotated 90º on each, and added Classic Motion Tweens between each of ’em.
Just realised they kinda look like ._. faces. Ain’t that cute.
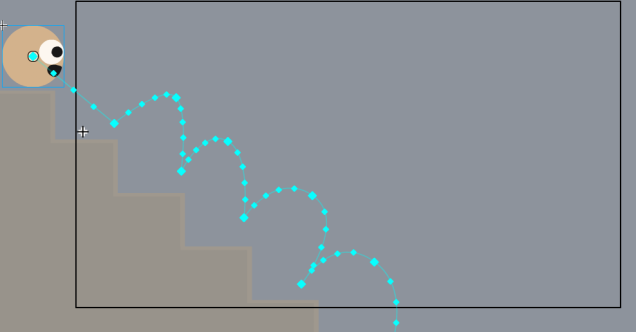
made a keyframe at the start, and then slapped a Motion Tween on it. I made sure to make it a motion tween, not a classic motion tween because they do very different things. A classic motion tween interpolates the frames between keyframes and a motion tween lets you control and manipulate a symbol’s movement path.
I then dragged my little head guy to the position I fancied, and it automatically created a keyframe at the point on the timeline. It also created a line showing the movement path.
I then raised the points on the line where I wanted the ball to jump
And made the lines curved by clicking them with this tool selected.
This is what the timeline looked like.
But Adobe Animate was being really annoying and wasn’t complying, by making the ball fly in big infuriating ovals up and down the stairs randomly. I fought with it for several hours, but it wasn’t going to work anytime soon. So instead I simply made the ball jump up and down on the same step a couple of times. Combined with the stairs moving up, this gave it the same effect of bouncing down the stairs but was a lot simpler. So yay!
So with that palaver out of the way, I moved onto the final stretch. At each point that the ball hit the stair, I flattened it and made a keyframe. Then when it was in the air, I made a keyframe and set it back to its original size.
I now had an animation where a rolling head bounced down a flight of stairs. I went home and began editing it. I copied and pasted it a couple of times, added some nice fade transitions, downloaded a bunch of free sounds and carefully placed them by hand at the right places and tada!
One really interesting thing I learnt from doing the editing, in particular, was that you can effectively imply action without actually showing it. Like in the finished video, you can hear the head tripping and falling down the stairs, but it is only a black screen. It makes you imagine the action, and the effect is still the same, whether I animated it or not. I also used this technique in the end. I feel like this is going to prove to be a really useful trick in the coming months.
And without further ado, here’s the finished animation. I’m completely pooped.
Today I learnt how to animate a clock’s hands spinning around, with Adobe Animate.
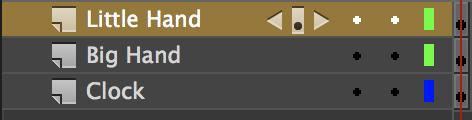
First of all, I made a clock in Adobe Illustrator and imported it into Animate, making sure to separate the different parts into their own layers.
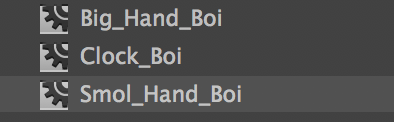
I then made each of them into a symbol. Symbols seem to be pretty similar to compositions in Adobe After Effects, as in they let you animate specific parts of something, which you can then watch in the main Scene window.
This is what they looked like as symbols, in the library window.
I then used this tool.
To move the pivot points of the two clock hands into the middle of the clock, so that when I begin rotating them, they won’t have a fit and fly around, but instead will rotate around the centre of the clock, like the good little hands that they are. A pivot point is represented by that little white dot.
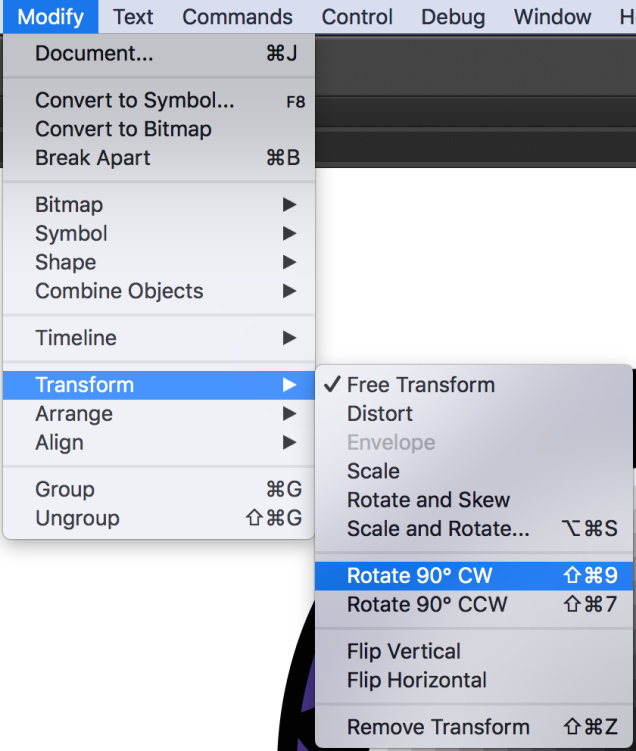
I then made a keyframe with on the small hand, and went forward 2-3 frames and made another keyframe. On this keyframe, I rotated the hand 90º clockwise, then I went on to do this four times.
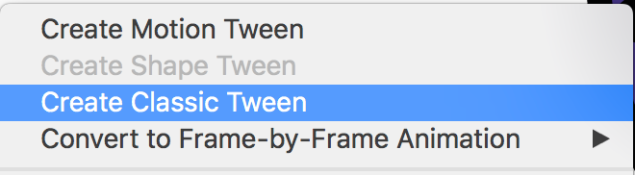
Doing this makes sure the minute hand will rotate 1/4 of the clock for each keyframe. I then Made a Classic Motion Tween between each of the four frames. A motion tween basically fills in the gaps between frames, which saves a great amount of time and mental torture.
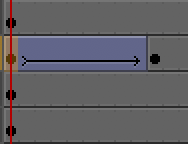
A Classic Motion Tween looks like this.
So now I had one full rotation of the minute hand. But I also wanted the hour hand to move somewhat realistically, so I started by making 12 keyframes on it, which were spaced at the points on the timeline when the minute hand passed 12. On each of the keyframes, I positioned the hand on a number, in a linear fashion. Then I put Classic Motion Tweens between each of them. This ensured that whenever the minute hand did a full rotation, the hour hand would shift one hour. I then copied and pasted the keyframes of the minute hand’s full rotation 11 times, spaced directly after one another. This meant that although fast, the movement of the clock hands would look realistic. This was what all of that put together looked like.
So that was the clock accounted for. It should have been done, but me being me, I wanted to add a background. So I made a fancy swirl and imported it into Animate. I tried using the same technique to back it swirl, but for some dumb reason it wouldn’t work, So I had to make it into a symbol, then make a keyframe, move it a bit, make another keyframe, move it a bit more, and so on. This technique of animation is referred to as animating on ones. The result looked like this.
After that, I was satisfied with it, so exported it.
I then went home and edited it to make it real fancy and show-offy. This is the final product. Yay!