Maya Arm Animation

I started this task by creating a sphere.

Screen Shot 2019-11-12 at 14.17.14.png

Then I created a cylinder, rotated it 90 degrees and extended it out, by selecting the vertices of one of the ends, and using the move tool to extend it out.

Screen Shot 2019-11-12 at 14.21.41.png

I then used the scale tool to shrink the selected vertices so that it looked like this.

Screen Shot 2019-11-12 at 14.22.56.png

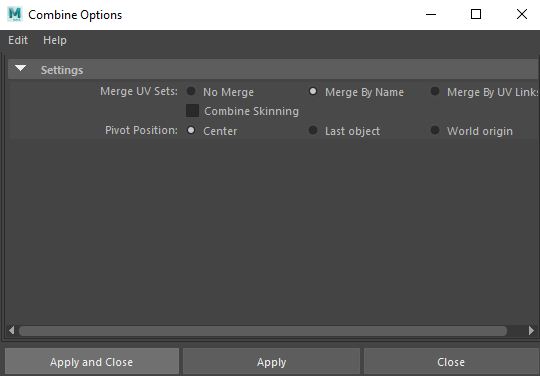
Next, I combined the two objects into one, by clicking on this option box.

bullshet

Then clicking “Apply and Close”.

bullshittery

This is what the two grouped objects look like in the outliner.

Screen Shot 2019-11-18 at 10.37.09.png

Then I selected the group and pressed CMD + D to duplicate the objects.

Screen Shot 2019-11-18 at 10.48.45.png

Then I played around with the second group, trying to make it look more like a forearm, then I made another sphere and a rectangle for the wrist and hand.  I stretched out the forearm quite a bit because I wanted to make the arm kind of spindly, cartoony and stylised.

Screen Shot 2019-11-18 at 11.04.00.png

This is what the outliner looks like at this point.  Screen Shot 2019-11-18 at 11.08.35.png

The thingies with the red arrows on them are my object transformation history, so they are not useful and just clutter up the outliner, so I’m going to remove them by doing this.

Screen Shot 2019-11-18 at 11.08.21.png

This is the outliner now.  Ain’t that better.

Screen Shot 2019-11-18 at 11.11.15.png


Then I renamed the groups so that it is easier to navigate the outliner.

Screen Shot 2019-11-18 at 11.18.36.png

Then I selected the arm and created a new layer.

Screen Shot 2019-11-18 at 11.20.36.png

This is what the layer looks like.

Screen Shot 2019-11-18 at 11.24.37.png

I then double-clicked on the layer, and the edit box came up.  I changed the colour so that it is more visible in the menu, and renamed it so that it is easier to understand which layers correspond to which objects.
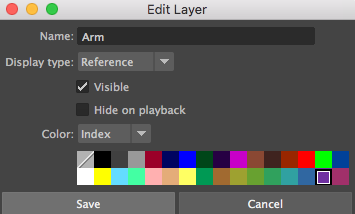
Screen Shot 2019-11-18 at 11.25.33.png

This is what the layer looks like now.

Screen Shot 2019-11-18 at 11.27.40.png

Next, I switched from the modelling to the rigging menu.

Screen Shot 2019-11-19 at 12.41.49.png

Then with the arm selected, I created a joint by doing this.
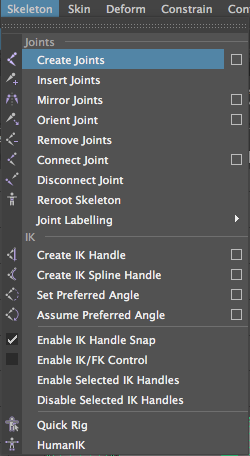
Screen Shot 2019-11-19 at 12.52.12.png

I then clicked on each sphere which will act as a joint, to make the arm rig.  I also switched to wireframe mode to make it easier to see the rig.

Screen Shot 2019-11-19 at 12.53.55.png

I then renamed the joints to reflect their corresponding parts of the arm.  They’re in a parent-child hierarchy, which means that when I move and rotate, for example, the upper arm joint, both the forearm and hand joints with move along with it, because they’re the children of the upper arm.

Screen Shot 2019-11-19 at 13.06.43.png

I then selected the hand object group, and the hand joint.  When doing this, you should always select the object first.

Screen Shot 2019-11-19 at 13.11.19.png

Then I clicked parent to combine them into the parent-child hierarchy of the joints.
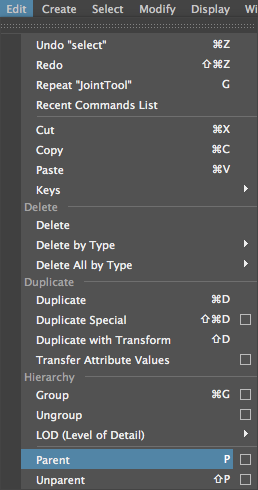
Screen Shot 2019-11-19 at 13.11.27.png

Then I did the same with the forearm and upper arm, and this is what it looked like in the outliner.

Screen Shot 2019-11-19 at 13.24.43.png

And now, whenever I rotate the upper parts of the arm, the rest moves with it!  Yay!

So now I just need to animate it.  I want to make it slap someone, so I’m going to download a model of a guy off of TurboSquid.  https://www.turbosquid.com/

I then created lambert materials and assigned them to different parts of the body to make it look better than everything just being a plain grey colour.

Screen Shot 2019-11-19 at 14.02.43.png

Next, I animated the arm swinging and tried to add secondary animation to it, in an attempt to make it look more realistic.

I then made the man fall down when he’s slapped, but I made a mistake and the inner bits of his face stayed suspended in the air.
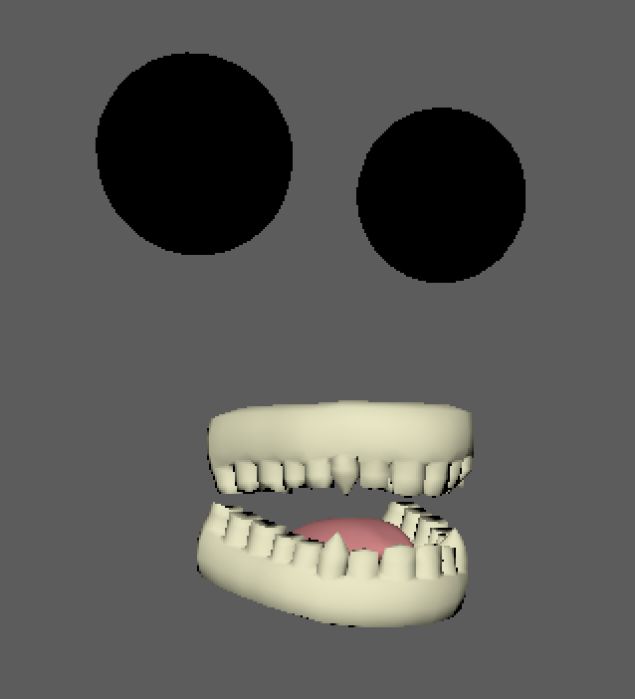
Screenshot 2019-11-19 at 15.26.40.png

But I thought that it makes it more interesting, so I decided to keep it like that.  After a small amount of time, I animated the face parts falling down out of shot.  I wanted to make it similar to this.

source.gif


I changed the colour of the eyes to white, then also made some pupils so that I could make something similar to the gif above, and this is it finished!


Questions!


Name one thing that non-manifold geometry cannot do? – non-manifold polygons cannot be unfolded into a continuous flat piece.

Describe 3 things that you can change when grouping objects together? – You can group the selected objects together, ungroup the selected group and you can select a group.

Give an example of how or when you might use a parent-child hierarchy – When you transform a parent, its children are transformed with it. This lets you, for example, model a leg by making the thigh the child of the hip, the knee the child of the thigh, the shin the child of the knee, the foot the child of the shin, and so on. Rotating one join rotates the rest of the leg under that joint.

Name 3 different combine options within May and how might you use the selected options in your workflow? – Pivot Position, you would use this to decide where you want the pivot point of the combined object will be.   Combine Skinning, this binds skins, by using the previous weights.  Merge UV Sets, this allows you to choose an option to set how your UV Sets should behave upon merging.

Describe two things that you should be aware off when combining geometry in Maya – Make sure you’re aware of where the pivot of your newly combined mesh is located, as it will affect future transforms you apply to it.

Combining meshes can result in non-manifold geometry, where the normals of adjacent faces are pointing in opposite directions.


Inanimate Object Animation

tldr:


RESEARCH

I watched a bunch of videos related to animated objects.

After watching this horror 3D short film, I got thinking about making a horror animation.  But then I also had the idea to do a noir black and white kind of thing, because I’m making a noir film in another class.  I could model and rig a cigar, and make it all dramatic.

Or if I go down the rabbit hole further, I could do a torture scene with inanimate objects.  It would be cool to have some voice acting from either me or my friends.  A group of thuggish objects could be questioning a sly object about the whereabouts of an object related to them.

I found this article about two people who made animations out of inanimate objects and they’re awesome!   https://www.itsnicethat.com/features/found-in-adobe-stock-michael-marczewski-animation-130918

Or I could combine the two ideas and make a torture noir scene with a cigar.  I found this free object on Turbosquid.  https://www.turbosquid.com/3d-models/3d-cuban-cigar-model/879151

Screen Shot 2019-11-25 at 11.26.04.png

I watched this video essay on Film Noir and it really helped me to think of ideas and get a sense of the genre.  It also gave me a list of films that I want to go and watch for more inspiration, like Chinatown.

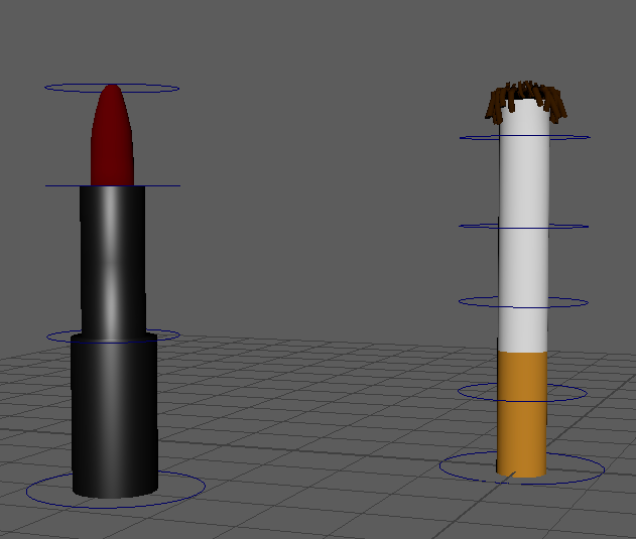
I’m thinking that I want it to start with a voiceover of the protagonist, and either a black screen or an establishing shot of the room.  I want the protagonist to be restrained in some way, the antagonist to be looming over him, and the femme fatal somewhere close by who is betraying the protagonist, who is going to be killed at the end of this scene.  The antagonist could either be one of those fancy metal lighters or a cigar, and the protagonist could be a normal cigarette.  The femme fatal could be a stick of lipstick, and there could be some thugs that could be shot glasses or just bottles of bourbon.

The antagonist and femme fatal are trying to get the whereabouts of some money or something valuable out of the protagonist, and once he gives it to them, he will be killed.

I also love the idea of having one colour that sticks out.  In premier pro, I’m going to make the whole video black and white, and then I can play around with the colours so that one type of colour is bright and vibrant, like red.  I think red would look cool, especially if I use red lipstick because that then signals out to the audience that she’s important.  Or I could make the thing that he gives them a bright colour.  Ooooo!  the femme fatal lipstick could kiss the protagonist on what would be his cheek and it would leave a bright red mark on it.

I found this 3D noir detective office that someone made.  I think that it would be awesome to have the scene take place on a noir desk, perhaps with a man slumped over it asleep.  So I guess the first thing to do is start making my own room.

Screen Shot 2019-11-26 at 13.40.03.png


MAKING STUFF

I used my friend Dia’s real-life cigarette for reference and modelled this.

Cigarette.JPG


I used this reference image to make my own 3D lipstick model.

LIPSTICKS-2.jpg

This is the result.

Screen Shot 2019-12-03 at 13.31.04.png


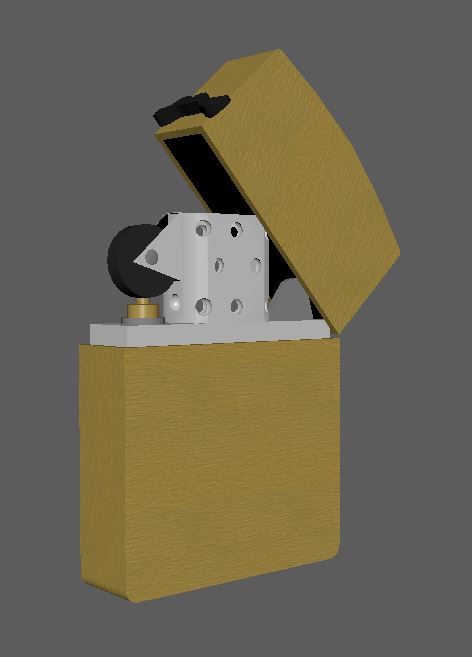
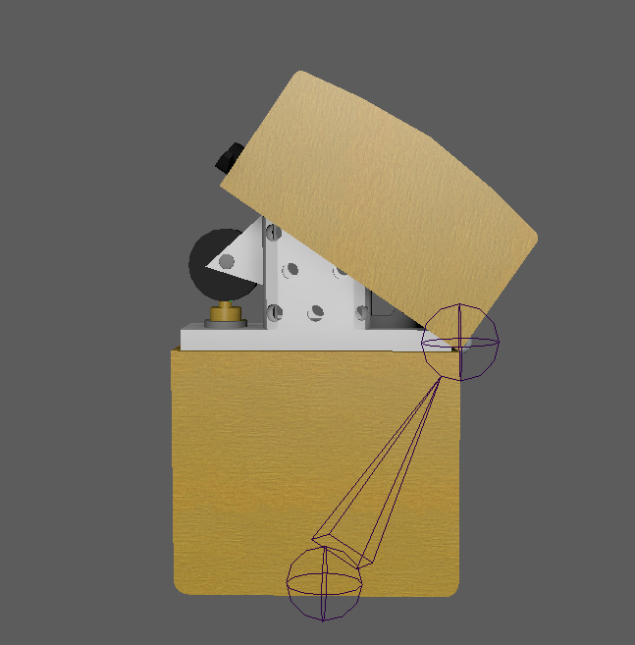
I then used this photo for reference in making a 3D lighter.

200_04_1024x1024

This is the result.

Lighter.JPG


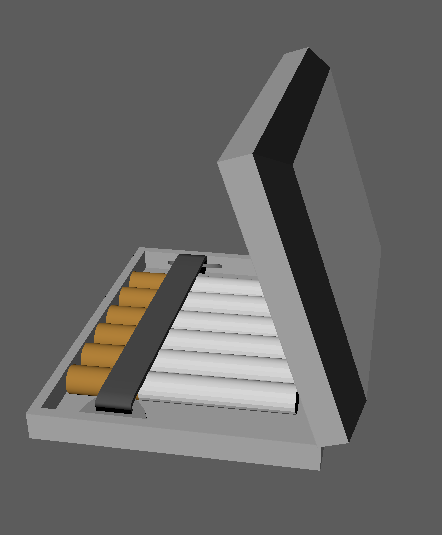
I then used this photo for a reference.


download.jpg

And this is the result.

Screen Shot 2019-12-03 at 13.33.14.png

I forgot to save the reference photos for the next objects I made.

Chair.JPG

Handbag.JPG

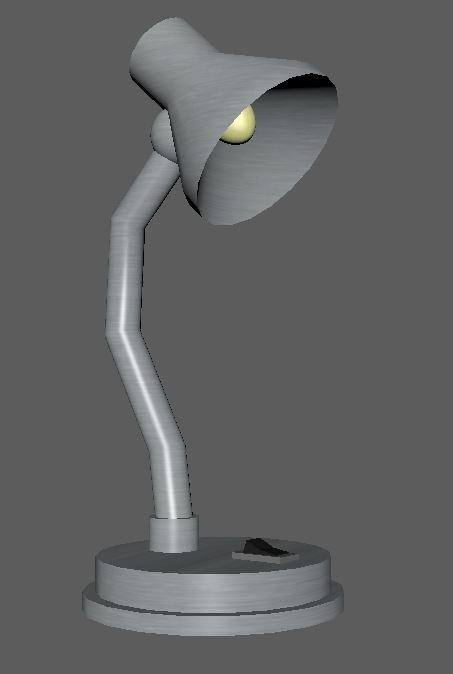
Lamp.JPG

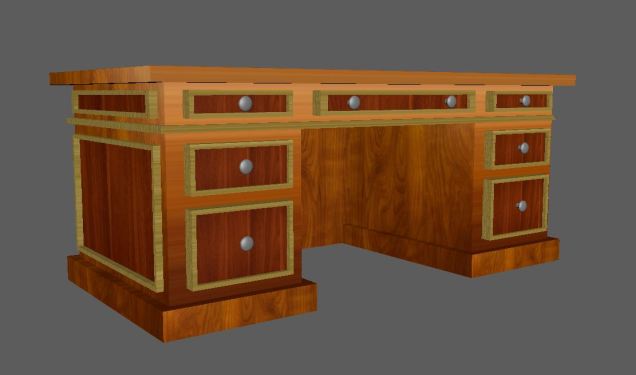
Desk.JPG

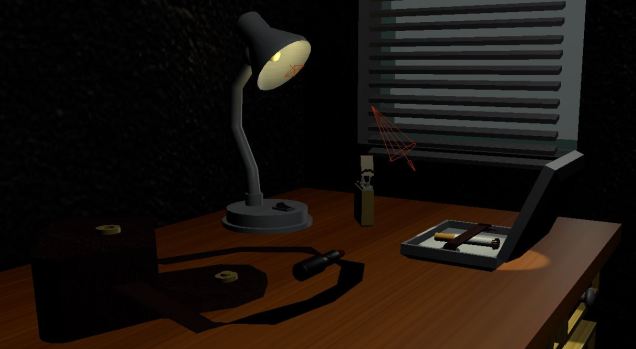
So this is how everything looks when it’s put together.

Closer shot.JPG


SCRIPT

LIGHTER “Now, I’m only going to say this once more, and you are going to use your pitiful voice to tell me the truth, or I’m going to burn your lovely missus here, and you’ll have to watch as she slowly, painfully melts into a red goop and you’ll be responsible.  How you’re gonna live with what you’ve done, I don’t know”  


CIGARETTE “STOP! Just… stop, I’ll tell you, but once I do, don’t you dare lay a single flame on her. …The diamonds are in the jewellery box on the shelf…”  


LIPSTICK “Christ, I thought he’d never talk. Being stuck here for half the day hasn’t done any favours for my immaculate complexion.”    


CIGARETTE “Y…You were working with him all along?! How could you do this to me?! I trusted you! I fucking love you!”  


LIPSTICK “Tough, love is overrated sweetie.”  


CIGARETTE “This is the man who will burn me alive. This is the woman who will betray me. And this is me, the fool who fell in love with the wrong cosmetic product. Now let’s roll back in time to see the beginning of the end of my wretched life.”  


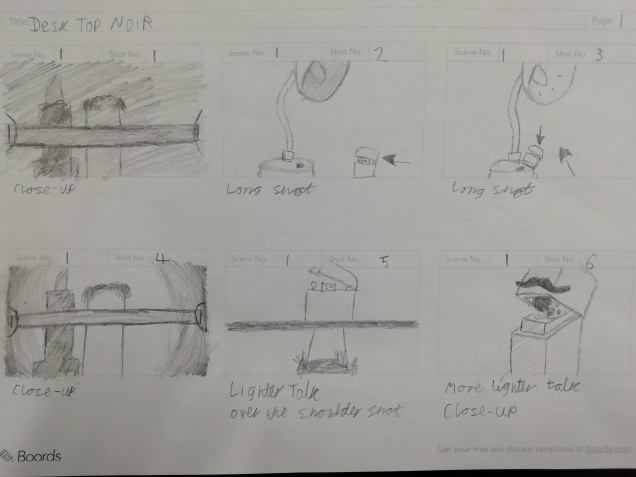
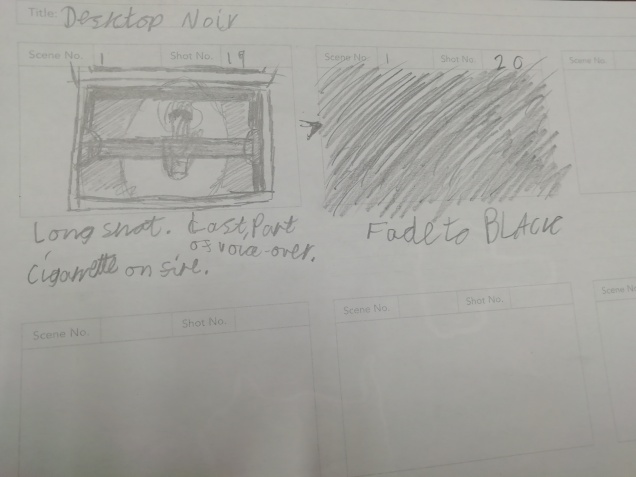
STORYBOARDS

IMG_20200303_182859IMG_20200303_182928IMG_20200303_183007IMG_20200303_183030


ANIMATING

I then rigged the lipstick and cigarette and used the constrain option to bind the circles to the skeleton.

Screenshot 2020-03-03 at 19.12.14.png

So now I have everything I need in order to actually start animating!

…or so I thought.  It turns out that because I scaled up the cigarette and lipstick models I couldn’t figure out a way to scale them back down to the correct size, so I deleted the rigs, scaled the models down, and re-rigged them.  I then realised that I needed to rig the lighter, so I did that.

Screenshot 2020-03-05 at 18.26.23.png

And NOW I have everything I need to start animating!

I got my dad to be the voice actor of the lighter,  my friend Alex to voice act the cigarette, and  Kat to be the lipstick.

Unfortunately, because I recorded them on my phone, for some reason they were saved in the file format m4a, which Maya can’t use, so I used a browser-based file conversion website called Zamzar.

I imported the voice lines into the timeline and animated the cigarette and lipstick to switch to each sound the voices made, to make it look like they were talking.  I tried my best to lipsynch the lighter’s lid moving up and down with the voice lines.  This all took a LOT of keyframes.  Here are all of the ones just for the lighter.

keyframe gore.JPG


RENDERING

After I animated it, I used the camera sequencer to organise what cameras would be used at what points in the timeline, and for how long.  Some of my shots only needed one or two frames rendering, so I didn’t include them in the camera sequencer.  Here’s what it looked like.

camera sequencer

Once that was done, I spent way too many hours trying to figure out a way to batch render the whole lot in one go, instead of manually setting each camera to render.  But I’m so pleased I didn’t because 400 frames in, I realised that I hadn’t set the lights up properly and everything was way too dark.  Although I was going for a noir type of atmosphere, this was just too damn dark.

Making_Objects.0265.jpg

So I set up the lights again and started the very long ordeal of rendering it.  The batch render took 1 minute per frame, and I had 1480 frames.  I did some maths with google and calculated that it was going to take me 23h 30m to render.  I rendered the shots over the span of 4 days and made a separate folder for each of the cameras so that I could stay organised and not have to look at almost 1500 jpegs every time I opened my Onedrive project folder.  The “LIGHT” and “DARK” at the end of each folder specify the frames that were rendered before and after I fixed the cameras.project gore

By the end of the 4 days, my desk was littered with sheets of pages with messy scribbles strewn all over them trying to document which shots I had rendered, in case I somehow forgot.  In hindsight, I could have just looked at the rendered frames’ numbers for reference but I guess I had developed a sort of tunnel vision.


EDITING

So now that I had all 1480 frames rendered out, I had to make them into a watchable video.  I used Premiere Pro’s image sequence import option to make each lot of jpegs into a video and started editing it all together with the voice lines.  I used a bunch of foley sounds and some atmospheric rain audio from https://freesound.org/

I used this for the jazzy background music to set the mood.

I used this for the rain in the establishing shots.

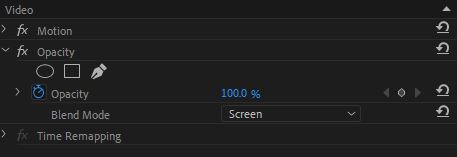
I positioned it over the shots I wanted there to be rain and I changed the blend mode from “Normal” to Screen”, and it erased the black background.

black screen.JPG

I used an adjustment layer to animate the colour changing from coloured to black and white at the end of the video.

adjustment layer.JPG

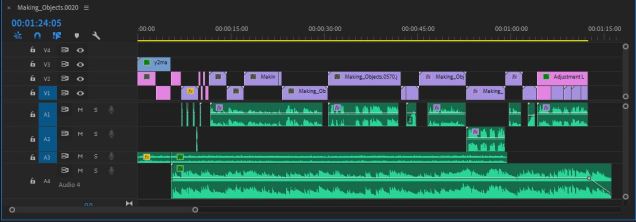
This is what the whole video looked like in the timeline.

finished.JPG

Then I exported it and uploaded it to Youtube.

My god, I’m so happy to finally finish this project!  I’m free!!!!!

Maya Arnold Robot Lighting Task

I was given a premade model of a toy robot that I needed to add realistic metal shaders to and then set up some lights so that the robot is lit up realistically.

I’m doing this with the help of this article.

https://docs.arnoldrenderer.com/display/A5AFMUG/Introduction+to+Arnold+for+Maya

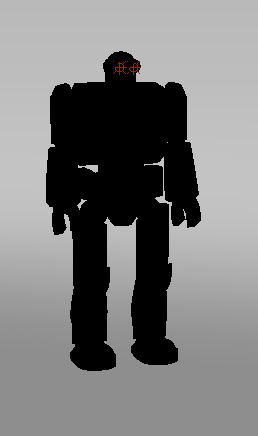
Here’s how the not so little guy should look by the end.

Screen Shot 2019-11-04 at 10.19.13.png

And here’s how he looks, to begin with.

Screen Shot 2019-11-04 at 10.24.55.png

To start off, I created 3 area lights by clicking the area light on the Arnold shelf.

Screen Shot 2019-11-04 at 10.27.17.png

Then I set up the area lights like so.

Screen Shot 2019-11-04 at 10.33.58.png

Then I increased the exposure of each light to 8.  I was able to do this by going to the Attribute Editor.  Whenever you want to edit the attributes of lights in Arnold, you always need to go to the Attribute Editor.

Screen Shot 2019-11-04 at 10.36.53.png

Screen Shot 2019-11-04 at 10.39.49.png

I selected the right light and clicked the little box that said: “use Colour Temperature” this means that I can now edit the colour of said lights.  I left the right light at its default colour, (approximately 6500) which is tinted a cold blue, then I did the same with the left light, but changed the value to 4000, which made it turn an orangey colour.

Screen Shot 2019-11-04 at 10.43.51.png

I then assigned a Standard Surface Shader to the robot.  I did this by going to the Hypershader window by clicking this little blue ball.  This material will be responsible for making the robot look metallic.

Screen Shot 2019-11-04 at 10.59.32.png

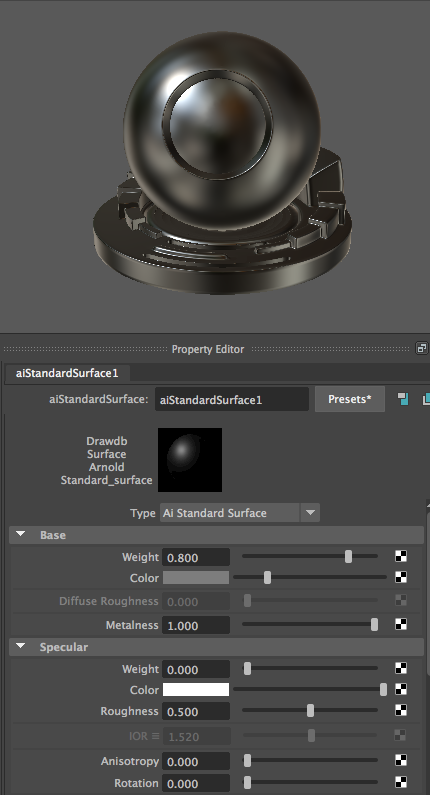
I then changed the values to this.

Screen Shot 2019-11-04 at 11.04.09.png

Once I’d assigned the new material to the robot, this is how he looked in the standard view.

Screen Shot 2019-11-04 at 11.12.33.png

Beautiful, ain’t he?

I then made a quick render to see the brave little guy’s progress so far.  I did this by clicking this button.

Screen Shot 2019-11-04 at 11.15.50.png

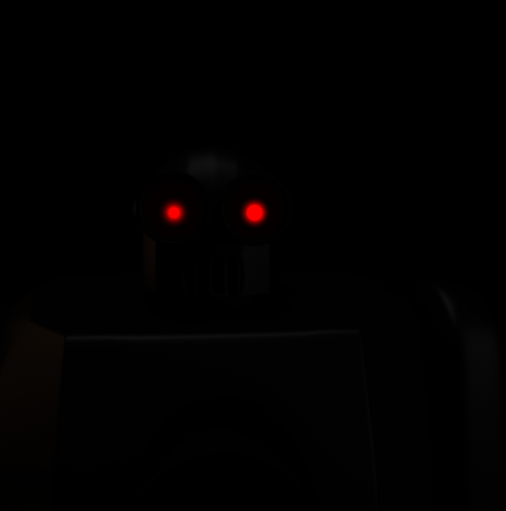
And here’s a blurry image of this majestic being.  I may have gone overboard on his eyes…

Screen Shot 2019-11-04 at 11.20.14.png

I then enabled DOF (depth of field) and selected the robot’s head, then did this.


This shows me how far away the robot’s head is from the camera.

Screen Shot 2019-11-05 at 12.49.44.png

And then typed the value at the time into this box.

Screen Shot 2019-11-05 at 13.07.31.png

And then changed the aperture size to 0.5.

Screen Shot 2019-11-05 at 13.09.32.png

Then I played around with the render view and got this.  It’s not what I’m supposed to do, but I like it.

Screen Shot 2019-11-05 at 13.17.10.png

Then I exported it properly, and this is the final image.

Shiny_Robo_Boi.jpg

More Lighting in Maya


So we had to light a ball using the three-point lighting technique in Maya.

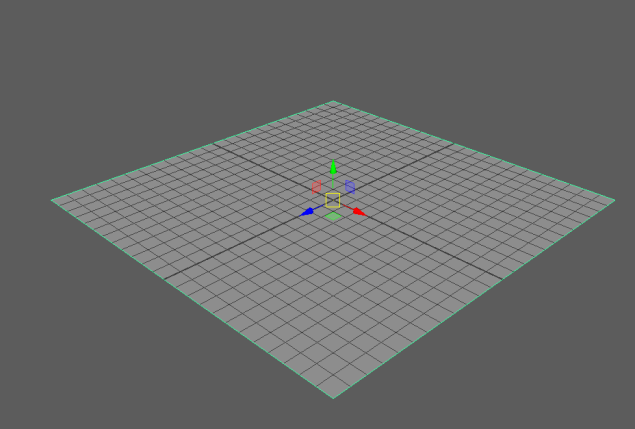
I started by creating a plane.

Screen Shot 2019-10-29 at 12.49.26.png

I made it this size by using the Channel Box and changing the scale options.  I then brought the subdivisions down to 1 on the width and height bits.

Screen Shot 2019-10-29 at 12.49.19.png

I then made three different lights; a spotlight and two directional lights.  I then placed them all around the ball, about 45 degrees apart from each other.  The spotlight is being used as the key light, one of the directional lights is the fill light, and the other directional light is the backlight.

This is how I created the lights that I used.

Screen Shot 2019-10-29 at 13.22.41.png

I pressed “7” on the keyboard to turn on lighting in Maya.

So this is the spotlight.

Screen Shot 2019-10-29 at 13.08.05.png

As I was going through this process, I regularly viewed the scene in the render window, so that I could see how it would look in the end.  This is the button that I pressed to do that.

Screen Shot 2019-10-29 at 13.09.10.png

And this is the render view from the top.

Screen Shot 2019-10-29 at 13.11.02.png

So Kieran (teacher) said that we were aiming to position the three lights so that the ball had a halo on the top of it.

I TECHNICALLY did what he wanted.

THE HALO LINE.png

I tried to make the lighting how Kieran wanted it, and this is the best that I could figure out

Screen Shot 2019-10-29 at 14.04.10.png

Screen Shot 2019-10-29 at 14.04.25.png

Maya Lighting Task

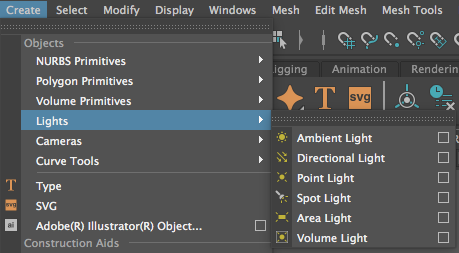
The 6 Light Sources

Ambient

It is useful for simulating a combination of direct and indirect lighting.

Brightens all parts of the scene uniformly.

images.jpg


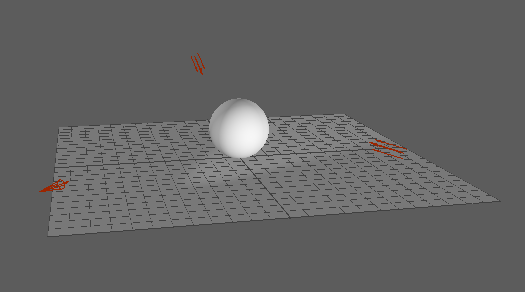
Directional

Even illumination of a scene using parallel rays of light.

useful for extremely far away sources, like sunlight.

download-1.jpg

Point

Light radiates in all direction from a single point, it is ideal for Omni-directional sources, like a lightbulb.

download-3.jpg


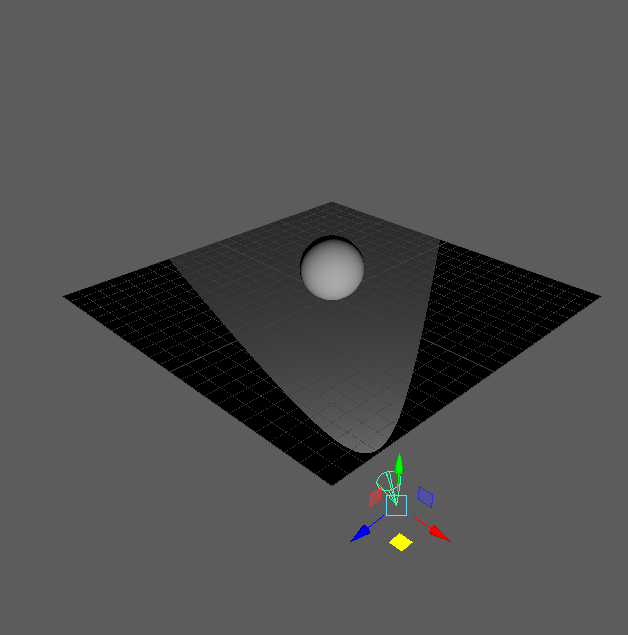
Spot

creates a cone of light in one direction, useful for beams of light, like a flashlight or a lighthouse.

download-2.jpg


Area 

2D rectangular light sources, it is useful for windows and ceiling lights, but the more area lights you have, the longer it will take to render.

maxresdefault.jpg


Volume

Light fills a 3D shape (sphere, cylinder, etc)

it is useful for a visual representation of the extent of the light.

download-4.jpg


Three-point lighting

3PointLighting.gif

Key light

the main source illuminating the subject.


Secondary light

(fill) highlights details of the object.


Backlight

Distinguishes the object from the background.


Attributes of light


Intensity

How much light emitted from the light source.


Fall off/decay

How much light diminishes from the source light (fall-off).


Cone angle

width of the lights cone of influence – area outside cone is not illuminated.


Penumbra Angle

Fall off at the edge cone of angle – gives a softer edge to the light source.


Drop-off

how much the light diminishes at the outer edges.


Colour

set an RGB colour for the light – affects the colour of the scene.


Light Controls

The aim from/ aim at


fall-off rate


cone radius


penumbra/umbra control


non-linear fall off


all in one control


Good ways to use lights


look to photographers for good techniques

tenor.gif


think in terms of balance

download.jpg


look at natural lighting 

images.jpg


avoid overly dramatic lights

giphy.gif


avoid saturated lights and hues

color-saturation-increase-decrease-mac.gif


normally only need a few lights

giphy.gif


avoid disco colours and effects

giphy-1.gif


Shadows


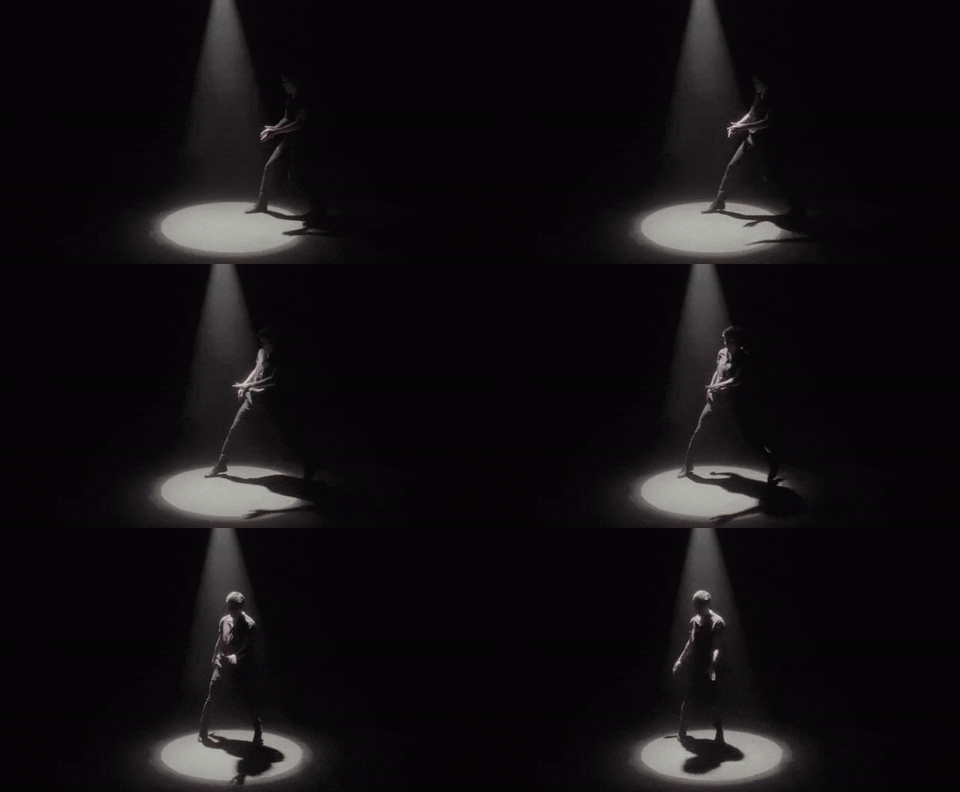
Hard shadows

db172cca8bc4eaef14f7152b9482ebb8.jpg


Soft shadows

a2-Hugo-1024Sources.jpg


Fall out

Acts light a colour gradient, the shadow becomes lighter at the top of the object.

giphy.gif


Shading

Every time you create a 3D object, you need to assign the right shaders, to make it look how you want it to.  Materials and textures also fall under this term.

tmpcd00148_thumb.png


Hypershade

The Hypershade is the central working area of Maya rendering, where you can build shading networks by creating, editing, and connecting rendering nodes, such as textures, materials, lights, rendering utilities, and special effects.

maxresdefault.jpg


Lambert

Default, matte material.  Here’s a D20 die I modelled in Maya.

Screen Shot 2019-12-03 at 11.38.31.png


Blin

Metallic material.  Here’s a flip lighter I modelled in Maya.

Screen Shot 2019-12-03 at 11.44.12.png


Phong

Phong is a material (shader) that represents glassy or glossy surfaces (such as car mouldings, telephones, bathroom fittings) with a hard specular highlight.  Here’s a sphere I made in Maya.

Screen Shot 2019-12-03 at 11.46.14.png

3D Ball Animation

When starting any kind of project in Maya, it is very important to set up your project right, otherwise, everything could mess up later down the line, for one reason or another.

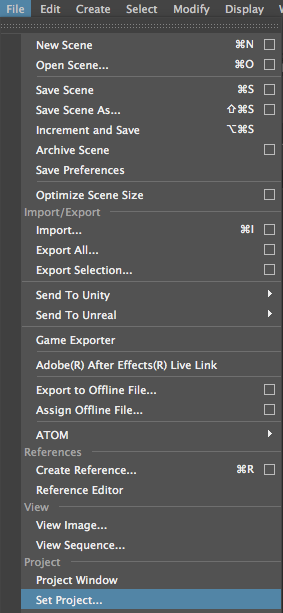
So, before you do anything, you need to set your project location, like so.

Screen Shot 2019-10-08 at 13.59.43.png

So we were given the task of creating a 3D bouncing ball animation.  The ball should behave similarly to the ball on the left.

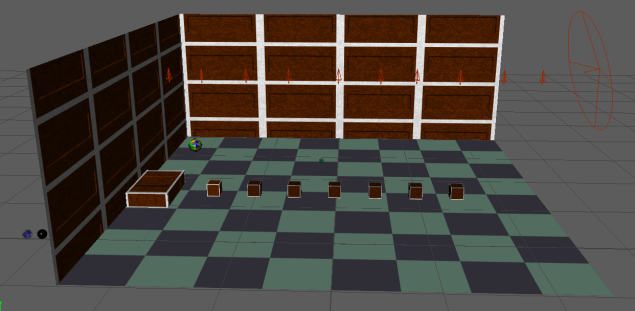
So we were given this scene, equipped with a ball and some boxes.

Screen Shot 2019-10-08 at 14.03.41.png

I then proceeded to animate the ball, using the squash and stretch animation principle.  These are all of the keyframes that I made.

Screen Shot 2019-10-08 at 14.05.05.png

I then made a playblast, which is essentially a quick rendered video, which is lower quality than a full render.  It is often used to show the progress of your project so far, without having to spend hours fully rendering it out.  To make a playblast, you right-click on your timeline (the bar with your keyframes on it), then click on the playblast button.

Screen Shot 2019-10-08 at 14.06.08.png

This is my playblast.  It is truly terrible, someone burn it with fire.


3D Spaceship Animation

We were given the task of modelling a spaceship from one single cube in Autodesk Maya.  So, knowing me, after a couple of hours of messing around, I created a spaceship, that if actually spotted flying around the skies in real life, would cause bystanders to think they had eaten too many strange-looking mushrooms.

I now present to you

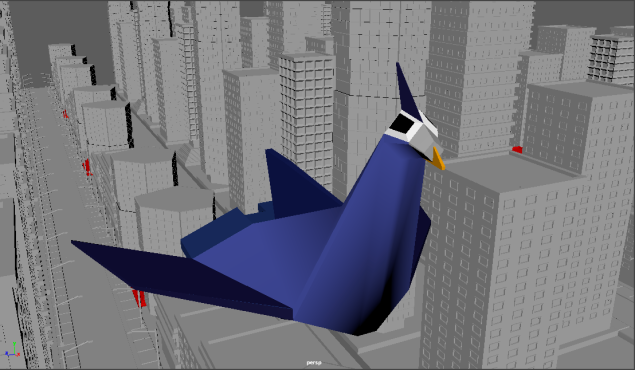
THE PIGEON-MOTHER-SHIP.

Screen Shot 2019-09-24 at 12.37.21Screen Shot 2019-09-24 at 12.37.29

Modelling


Unfortunately I whilst I was crafting this glorious monstrosity, I was so immersed in it that I forgot to take screenshots of my progress, so this is basically how I made her.

I selected the face option, then used the extrude tool to make everything you see that is sticking out in some way.

Screen Shot 2019-10-01 at 13.24.12

Screen Shot 2019-10-01 at 13.24.24

To make the freakishly long neck, I extruded the front of the then-plain-and-boring-ship and used the move tool to move it up, and the rest is history.

Screen Shot 2019-10-01 at 13.41.20.png

I used the scale tool to change the size of the wings.

Screen Shot 2019-10-01 at 13.51.21.png

And then these are all of the materials I assigned to different parts of my cursed creation to give it colour.  The material lambert basically means that it is not matte, it’s not shiny, then Blin means that it is shiny and reflective.  I renamed the lamberts so that I knew what I was looking at, but I guess that I forgot to rename the Blins… oh well.

Screen Shot 2019-10-01 at 13.42.17.png


Animation


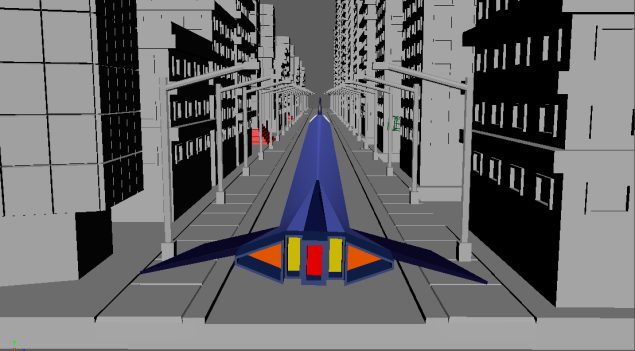
Once we had created our masterpieces, we were given a whole 3D city to mess around in, and given the task of animating a 10-second sequence of the ship flying around.

Screen Shot 2019-09-24 at 13.16.53.png

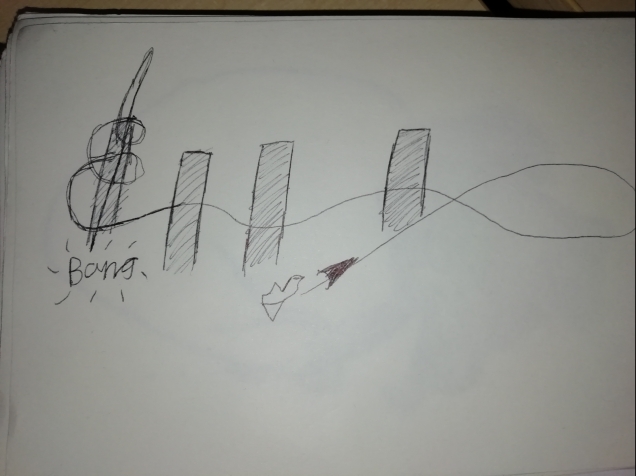
I decided that I wanted to make the technologically-enhanced-pigeon to use a road like a run-way, then take off and swerve between the skyscrapers, then fly high into the sky, and fall back down to earth and crash into a building, then try and make some kind of explosion.  I soon realised that I had planned a lot of stuff that would be hard to realistically animate, but I continued anyway.

I drew out a very simplified version of my idea.

img_20191001_141145.jpg

So I placed my majestic ship on one of the many roads and set a keyframe by recklessly pressing the “S” key (sorry Kieran), then moved the ship along the road on the X-axis, and made a keyframe.

Screen Shot 2019-10-01 at 13.58.27.png

 Then I moved the ship to the end of the road, and on the Y-axis, lifted her up into the sky, and made yet another keyframe.

Screen Shot 2019-10-01 at 14.21.36.png

I then continued moving the mechanical pigeon in the general plan that I drew out, setting keyframes at mostly regular intervals of 20 frames.  These are all the keyframes of the general outline of the animation.

Screen Shot 2019-10-01 at 14.24.49.png

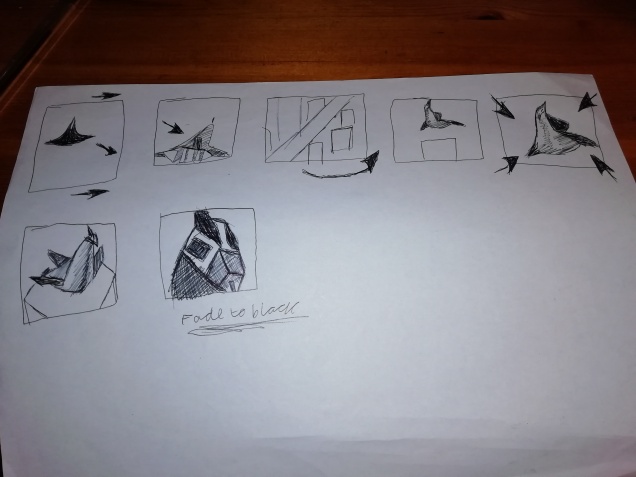
It was at this point that I realised that I had not only been disobeying the brief (making a spaceship take off and fly around, instead of just making it land), but I had also made plans for a way too ambitious animation than my current skillset, and the allotted time allows for.  So, I’m just going to make a simple animation of the spaceship coming in for a landing on the top of a building.  I started by making the spaceship come in for a simple landing, and made it wobble, trying to make it look more realistic.  I tried to find a reference video of a spaceship landing, but I couldn’t.  I then storyboarded the shots that I wanted.

IMG_20191110_182941.jpg

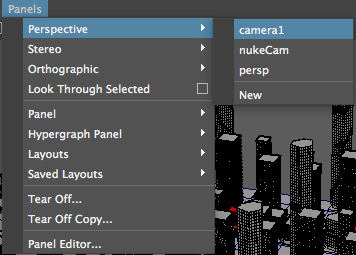
I separated the shots into different cameras, then made them and placed them where I wanted them.  This is them in the outliner.

Screen Shot 2019-11-11 at 10.39.35.png

I followed Kieran’s video about how to render a scene in Maya.  youtube.com/watch?v=ojRK62M8QvM&feature=emb_logo

I went through this process 3 times, one for each of the cameras.

I then put all the shots in Premiere

Screen Shot 2019-11-12 at 12.38.14.png

Then I edited them to make the shots flow better together, and added sounds to make it more enjoyable.

This is the final result!

Maya Cameras (Unfinished)

To create a camera, go to Create, then Cameras, then Camera, like so.

Screen Shot 2019-09-30 at 10.38.12.png

Cameras allow you to make use of shot types in a 3D environment, so that you can have multiple shots and angles of the action, just like a live-action film.

To view what the camera is seeing, then do this.

Screen Shot 2019-09-30 at 10.41.25.png

Either Film Gate or Resolution Gate should always be on.

Screen Shot 2019-09-30 at 10.42.50.png

You can create whats called a parent-child relationship between the camera and the object that you’re focusing on.  This also works for any objects, it doesn’t need to be a camera.  Whatever you do to the parent is automatically done to the child, but you can change the child independently.  To do this, select what you want to be the children; you can select as many children as you want.  Then shift-click what you want to be the parent, then do the following.

Screen Shot 2019-09-30 at 10.50.29.png

You can draw out a path for the camera to follow, by selecting the tool on the right with the little pencil symbol.

Screen Shot 2019-09-30 at 11.20.23.png

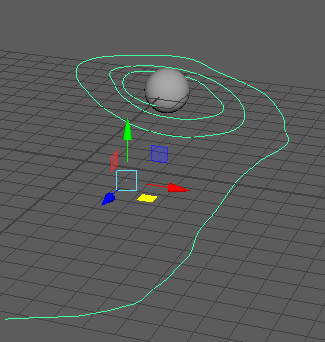
Then you can make whatever crazy path you want (don’t do what I did if you don’t want to throw up with motion sickness).

Screen Shot 2019-09-30 at 11.21.26.png


Pixar Short Film Research

Pixar wasn’t always the massive animation company that it is today, it all started in 1979 as a small department in Lucas Films called the “Computer Division”, which was given the task of creating film technology for the film industry.

By 1986 there were about 40 people working in the Computer Division, and Steve Jobs decided to buy it from Lucas Film and established it as an independent company called “Pixar”.

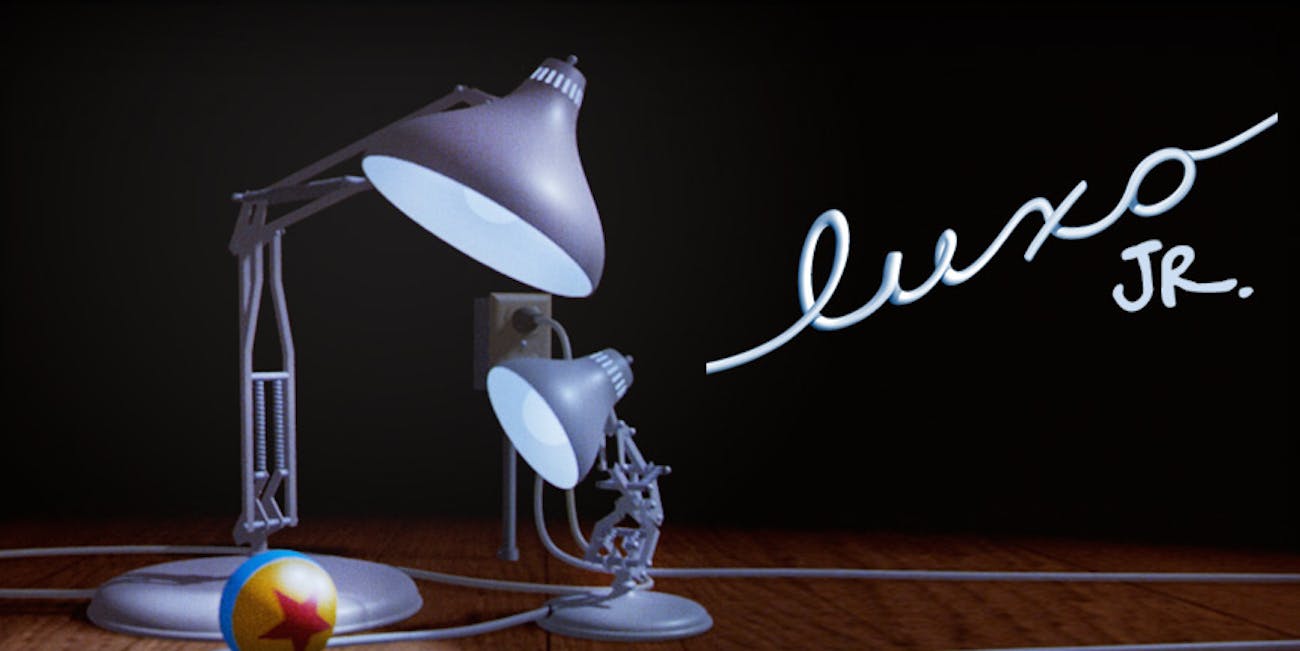
For the next 9 years, Pixar continued to produce commercials and short films including; Luxo Jr. (1986), Red’s Dream (1986), Tin Toy (1988), Knick Knack (1989).

In 1995 Toy Story is released, and it is the world’s first animated feature film, and quickly became the highest-grossing film of the year. This was a landmark achievement for Pixar, and it propelled them into eventually becoming the major animation company that they are known as today. Since then, they have made very popular animated films such as; Monsters Inc (2001), Finding Nemo (2003), The Incredibles (2004), Cars (2006), Ratatouille (2007), Wall-E (2008), Up (2009), Brave (2012), Inside Out (2015), Coco (2017), The Incredibles 2.


Knick Knack (1989)

Made in 1989, Knick Knack is one of Pixar’s earliest animated shorts, and it was their first animation produced in stereoscopic 3D. It is about a shelf of living travel souvenirs who are all having fun together. But there is a snowman stuck inside of a snow globe, who longs to hang out with a mermaid, so he does everything he can think of to try and escape the snow globe, and chaos ensues. I used to watch this short as a kid, so it is fun and nostalgic to be studying it now.

Because this short is so old, there isn’t a whole lot of information online about how the film was made, and I can’t find what software this film was made with. But I found some of the software that was used on Tin Toy, which is the short made before Knick Knack, so I presume that the same software was used for Knick Knack. It is Pixar’s proprietary animation system, identified to the outside world as Marionette but internally known as Menv (“men-vee”), short for “modelling environment,”.

I can only find the jobs of three people that worked on Kick Knack;

Original Music by: Bobby McFerrin.
Written By: John Lasseter.
Directed by: John Lasseter.


Film Composer

A film composer writes the score, which is the sum of all the original music going into a film. They’ll demo pieces of the score regularly to the film’s creative team for feedback on how it’s fitting into the scene. Film composers are also responsible for the recording of the film score.

Script Writer

Screenwriters develop scripts derived from their own ideas or other existing ideas or work. When writing scripts, screenwriters are responsible for describing the stories in detail, including physical environments and the moods of the characters.


Director

A film director controls a film’s artistic and dramatic aspects and visualises the screenplay (or script) while guiding the technical crew and actors in the fulfilment of that vision. The director has a key role in choosing the voice actors, production design, and the creative aspects of filmmaking.


Research

http://www.pixartalk.com/shorts/knick-knack/

https://pixar.fandom.com/wiki/Knick_Knack

https://www.pixar.com/our-story-1

https://www.connollymusic.com/stringovation/how-to-become-a-film-composer

https://study.com/articles/Screenwriter_Responsibilities_Outlook_and_Requirements.html

3D Animation Pipeline

For major animations made by big companies such as Pixar and Disney, there needs to be a production line of people with different jobs; this is known as a “pipeline”.

But the pipeline relies on everyone doing their jobs right, because if one small error occurs and gets passed down to the next department, then this will clog the metaphorical pipe. For example, if a modeller accidentally gives a model an extra finger, then it gets passed down through a couple of departments before anyone realises the mistake, it could potentially take a lot of effort to fix.

The schedule is very important to make sure that everything runs smoothly. It is very carefully planned out to make sure that people’s deadlines for their projects work together, and then consequently the finished animation is released on time.

It is also good for the people who are in the pipeline to be aware of some of the other job roles around them, as they could make decisions in their work which would make the job of the next person a lot easier, like making models that have good topology will make animating them way easier.

And now, here are the main job roles in the animation pipeline.

Story

Some stories might come from comic books, books, films, history, personal experiences and so on.


Directors

Directors are responsible for the whole upkeep of the production, they have to keep the whole crew on track and doing everything right.  Directors start with the script.


Editorial

Then the storyboards are created from the script.  After that, the Lead Editor makes an animatic, can be made to show the directors, producers and studio executives so that they can see how all the shots fit together.  It is basically a rough blueprint of the final film.


Art

Visual development artists create the characters, props and environments of a film before it is made, and then they show everything to the director, to see if they fit the film that they want to make.


Modelling

The modellers receive the concept art from the art department, then using that create all the environments, characters, props and pretty much everything you see in the finished film.  They do this using 3D application software, like Blender, Autodesk 3DS Max, Autodesk Maya and ZBrush and so on.


Rigging

The character models are then given to the riggers, who make the skeleton, and all of the joints, muscle, and fat (or weighting) of the character.  This is in preparation for the actual animation of the character models.


Surfacing Department

The surfacing artists are responsible for basically putting the textures on these models, like wood, glass, dirt or whatnot.  They add all of the surface details to the models.


Rough Layout

This process is essentially taking all of the work that has been made so far, like the models, and create a rough version of the film in a 3D space, using motion capture artists to act out the scenes, like the characters, and visual cinematography.


Final Layout

This department makes all of the low-quality detail into high-quality detail.  They make stereo passes, which make sure that the audience’s eyes follow the right parts of the scene.  They also do set dressing, which is basically decorating the environment of the scenes – this is like mise-en-scene in film.


Animation

The modern 3D animators use the CG puppet models that the modellers created.  They give the models controllers so that people can make the characters make different expressions, move different limbs and whatnot.  The number of controls of a typical 3D model for a film is about 6000.

For the animators to actually animate, they need a real-life reference for the movements.  They get these reference videos from a number of sources, and these include the internet or filming themselves acting out the movements.  They eventually build up their own reference library for each character.


Crowds

This department is responsible for creating large numbers of digital extras to a scene.  They create a small number of different background characters and animations.  They then use an artificial computer brain to assign the animations to these characters.
 

Character Effects (Character FX)

this department basically makes anything that the characters interact with, like hair dynamics, fur; and now the environment and objects visually react when the characters interact with them.


Effects (FX)

This department creates all the effects, like rain, fire, snow, explosions, sparks, particles and so on.


Matte Painting

This department basically makes the backgrounds, like mountains, cloudy skies, cityscapes etc.


Lighting

They take all of the 3D work and add computer-generated lights to make everything look good and realistic in a 3D space.


Image Finalising

These beautiful people take the almost finished film, and go in and clean up any imperfections in the film, for example deleting any unwanted, pesky pimples on a character.


Sound Design

A Composer will write music to heighten and enhance the story.

this department also adds all of the sounds and EQ them, normalise them, and makes everything sound right and play at the right times.


Marketing

Marketing is the penultimate stage of the pipeline. The wonderful people in marketing are responsible for releasing trailers, teaser posters, posters etc. They basically advertise the animation and ignite the hype.
 

Distribution

This is the last leg of the pipeline. If the animation is going to be shown in cinemas, then these people are responsible for sending it to the cinemas, and wherever else it needs to go.


Research