During filming, I didn’t feel like I could contribute much, although I filmed a couple of shots, I was pretty much useless. The only thing I seemed to be able to manage was to accidentally appear in the background of some of the shots, which wasn’t exactly favourable.
One member of the group was much more confident and experienced than the rest of us, so the majority of the direction and camera work was done by them, while the rest of us just kind of lingered around not doing much.
On one occasion we were filming in a multistorey carpark, which would be edited to make it seem as if it were part of the college roof, but where we were filming had a roof above us, but on top of the college was roofless, so I suggested that we should film on the top floor of the carpark instead so that it would be believable that the two different locations were the same place, but the rest of the group didn’t think it was a problem, and because I wasn’t confident enough to argue my point I let it slide. Later we realised that some of the shots were unusable because of the problem I had brought up.
So to remedy all of this on future projects, I need to always know exactly where the camera is going to be pointed so that I’m not constantly in the way. I need to make sure that I am actively contributing to the filming by doing more camera work, direction, mise-en-scene etc. I also need to be more confident when I speak up, and I need to stay firm to what I think.
But during the editing, I felt much better because I had much more freedom to do what I wanted, and I had a lot of fun editing it together and finding music that would work well with it. The majority of the editing was done by me because I and the other editor left the editing kinda late, and the only way we would be able to submit it on time is if I edited it alone. Although I much more enjoyed editing it alone than with someone else, I felt like it should have been a collaborative effort and was unfair for the other person. So when it comes to editing next time, I need to be more conscious of my time management and make sure that the other editor/s are as involved as I am.
I’m pretty proud of the actual edit though, I think that each character having a different soundtrack made for an interesting effect. But oh boy there are so many things I would change in hindsight.
This was the first time I edited something that had multiple characters doing things simultaneously, so it didn’t occur to me that I should show the everything as it happened in accordance with the timeline of events, instead of jumping back to a couple minutes in the past at the end of the scene where the phone rings.
I also should have severely cut down the shots and even taken some of them out completely to speed up the film and give it more energy. Whenever I rewatch it, I sometimes find myself waiting for the shot to end, because it drags on and on, whereas, on an ideal film the audience shouldn’t be made aware of where the cuts are, otherwise it ruins the illusion of reality.
Throughout the edit there is hardly and ambience or foley, so on the few occasions that I did, it was a jarring shock that broke the melodic noir atmosphere, like when Dia is talking on the phone in the street. To fix this, I wish that I had remembered the existence of subtitles.
The last self-criticism I have is that I left writing this evaluation really late, which I aim to not repeat when it comes to writing it next time.
I feel like I have learnt a lot from this project, and I hope that I’ll be better at everything next time.
From the very beginning, I knew the art style I wanted to use for the faces, as for years I have been doodling faces in this very same way. I also knew that I wanted a pastel colour scheme so that none of the colours were very bright and in your face.
I began this gigantic task of an animation by creating five different character designs that I would use here and there for different things, and I could always duplicate them and change the colour of each character’s hair and clothes if I needed a bigger selection of people if they started to repeat too much.
I drew them out in my sketchbook, then drew them in Photoshop. Here’s my little family of blobby people.
As I’ve explored in my sketchbook, I drew inspiration from cartoons such as Adventure Time, Powerpuff Girls, and from the Youtuber TheOdds1sOut. The design of the Powerpuff Girls’ bodies heavily influenced the design of my characters’ bodies. I wanted the designs to be cute, and for each one to be full of personality. The Odd1sOut also greatly influenced my idea for a pastel colour scheme.
I’ve just realised that I haven’t designed the star of the badly animated show, Muybridge himself! I need to design a young and an older Muybridge. I found this picture of him when he was a young, glum-lookin’ lad.
I then began researching what colours men of that time would have worn. I want him to have slightly more striking colours than the rest of the people, as I want him to stand out as the main character. I found this picture and decided to give him a dark blue suit, as he was relatively well off by then, and his attire should represent that. Blue feels like a fancier colour than the bog-standard greys and blacks.
Here’s the result. He looks pretty gosh darn snazzy.
Now last but not least, I need to design old Muybridge. I found this picture of him, which shows what type of clothes he wore in his later years.
Here is what my version of him looks like.
Next, onto the horse and stagecoach. I started by opening up Adobe Animate, and rotoscoping one of Muybridge’s photographic sequences of the walk cycle of a horse pulling what I assumed was probably a stagecoach.
But since the quality of the pictures was so low, I had to infer parts of the horse, so the end result looked terrible.
Ashamed of my monstrosity of a horse, I went back to the drawing board and found a video of a 3D horse walk cycle on Youtube made in Maya, and downloaded that for the new and improved horse rotoscope. Here’s that video.
I have now started rotoscoping that. I’m not animating the whole video, however, as I’m just going to animate one cycle and loop that to save time. I’m much happier with the appearance of my new horse. Here’s a handsome fella.
I’ve decided to animate this striking fellow on twos, instead of ones, to cut the number of drawings and amount of time I need to spend on this by half. I could, however, animate on threes to save even more time, but I want the animation to be somewhat smooth.
Here’s the result. He’s adorable, ain’t he?
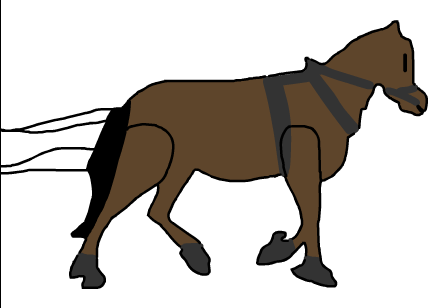
But I’ve just realised that the little fella is going to be pulling a stagecoach, and that would require him to wear a harness, so now imma go do that. I want a simple design for the harness because I don’t have the patience for anything more detailed. I found this design from the cartoon South Park, which I’m going to use because of its simplicity.
I used this for reference as I re-created it, then shifted its position on every other frame to match up with the horse’s movements. Here’s how he now looks.
I then duplicated this handsome laddie and recoloured him on each frame to make a separate horse, because stagecoaches are normally pulled along by at least two horses. So here’s his sister.
Now it’s time to add in the stagecoach. I found this image, and I’m now going to draw a simplified version of it in Photoshop.
I’ve put each wheel on a different layer because I want to animate the wheels separately from the rest of the coach.
I wasn’t quite sure how to go about making the driver’s seat, so I found this image which helped me.
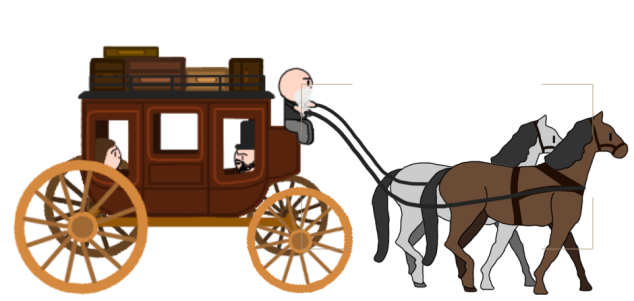
This is the result. I wanted to make it nicer to look at, so I added some luggage and extra decorative lines, and I’m pretty happy with the result! Yay!
Next, I want to smoosh it all together into one nice big animated scene. I used Adobe After Effects for this.
I then added the background. I had fun messing around with the brush tools until I was satisfied with it.
Then I put everything together and animated the wheels rotating, and duplicated the background a couple of times to have them slide across the screen, to make it look as if the cart was moving. Here is a gif of the result, I’m really happy with it!
My teacher suggested that I add a little bump every now and again to the coach because roads at this time in history were nowhere as smooth as this makes it look. I don’t have a gif of it, so just imagine a little bump every second.
With that shot done, I’m now going to work on the previous scene. I want Muybridge to be standing on a stage, showing off his newest animation, which will start with the above gif. I want the curtains to open dramatically, so I found this video on youtube, which I’m now going to rotoscope.
Here are all of the keyframes that I drew.
And here’s the final result! Ain’t that cool?
I’m now making a zoopraxiscope to accompany Muybridge on stage. I want it to be from the back, here’s my reference picture.
Here it is.
I then smooshed all of the assets together in one awesome little image.
I’m now going to smoosh everything together even further in After Effects and animate it. My plan was to have the zoopraxiscope turn on, and the animation of the coach and horses would then appear on the screen behind, and the camera would zoom into it, and the animated accident would commence. But the simple act of making the camera zoom the way I wanted it to but it became so unnecessarily difficult and complicated because when I thought I was moving the camera up, I was actually moving the point of view up so that it would then distort the animation earlier on. After many hours of confusion, I finally worked out that if I scale up the whole scene as well as moving the camera forwards, it would work perfectly! Yay! Even He’s happy about it.
But I then encountered another problem that set me back way too many precious hours. For some bizarre reason, a little baby horse kept flickering in and out of existence in the stagecoach animation. I became certain that I was being haunted by a baby ghost horse, as it completely disappeared when I zoomed out and it didn’t appear to be selectable. In the end, I had to delete everything and put the scene back together again.
I can now safely say that I think I’ve exorcised it with the power of After Effects, and I hope never to encounter such an abomination again.
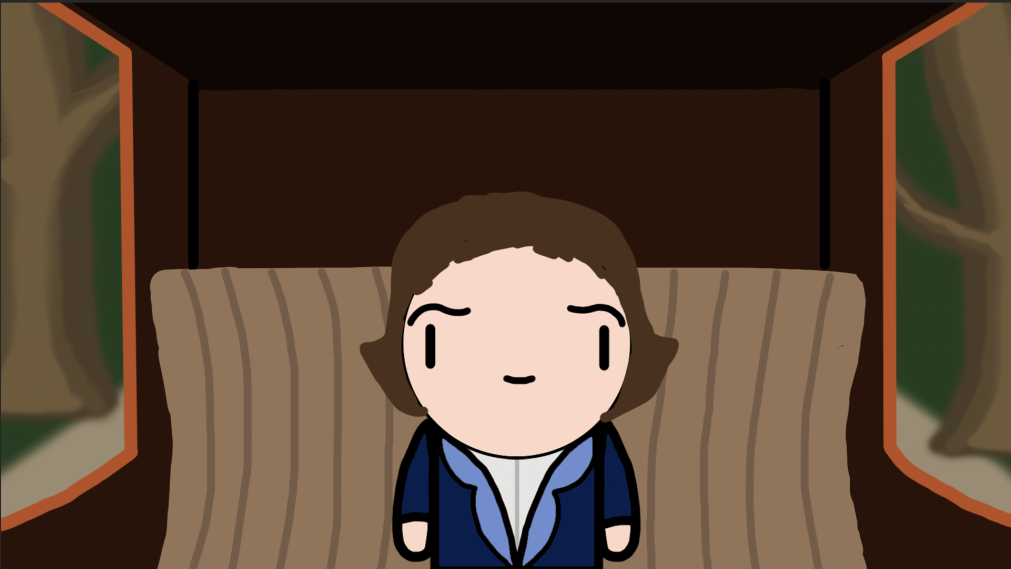
With that all done, I’m now going to move onto the next shot of my REALLY time-consuming animation. For this bit, I’m going to draw the interior of the stagecoach, so I found these images for reference.
This is what it ended up looking like.
I then drew a background and some trees. I will make the trees fly past the window, to make it seem like the coach is moving.
I then put the young Muybridge in the coach and smooshed all the assets together. I purposefully didn’t show his legs, because I wanted him to look like he was sitting down, and the asset I made was standing.
I imported everything into After Effects and started animating it. I made the trees move past the window, and every now and again I bounced Muybridge and the coach up and stretched him out, to make it look as if they hit a bump in the road. I did this to make it more realistic and interesting to watch. In case, by some miracle, you’re interested, here are all of the animated keyframes for this shot. I also made him blink occasionally because it looks really cute, and it makes him feel more alive.
I then made the front of the inside of the coach. I duplicated the coach, trees and background. Then I added a window for plot purposes, with the driver’s little legs hanging down to make it more immersive.
For plot purposes, I made a cut-down tree that would cause the accident. The stagecoach that Muybridge was travelling in apparently crashed into a tree after the brake broke and the horses went out of control. So I’m going to make the coach try to brake before hitting the fallen tree, but the brakes snap and they collide, which sends Muybridge flying into a tree head first.
I then added some passengers to make the scene more interesting, and it all turned out like this.
I once again animated the trees flying past the window, but I reversed them this time because we are looking forward instead of backwards this time. I once again animated bumps, and I made the little boy fly because of his small body mass. I tried to add some squash and stretch to the little fella.
I then made a duplicate file of Muybridge in the coach and modified it slightly and animated it. Here is the general gist of it.
At this point, the brakes are going to snap, but I’ve just realised that I haven’t made a break, so I’m going to get on that. I found this picture, which I am going to use for reference.
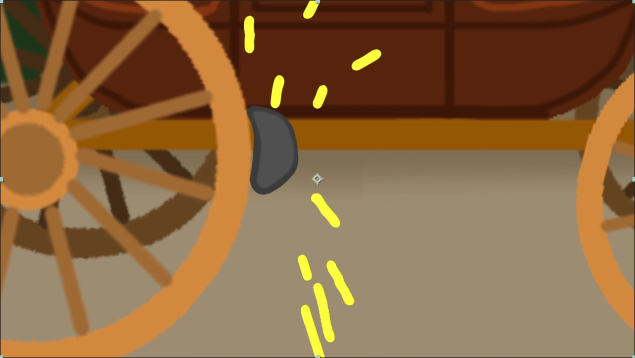
I think it would be cool to have sparks flying off as the driver tries to break, Si I found this video which I am going to use for some kind of vague reference.
Here’s what it all looks like. Because I am running short on time, I animated about 3 frames of yellow blobs flying away and looped it.
I then drew a log in Illustrator and Photoshop.
I put the log it in the scene, and it looked like this.
I then animated the log moving on screen from the right, and made the horses jump over it. But the stagecoach wasn’t so lucky, as it had a 90-degree angle crash, which sent Muybridge flying.
I drew a quick version of Muybridge from the side and stretched him out, using the squash and stretch principle to enhance the movement. Try to ignore the fact that his original head stays in the coach. At this point, the deadline was in a couple of hours, and I just simply did not have the time or patience.
For the next shot, I took the head from the screaming Muybridge from earlier and quickly animated it getting bigger, which made it look as if he was flying closer and closer to the camera.
When he supposedly “hit” the camera, I squashed his face, as if his face was pressed against a pane of glass, and also drew some cheeks, to add to this effect.
After this, I mad his face slowly slide down the screen, as if his face was slowly sliding down a pane of glass, then froze the last frame and added a black dissolve effect. Here’s what that looked like in the timeline.
And that was the end of that scene. Onto the next!
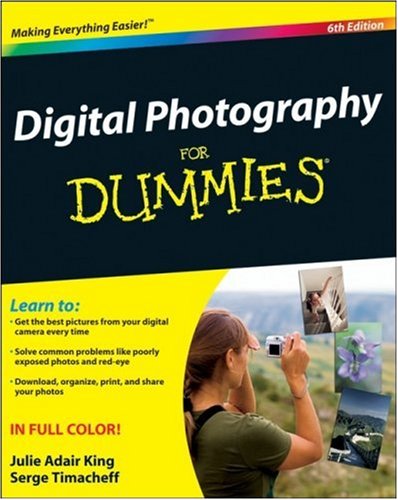
After Muybridge’s accident in real life, he travelled back to England where he spent about 5 years recovering. During this time, he studied photography, so I thought that it would be neat if I showed him in bed with a bandage on his head, to indicate a head injury, and he would then pick up a book of photography for dummies.
So to begin with, I needed a hospital and a hospital bed for Muybridge to lie in, so I found this picture for reference. It is perfect because it is the exact camera angle that I imagined! Yay!
I then copied it in Photoshop, and drew lighter and darker tones of the objects to give them depth, and also just because it’s fun. I then used the angle of the lines of the table for perspective reference, so that I could draw a book lying down. Next, I brought in the Young Muybridge asset and deleted everything except for his head and arms, then I drew a head bandage and a grey outfit on him. I also played around with the colours of the background. To show that he went to England after the accident, I added a little sign that said England on it, and as a bonus little easter egg, I wrote the number of the college room I’ve spent many a day and night making this animation. Here is the result.
Next, I animated his eyes looking at the book, using the principle of staging to show the audience where to look, and to indicate what’s going to happen next. I then made his arm extend out and grab the book. After this, I zoomed in and removed the front bedpost to make sure that nothing was obscured, and drew an open book of photography for dummies. I used this picture for reference.
I drew a quick camera for the front of the book, although now looking back at it, I’m not sure how relevant it is for the time period, but since it is only a very trivial bit of the animation, and it is just to enhance the idea of the book, I don’t think it matters enough to redo it at this point in time. I wrote “Ye Olde Photography”, to enhance the light-hearted comedy element of the animation, and to make sure that the audience remembers that this is set in the past. Ye Olde is “suggestive of a Merry England, Deep England or “old, as in Medieval old feel.” – Wikipedia.
I animated his eyes moving from right to left, to make it look as if he was reading the book.
And finally, I cut to a shot of the stage from earlier and drew a bowing Muybridge.
And last but not least, Here is how the whole animation looked in the timeline. I’m not going to show all of the keyframes, as I could not show them all in a single picture, and it would just be so unnecessary.
ANDTHAT WAS THE END OF MY ANIMATION!!!! YE OLDE HURRAH!
But I wasn’t completely out of the hand-drawn-woods yet, as I still needed to add music and spot effects to it in Logic Pro X.
At this point, I was several hours past the deadline, so I didn’t have the time I would need to record the foley sounds myself, so I used the website Freesound (https://freesound.org/) for the sound effects. The process of finding the right sounds, and placing them in the right spot took me about 4 hours. Here are some of the many sounds I used.
After all the foley sounds were added, I went onto the final stage of the animation process, which was to add music. I found the perfect sound file of a vintage news-like song and some other neat bits of music, by using the in-built sound library in Logic Pro X which I accessed by clicking this little guy in the top left-hand corner of the screen.
I then exported everything, and now, I am completely finished!!!!!


 .
.