Maya Arm Animation

I started this task by creating a sphere.

Screen Shot 2019-11-12 at 14.17.14.png

Then I created a cylinder, rotated it 90 degrees and extended it out, by selecting the vertices of one of the ends, and using the move tool to extend it out.

Screen Shot 2019-11-12 at 14.21.41.png

I then used the scale tool to shrink the selected vertices so that it looked like this.

Screen Shot 2019-11-12 at 14.22.56.png

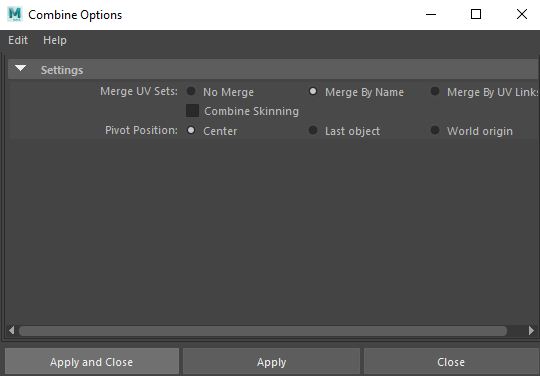
Next, I combined the two objects into one, by clicking on this option box.

bullshet

Then clicking “Apply and Close”.

bullshittery

This is what the two grouped objects look like in the outliner.

Screen Shot 2019-11-18 at 10.37.09.png

Then I selected the group and pressed CMD + D to duplicate the objects.

Screen Shot 2019-11-18 at 10.48.45.png

Then I played around with the second group, trying to make it look more like a forearm, then I made another sphere and a rectangle for the wrist and hand.  I stretched out the forearm quite a bit because I wanted to make the arm kind of spindly, cartoony and stylised.

Screen Shot 2019-11-18 at 11.04.00.png

This is what the outliner looks like at this point.  Screen Shot 2019-11-18 at 11.08.35.png

The thingies with the red arrows on them are my object transformation history, so they are not useful and just clutter up the outliner, so I’m going to remove them by doing this.

Screen Shot 2019-11-18 at 11.08.21.png

This is the outliner now.  Ain’t that better.

Screen Shot 2019-11-18 at 11.11.15.png


Then I renamed the groups so that it is easier to navigate the outliner.

Screen Shot 2019-11-18 at 11.18.36.png

Then I selected the arm and created a new layer.

Screen Shot 2019-11-18 at 11.20.36.png

This is what the layer looks like.

Screen Shot 2019-11-18 at 11.24.37.png

I then double-clicked on the layer, and the edit box came up.  I changed the colour so that it is more visible in the menu, and renamed it so that it is easier to understand which layers correspond to which objects.
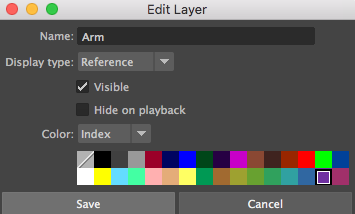
Screen Shot 2019-11-18 at 11.25.33.png

This is what the layer looks like now.

Screen Shot 2019-11-18 at 11.27.40.png

Next, I switched from the modelling to the rigging menu.

Screen Shot 2019-11-19 at 12.41.49.png

Then with the arm selected, I created a joint by doing this.
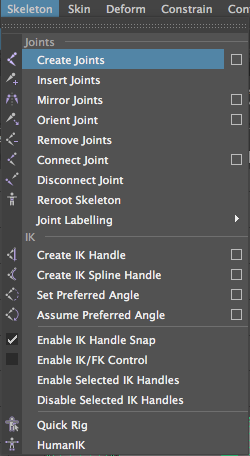
Screen Shot 2019-11-19 at 12.52.12.png

I then clicked on each sphere which will act as a joint, to make the arm rig.  I also switched to wireframe mode to make it easier to see the rig.

Screen Shot 2019-11-19 at 12.53.55.png

I then renamed the joints to reflect their corresponding parts of the arm.  They’re in a parent-child hierarchy, which means that when I move and rotate, for example, the upper arm joint, both the forearm and hand joints with move along with it, because they’re the children of the upper arm.

Screen Shot 2019-11-19 at 13.06.43.png

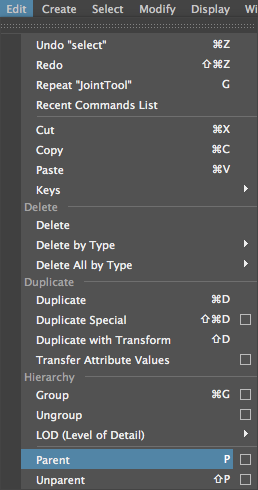
I then selected the hand object group, and the hand joint.  When doing this, you should always select the object first.

Screen Shot 2019-11-19 at 13.11.19.png

Then I clicked parent to combine them into the parent-child hierarchy of the joints.
Screen Shot 2019-11-19 at 13.11.27.png

Then I did the same with the forearm and upper arm, and this is what it looked like in the outliner.

Screen Shot 2019-11-19 at 13.24.43.png

And now, whenever I rotate the upper parts of the arm, the rest moves with it!  Yay!

So now I just need to animate it.  I want to make it slap someone, so I’m going to download a model of a guy off of TurboSquid.  https://www.turbosquid.com/

I then created lambert materials and assigned them to different parts of the body to make it look better than everything just being a plain grey colour.

Screen Shot 2019-11-19 at 14.02.43.png

Next, I animated the arm swinging and tried to add secondary animation to it, in an attempt to make it look more realistic.

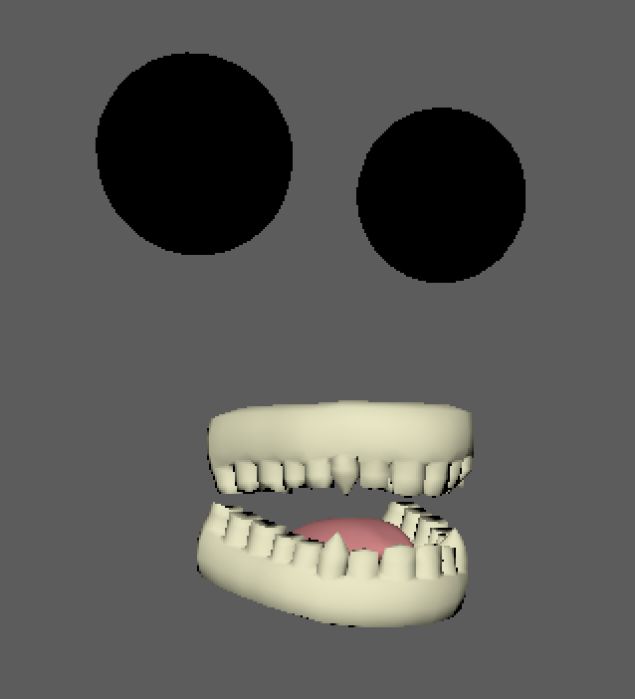
I then made the man fall down when he’s slapped, but I made a mistake and the inner bits of his face stayed suspended in the air.
Screenshot 2019-11-19 at 15.26.40.png

But I thought that it makes it more interesting, so I decided to keep it like that.  After a small amount of time, I animated the face parts falling down out of shot.  I wanted to make it similar to this.

source.gif


I changed the colour of the eyes to white, then also made some pupils so that I could make something similar to the gif above, and this is it finished!


Questions!


Name one thing that non-manifold geometry cannot do? – non-manifold polygons cannot be unfolded into a continuous flat piece.

Describe 3 things that you can change when grouping objects together? – You can group the selected objects together, ungroup the selected group and you can select a group.

Give an example of how or when you might use a parent-child hierarchy – When you transform a parent, its children are transformed with it. This lets you, for example, model a leg by making the thigh the child of the hip, the knee the child of the thigh, the shin the child of the knee, the foot the child of the shin, and so on. Rotating one join rotates the rest of the leg under that joint.

Name 3 different combine options within May and how might you use the selected options in your workflow? – Pivot Position, you would use this to decide where you want the pivot point of the combined object will be.   Combine Skinning, this binds skins, by using the previous weights.  Merge UV Sets, this allows you to choose an option to set how your UV Sets should behave upon merging.

Describe two things that you should be aware off when combining geometry in Maya – Make sure you’re aware of where the pivot of your newly combined mesh is located, as it will affect future transforms you apply to it.

Combining meshes can result in non-manifold geometry, where the normals of adjacent faces are pointing in opposite directions.



More Lighting in Maya


So we had to light a ball using the three-point lighting technique in Maya.

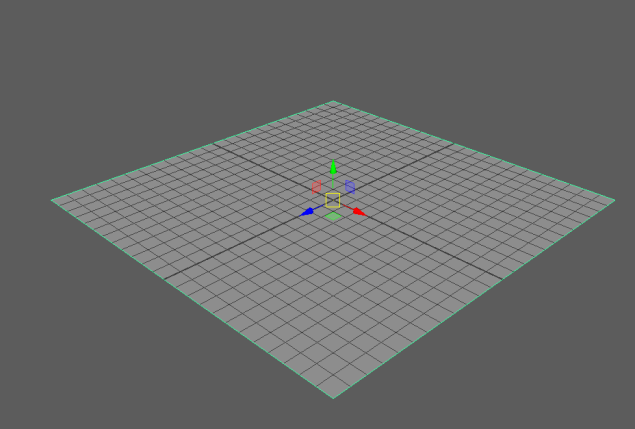
I started by creating a plane.

Screen Shot 2019-10-29 at 12.49.26.png

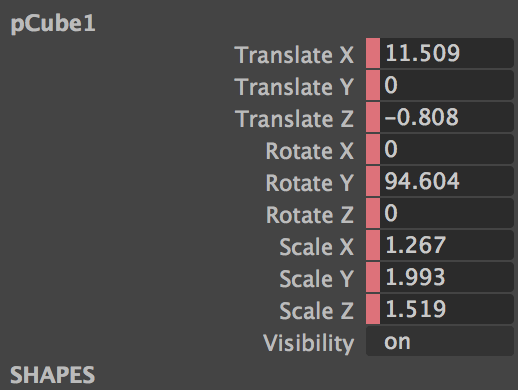
I made it this size by using the Channel Box and changing the scale options.  I then brought the subdivisions down to 1 on the width and height bits.
Screen Shot 2019-10-29 at 12.49.19.png

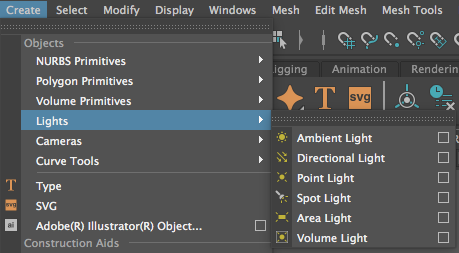
I then made three different lights; a spotlight and two directional lights.  I then placed them all around the ball, about 45 degrees apart from each other.  The spotlight is being used as the key light, one of the directional lights is the fill light, and the other directional light is the backlight.

This is how I created the lights that I used.

Screen Shot 2019-10-29 at 13.22.41.png

I pressed “7” on the keyboard to turn on lighting in Maya.

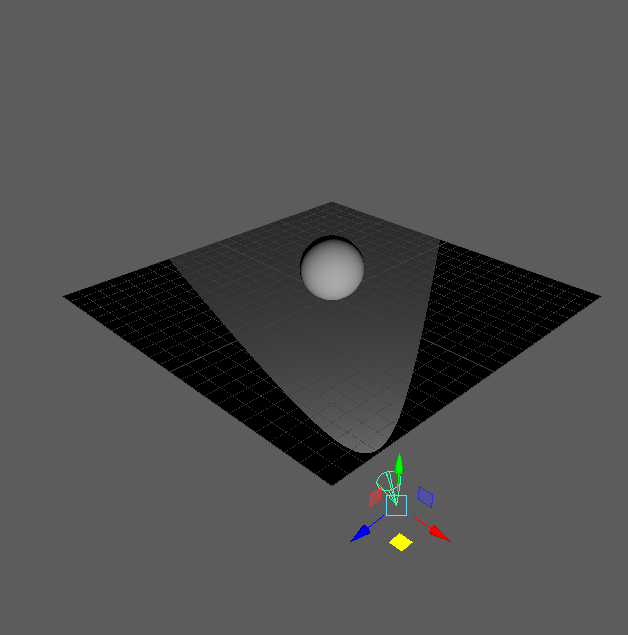
So this is the spotlight.

Screen Shot 2019-10-29 at 13.08.05.png

As I was going through this process, I regularly viewed the scene in the render window, so that I could see how it would look in the end.  This is the button that I pressed to do that.

Screen Shot 2019-10-29 at 13.09.10.png

And this is the render view from the top.

Screen Shot 2019-10-29 at 13.11.02.png

So Kieran (teacher) said that we were aiming to position the three lights so that the ball had a halo on the top of it.

I TECHNICALLY did what he wanted.

THE HALO LINE.png

I tried to make the lighting how Kieran wanted it, and this is the best that I could figure out

Screen Shot 2019-10-29 at 14.04.10.png

Screen Shot 2019-10-29 at 14.04.25.png

Maya Lighting Task

The 6 Light Sources

Ambient

It is useful for simulating a combination of direct and indirect lighting.

Brightens all parts of the scene uniformly.

images.jpg


Directional

Even illumination of a scene using parallel rays of light.

useful for extremely far away sources, like sunlight.

download-1.jpg

Point

Light radiates in all direction from a single point, it is ideal for Omni-directional sources, like a lightbulb.

download-3.jpg


Spot

creates a cone of light in one direction, useful for beams of light, like a flashlight or a lighthouse.

download-2.jpg


Area 

2D rectangular light sources, it is useful for windows and ceiling lights, but the more area lights you have, the longer it will take to render.

maxresdefault.jpg


Volume

Light fills a 3D shape (sphere, cylinder, etc)

it is useful for a visual representation of the extent of the light.

download-4.jpg


Three-point lighting

3PointLighting.gif

Key light

the main source illuminating the subject.


Secondary light

(fill) highlights details of the object.


Backlight

Distinguishes the object from the background.


Attributes of light


Intensity

How much light emitted from the light source.


Fall off/decay

How much light diminishes from the source light (fall-off).


Cone angle

width of the lights cone of influence – area outside cone is not illuminated.


Penumbra Angle

Fall off at the edge cone of angle – gives a softer edge to the light source.


Drop-off

how much the light diminishes at the outer edges.


Colour

set an RGB colour for the light – affects the colour of the scene.


Light Controls

The aim from/ aim at


fall-off rate


cone radius


penumbra/umbra control


non-linear fall off


all in one control


Good ways to use lights


look to photographers for good techniques

tenor.gif


think in terms of balance

download.jpg


look at natural lighting 

images.jpg


avoid overly dramatic lights

giphy.gif


avoid saturated lights and hues

color-saturation-increase-decrease-mac.gif


normally only need a few lights

giphy.gif


avoid disco colours and effects

giphy-1.gif


Shadows


Hard shadows

db172cca8bc4eaef14f7152b9482ebb8.jpg


Soft shadows

a2-Hugo-1024Sources.jpg


Fall out

Acts light a colour gradient, the shadow becomes lighter at the top of the object.

giphy.gif


Shading

Every time you create a 3D object, you need to assign the right shaders, to make it look how you want it to.  Materials and textures also fall under this term.

tmpcd00148_thumb.png


Hypershade

The Hypershade is the central working area of Maya rendering, where you can build shading networks by creating, editing, and connecting rendering nodes, such as textures, materials, lights, rendering utilities, and special effects.

maxresdefault.jpg


Lambert

Default, matte material.  Here’s a D20 die I modelled in Maya.

Screen Shot 2019-12-03 at 11.38.31.png


Blin

Metallic material.  Here’s a flip lighter I modelled in Maya.

Screen Shot 2019-12-03 at 11.44.12.png


Phong

Phong is a material (shader) that represents glassy or glossy surfaces (such as car mouldings, telephones, bathroom fittings) with a hard specular highlight.  Here’s a sphere I made in Maya.

Screen Shot 2019-12-03 at 11.46.14.png

Maya Asset Management

Folder structure is very important when using Maya, because if your files are spewed all over your different folders then Maya will have a hissy fit and refuse to work unless everything is as it should be, and it will also just be really annoying to have to search through all of your files just to find the latest save file incarnation of your dumb little animation.

But fear not! The folks over at Maya have thought about this, and have made it so that Maya projects automatically save all the relevant files in a very organised manner, so you don’t actually have to put any effort into remembering how to organise your files! Yay!

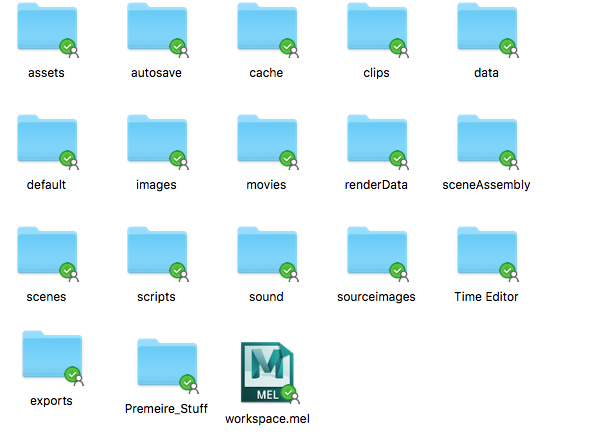
Here is an example of my folders.

Screen Shot 2019-11-12 at 14.10.23.png


But it’s not all sunshine and rainbows if you forget to save your project regularly as you work on it, then when you come back to it, you may find that you’ve lost a whole days work. So in the name of all things sane and productive, please click the little save button every half hour or so.

And just in case you’re interested in this kind of thing, Maya can save files as: “Maya Binary” (“MB”), for unfinished projects, and “Maya IFF” for finished, rendered projects.