Seed Animation Studio Research

Seed Animation is a small animation company based in Soho, London.  They have produced animations for companies ranging from Cadbury to MTV.

I love that all of their animations always have a unique twist, whether it be a very visually appealing use of colour, a cute animation technique, or just dumb sex jokes that make me giggle like an idiot.

They have produced many animations, but some of their main ones are the following.


Soreen

They produced a series of 3 animated adverts for the cake brand, Soreen.  They quickly decided that they really liked the idea of puppeteering.  They created little scenes in a fictional world of sentient pieces of Soreen.


To make this, they set up a yellow cloth background on a tabletop and stuck sticks to the back of the Soreen pieces, which they edited out later.  The sticks allowed them to control the movements of the cakes, without their hands actually having to be in the shot.  In post-production, they drew on the faces and arms, frame by frame, which was a type of rotoscoping.


Shell

They created an animated advertisement for the oil company, Shell.  It wasn’t long before they came up with a unique idea to make a stop motion animation with coffee latte art.  It was the world’s first “Latte-mation”.

They began by drawing out the whole sequence in storyboards and then making it into an animatic so that they can iron out any animated creases before production.

They then started on character development; they made about 7-ish different designs for each character.

They then combined the animatic and the final designs in a 3D environment, so that they could get a very detailed final version of how they wanted the end result to look and play out.

Next, they employed the UK Latte Art Champ Dhan Tamang.  Over the course of the prouction, he churned out over 200 pieces of latte art, based on the designs in the 3D animated short they had prepared.  He copied every single frame of the digital animation, with a separate cup of Latte art for each frame.

They then masterfully mushed everything together and polished it in Adobe After Effects, 3Ds Max, Maya and Photoshop.


Research

Selects

Task 1.1 History of Animation Timeline

Shahr-e Sukhteh (3,000 B.C.)

1-1

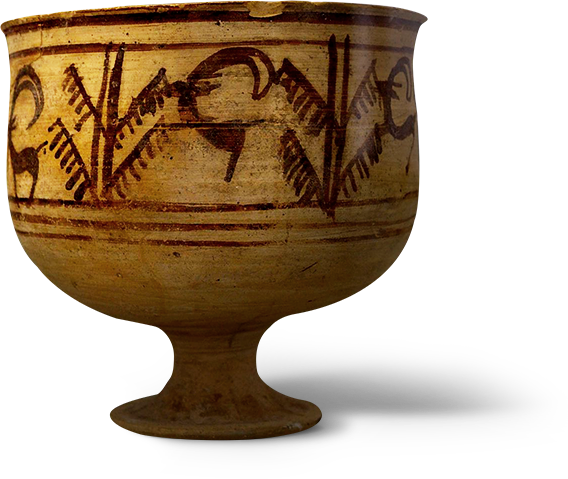
The earliest concept of animation known is this pottery bowl made in the bronze-age.  It depicts a handful of drawings of a leaping goat.  Although these are very simple drawings, presumably when the bowl was spun it would give the goat the illusion of simplistic motion.

It is truly insane to think that this little bowl is the great ancestor of all animation.

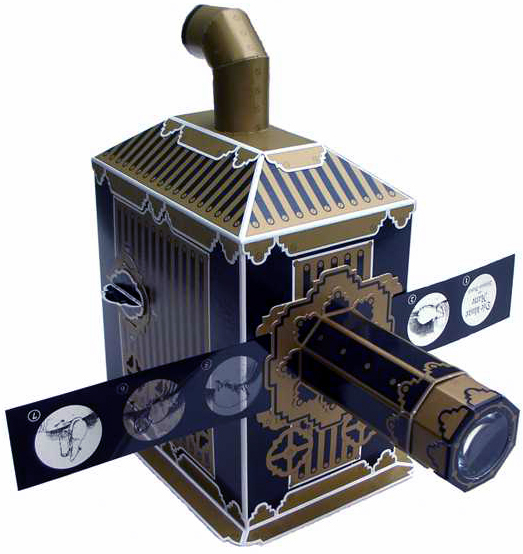
Magic Lantern (1603)

visual_reinforcement_magic_lantern

It was invented by the Dutch scientist Christiaan Huygens.  The projection was originally lit by candlelight.  It used the candlelight behind the hand-drawn glass slides to project the image onto a wall, through one or more lenses.  This was a significant leap in the progression of film and animation.

Thaumatrope (1824)

Image result for thaumatrope gif

It was invented by the English physician John Ayrton Paris.

The Thaumatrope is a Victorian toy made from a simple card disk, featuring a picture on each side.  This is attached to two pieces of string, and when the strings are twirled rapidly, the card rotates on its axis and the two images appear to combine into one picture.  It was the first invention to exploit the persistence of images on the retina.

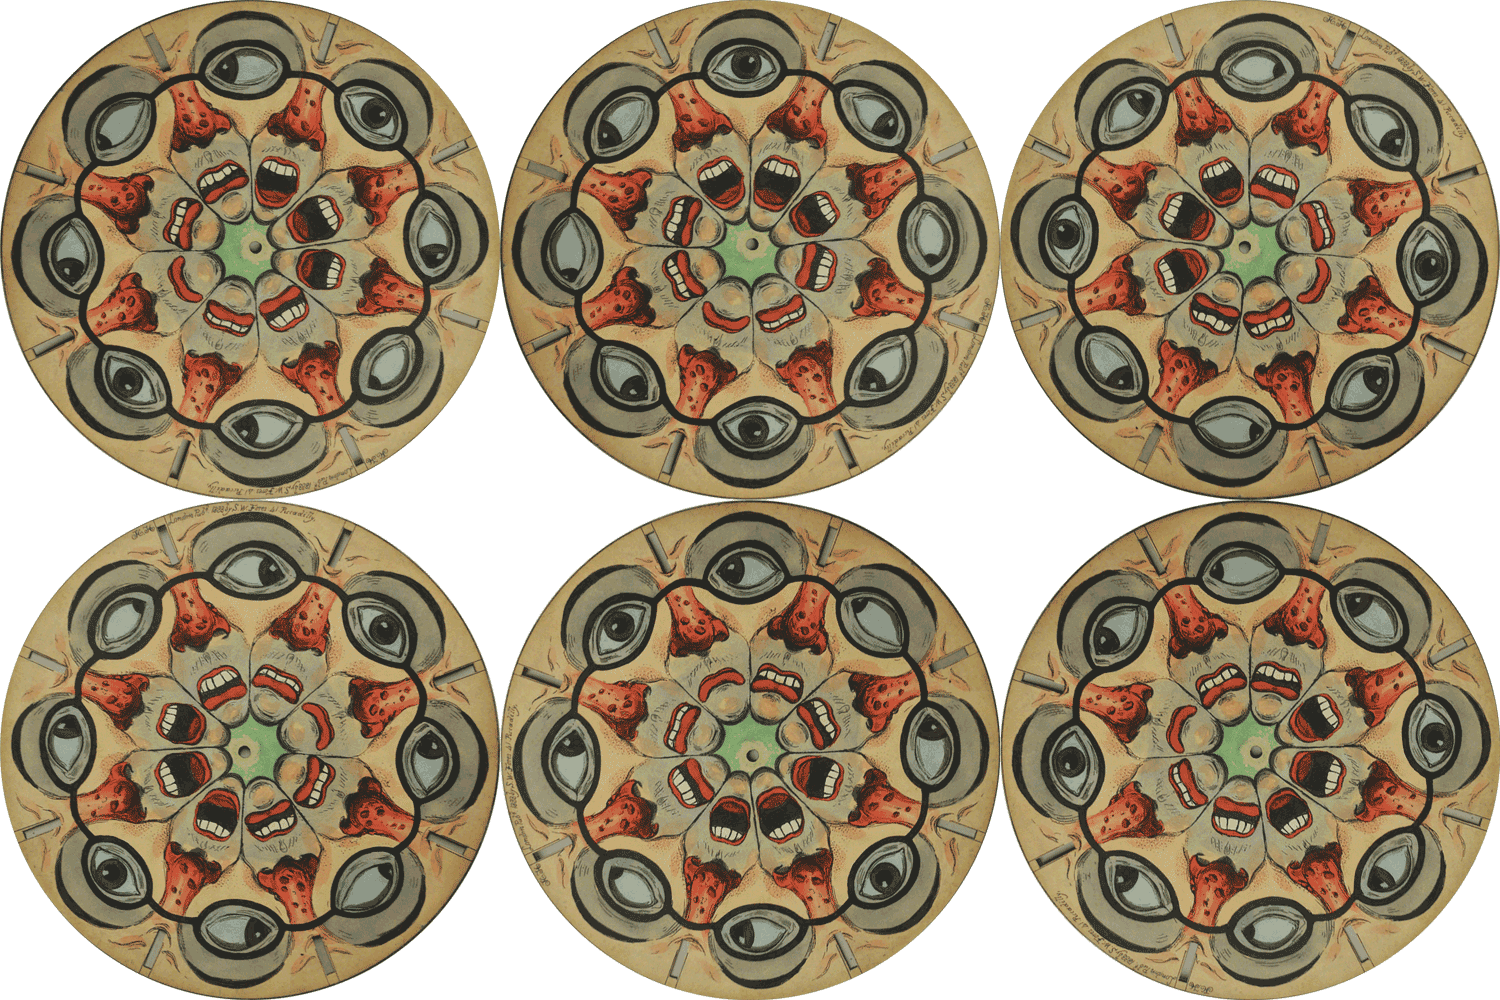
Phenakistoscope (1832)

phenakistoscope-4

It was invented by the Belgian physicist Joseph Plateau.  But by a complete coincidence a couple of weeks later, Simon von Stampfer in Berlin created an identical invention and named it the Stroboscope.

It was operated by spinning the cardboard disc and looking at the reflection of the image in a mirror, through a series of moving slits. Through the distortion and flicker, the disc created the illusion that the image was moving.

Originally marketed as just a children’s toy, the Phenakistoscope is widely considered to be the very first form of animation, which would go on to eventually inspire the creation of films and the modern film industry.

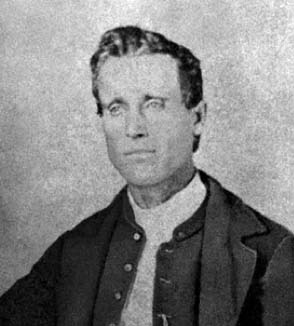
Joseph Plateau (1801 – 1883)

joseph

 In 1832, Plateau created an early stroboscopic device, the “phenakistoscope”, the first device to give the illusion of a moving image. It consisted of two disks, one with small equidistant radial windows, through which the observer could look, and another containing a series of images. When the two disks revolved at the correct speed, the synchronization of the windows and the images created an animated effect. The projection of stroboscopic photographs, creating the illusion of motion, eventually led to the creation of cinema.

Plateau also studied the phenomena of capillary action and surface tension.  The mathematical problem of existence of a minimal surface with a given boundary is named after him. He conducted extensive studies of soap films and formulated Plateau’s laws which describe the structures formed by such films in foams.

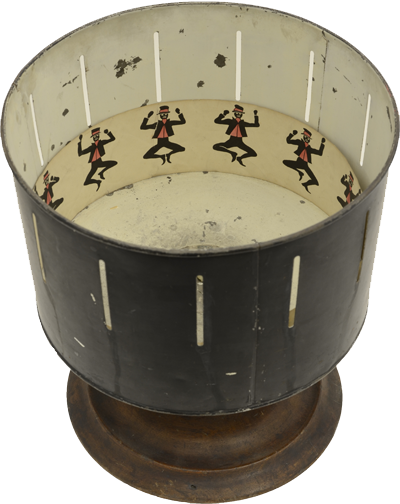
Zoetrope (1834)

zoetrope

It was invented by the British Mathematician William George Horner who originally named it the Daedalum, which translates as “wheel of the devil”.  but Pierre Desvignes, a French inventor, renamed his version of it the zoetrope (from the Greek word root zoo for animal life and trope for “things that turn.”)

Because of its old vintage heritage, the jittery moving picture can be seen as a bit eerie, which is why it was used in a scene in the film The Woman in Black.

The zoetrope consists of a cylinder with slits cut vertically in the sides. On the inner surface of the cylinder is a band with images from a set of sequenced pictures. As the cylinder spins, the user looks through the slits at the pictures across. The scanning of the slits keeps the pictures from simply blurring together, and the user sees a rapid succession of images, producing the illusion of motion.

William Horner (1786 – 1837)

horner

He was the inventor of the historical Zoetrope, but he was also a British mathematician; he was a schoolmaster, headmaster and school keeper, proficient in classics as well as mathematics, who wrote extensively on functional equations, number theory and approximation theory, but also on optics. His contribution to approximation theory is honoured in the designation Horner’s method, in particular, respect of a paper in Philosophical Transactions of the Royal Society of London for 1819. 

Flip-book (1868)

giphy-2

It was invented by John Barnes in 1868, who named it the Kineograph.  The basic idea was creating using a booklet with a drawing which moved when the pages were flipped. The idea didn’t really catch on though until 1882 when Henry Van Hoevenbergh created an American version in combining the work of John Barnes and the photographer Eadweard Muybridge to create a moving image using a booklet that was flipped.

Praxinoscope (1877)

quaintpasteldrongo-size_restricted

It was invented by the French inventor Charles-Émile Reynaud.  It was essentially a new and upgraded take on the zoetrope, as it used a strip of pictures placed around the inner surface of a spinning cylinder. It improved on the zoetrope by replacing its narrow viewing slits with an inner circle of mirrors, which were placed so that the reflections of the pictures appeared more or less stationary in position as the wheel turned. Someone looking in the mirrors would, therefore, see a rapid succession of images producing the illusion of motion, with a brighter and less distorted picture than the zoetrope offered.

Charles-Émile Reynaud (1844 – 1918)

reynaud

was a French inventor, responsible for the praxinoscope (an animation device patented in 1877 that improved on the zoetrope) and the first projected animated films. His Pantomimes Lumineuses premiered on 28 October 1892 in Paris. His Théâtre Optique film system, patented in 1888, is also notable as the first known instance of film perforations being used.

Zoopraxiscope (1879)

1280px-muybridge27s_zoopraxiscope_and_disc

Invented by the great photographer and pioneer of early cinema, Eadweard Muybridge. The Zoopraxiscope (earlier known as the Zoogyroscope) was essentially a projecting version of the earlier Phenakisticsope or ‘spinning picture disk’. The device projected sequences of images from glass discs and was invented in order to prove the authenticity of Muybridge’s famous galloping horse pictures. The earlier Zoogyroscope took the 16-inch discs while the latter Zoopraxiscope took the 12-inch discs.

Thomas Eddison (1847 – 1931)

edison-1_resize_md

He is known as America’s greatest inventor.  He created many devices in the areas of Mass communication, sound recording, electrical power generation and motion pictures.  But he also invented the Kinetoscope.

The Kinetoscope is an early motion picture exhibition device. The Kinetoscope was designed for films to be viewed by one individual at a time through a peephole viewer window at the top of the device. The Kinetoscope was not a movie projector but introduced the basic approach that would become the standard for all cinematic projection before the advent of video, by creating the illusion of movement by conveying a strip of perforated film bearing sequential images over a light source with a high-speed shutter.

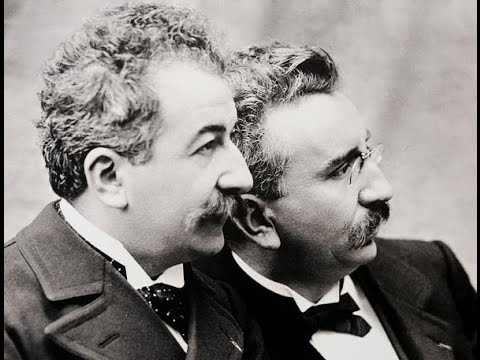
The Lumière Brothers.  Auguste (1862 – 1954), Louis (1864 – 1948)

hqdefault

They were among the first filmmakers in history. They patented an improved cinematograph, which in contrast to Thomas Edison’s “peepshow” kinetoscope allowed simultaneous viewing by multiple parties.

They created the first ever motion picture film in history, which was called “Arrival of a Train at La Ciotat” (1895).  It depicted a steam engine train arriving at a station.  It was so much more realistic than what anyone had ever seen before.  When they first showed it to an audience, it was so realistic that they screamed, because they thought that an actual train was about to run them over.

Although revolutionary, it was mainly seen as just a gimmick at this time.  At one of these showings, it just so happened that George Melies was in the audience.  This greatly affected him, and inspired him to leave his magician career behind, and start making films instead.

Humorous Phases of Funny Faces (1906)

jyyezs

It is a short silent animated cartoon directed by the British-American film producer James Stuart Blackton and is the first entirely animated film using stop motion photography to create movement. It depicts a series of scenes with a handful of caricatured characters.  It is clearly a fun exploration of the then new tech.

Fantasmagorie (1908)

nwhzclc

The title “Fantasmagorie” is French for  “A Fantasy”. It was directed by the French cartoonist, Émile Cohlis.  It was the first animated film using hand-drawn animation and is considered by film historians to be the first animated cartoon. The film, in all of its wild transformations, is a direct tribute to the by-then forgotten Incoherent movement. The title is a reference to the fantasmograph, a mid-Nineteenth Century variant of the magic lantern that projected ghostly images that floated across the walls. It is a very creative animation, where objects transform into other objects smoothly.  It seems to be an experiment into what this then-new technology could achieve.

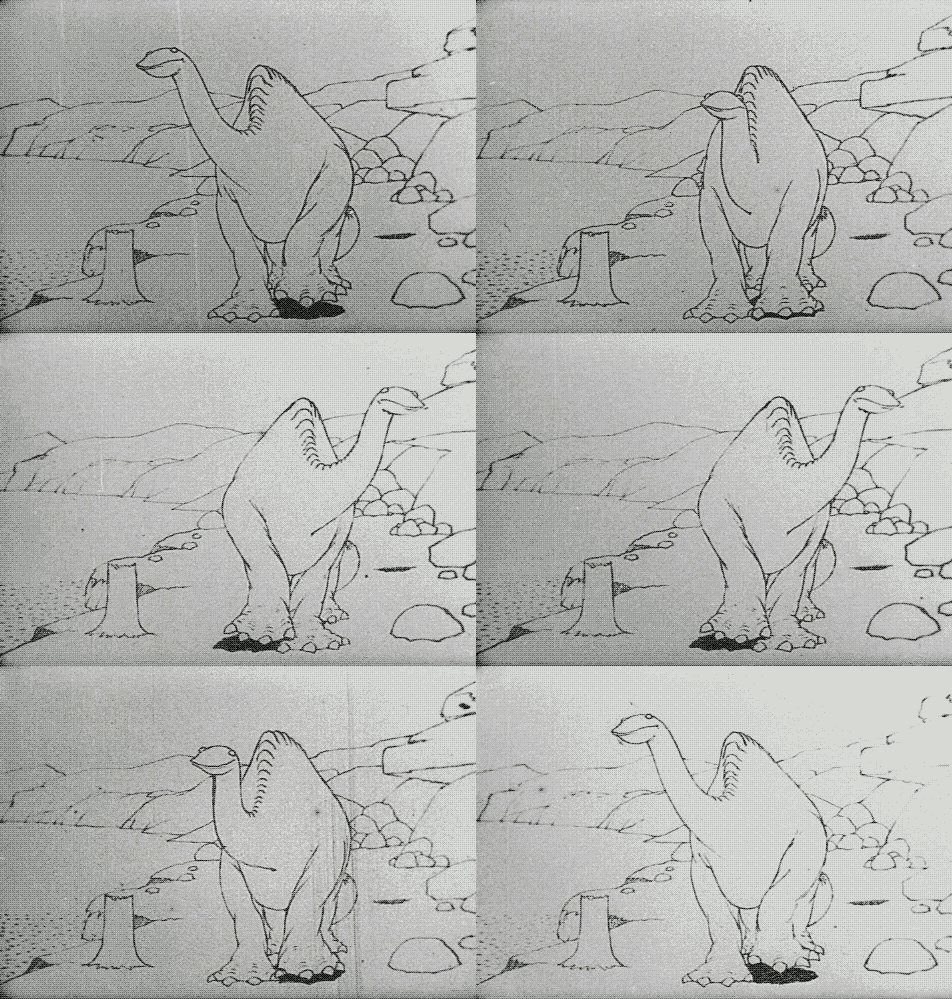
Gertie The Dinosaur (1914)

tumblr_n63nwtd3vc1sqmphzo1_500

Created by the American Animator and cartoonist Winsor McCay.  This animation is considered to be the first animated film to feature an appealing character.  This shows that these early animators were starting to understand how to present animated characters to audiences, in a way that would make them like, and relate to the characters more.

Felix The Cat (1919)

5a604b1316a173ec8b79db7561ebcef2

Felix made his first appearance in Feline Follies, which was directed by the American Cartoonist Otto Messmer.  many Felix The Cat films were made, which went on to make him be considered as the first animated movie star.

Steamboat Willie (1928)

rx

It was created by Walt Disney and was one of the first appearances of Mickey Mouse, who went on to become one of the most iconic animated characters in history.  “If you can dream it, you can do it.” – Walt Disney. Steamboat Willie is known for being the first cartoon with sound printed on the film and was the first notable success for Walt Disney Studios, which was founded in Los Angeles in 1923.

Walt Disney (1901 – 1966)

walt-disney-united-artistis-photofest-croppedjpg

He was an American motion-picture and television producer and showman, famous as a pioneer of animated cartoon films and as the creator of such cartoon characters as Mickey Mouse and Donald Duck. He also planned and built Disneyland, a huge amusement park that opened near Los Angeles in 1955, and before his death, he had begun building a second such park, Walt Disney World, near Orlando, Florida. The Disney Company he founded has become one of the world’s largest entertainment conglomerates.

Merry Melodies (1931)

ovvb

Warner Bros was founded in 1930, and in 1931, they began producing the Merry Melodies, and Looney Tunes, which featured the classic animated characters; Bugs Bunny, Daffy Duck, Porky Pig and Elmer Fudd. These cartoons were a major step in animation for the world; animation was starting to become a major source of entertainment for the masses.

Snow White and The Seven Dwarfs (1937)

giphy

It was created by Disney, and at the time was revolutionary, because it was the first fully animated, hand-drawn feature film. It was a visual exploration of the classic fairy tale by the Brothers Grimm.  It went down in cinematic history as one of the animated classics.  The animated film set in place a new format of feature films that would go on to become one of the biggest methods for producing films.

The Flintstones (1960)

giphy-1

It was produced by the American animation studio, Hanna-Barbera.  It was the first ever fully animated cartoon series to appear on prime-time television, and it marks the start mass produced cartoons for generations to come. It was about a family of cavemen living in stone-age suburbia.

Fritz The Cat (1964)

complexconsiderateiberianbarbel-max-1mb

Created by the American Director, Ralph Bakshi. It was the first ever adult X-rated animated feature film to be released. This film rather graphically illustrated that cartoons don’t always have to be for children.

The Simpsons (1987)

giphy-2

Created by the legendary American cartoonist, writer, producer, animator, and voice actor, Matt Groening.  The Simpsons is an American adult sitcom that has earned the impressive titles of being the longest-running American sitcom, the longest-running American animated program, and the longest-running American scripted primetime television series. By now, cartoons were one of the main forms of digital entertainment and were happily accepted as the norm.


Javier Mariscal (1950 – Present)

thumb2_a0e905aa-3e70-4900-b7c1-c81cb1574916-log1

He is a Spanish Artist, Designer and Director.  Among his best-known works are Cobi, the mascot for the 1992 Olympic Games in Barcelona. One of these latest works is Chico&Rita (2010), an animated film directed together with Fernando Trueba. The film was nominated for an Oscar and received the Goya award for the best-animated film.


Jamie Hewlett (1968 – Present)

b5d8b94c878e73c9844abd4662f7f733

He grew up drawing every second that he could.  He attended multiple art schools but got rejected from Kingston Polytechnic because he had an argument with his interviewer.  At the age of 20, he created the comic series Tank Girl.  It was a huge success.  Hollywood killed tank Girl, and he did a series of odd jobs for a couple years.  During his Tank Girl rein, he met several famous musicians, who were fans.  One of these was Damon Albarn.  In 2001, they started the massively popular band Gorillaz.  Over the course of the next decade, his distinctive art style helped to make Gorillaz a pop culture icon.


Matt Groening (1954 – Present)

life-is-hell-600x390

Is an American cartoonist and animator who created the comic strip Life in Hell, and the television series The Simpsons and Futurama.  

Growing up in Portland, Oregon, Matt Groening did not particularly like school, which is what originally turned him towards drawing. In the mid-1980s, he moved to Los Angeles and started drawing a comic strip named “Life in Hell”, which eventually became published in the newspaper where he worked. In 1988, James L. Brooks, looking for a filler in the television show, The Tracey Ullman Show (1987), turned towards a framed “Life in Hell” strip on his wall and contacted Groening. The animated shorts that Groening created were The Simpsons (1989).


Seth MacFarlane (1973 – Present)

sethmacfarlane_fox-580x326

Born in Connecticut in 1973, Family Guy creator Seth MacFarlane began working in animation in the mid-1990s. He debuted his first animated show Family Guy in 1999. It was cancelled in 2002 but brought back in 2005 because of widespread demand. Since then, MacFarlane has developed other animated series American Dad! and The Cleveland Show. In 2012, he released his first live-action feature film Ted and was picked to host the 2013 Oscars.


Research

https://publicdomainreview.org/collections/phenakistoscopes-1833/

https://history-of-animation.webflow.io/

About Magic Lanterns

Thaumatropes

https://reelfocus.blogspot.com/2015/04/zoetrope-and-zoopraxiscope.html

Zoetrope History

https://whatis.techtarget.com/definition/zoetrope

https://prezi.com/6ziwzr97ncmi/the-history-of-animationthe-flipbook/

https://www.revolvy.com/page/Praxinoscope

https://www.kingston.gov.uk/info/200246/museum_collections_and_exhibitions/539/eadweard_muybridge/3

https://www.kingston.gov.uk/info/200246/museum_collections_and_exhibitions/539/eadweard_muybridge/3

https://en.wikipedia.org/wiki/Humorous_Phases_of_Funny_Faces

https://en.wikipedia.org/wiki/Merrie_Melodies

http://www-groups.dcs.st-and.ac.uk/history/Biographies/Plateau.html

https://en.wikipedia.org/wiki/Joseph_Plateau

https://en.wikipedia.org/wiki/William_George_Horner

http://www-history.mcs.st-and.ac.uk/Biographies/Horner.html

https://en.wikipedia.org/wiki/Thomas_Edison

Hugo (2011)

https://en.wikipedia.org/wiki/Walt_Disney

https://www.britannica.com/biography/Walt-Disney

How I Got Here: Jamie Hewlett

https://www.britannica.com/biography/Matt-Groening

https://www.biography.com/people/seth-macfarlane-20624525

https://www.imdb.com/name/nm0004981/bio?ref_=nm_ov_bio_sm

Masking Animation

Today I learnt how to animate a moving pencil making a line as it goes.

Right off the bat, I decided that I didn’t want to make a pencil.  So I made my alternative artwork on Adobe Illustrator and imported it into Adobe Animate.

Screen Shot 2019-03-12 at 13.34.24.png

I then made the hand into a symbol.

Screen Shot 2019-03-12 at 13.43.33.png

I then added a Classic Motion Guide to the symbol.  These allow you to draw the path that you want your symbol to follow.

Screen Shot 2019-03-12 at 13.43.24

This is what it looked like.

Screen Shot 2019-03-12 at 13.44.32.png

I selected the pen tool, with the ink option because I wanted a somewhat smooth line.

Screen Shot 2019-03-12 at 13.50.49

Screen Shot 2019-03-12 at 19.44.57.png

I proceeded to draw a spectacular continuous line drawing.

Screen Shot 2019-03-12 at 14.03.55.png

I placed the pivot point in the tip of the finger so that the finger would follow the line, not the middle of the forearm.

Screen Shot 2019-03-12 at 14.05.22.png

I created about 70 frames, and added a Classic Motion Tween to that bad boy, then moved the red slider on the timeline to the end, and placed the hand on the end of the line, and it snapped to it, creating a keyframe.

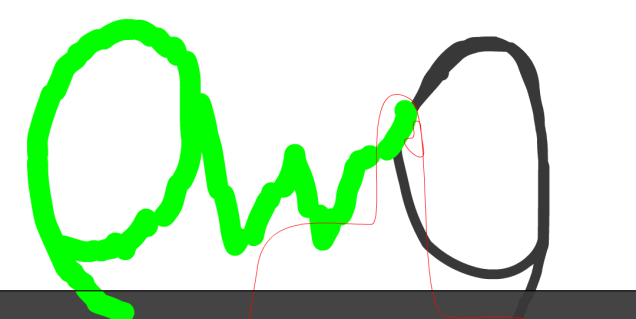
When I played the animation, the hand followed the OwO, finger first.  But the line was not visible.

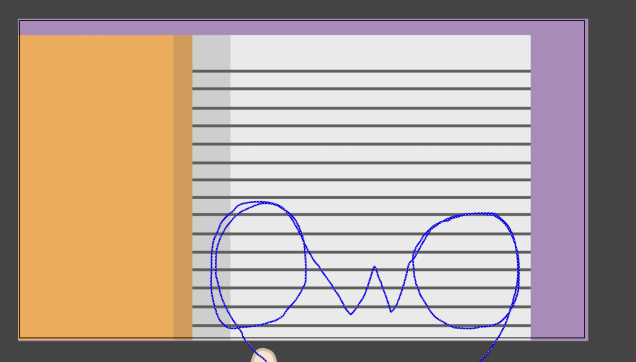
Next up was masking.  I made a copy of the OwO and changed its colour.  I then made a mask of it.

Screen Shot 2019-03-12 at 16.26.01.png

This is what it looked like.

Screen Shot 2019-03-12 at 16.32.50.png

I then selected the mask layer and went to the first keyframe.  I selected the brush tool and painted along the line behind the finger, went to the next frame, where the finger had moved, and painted the line behind it, and went on like this for the whole animation.

Screen Shot 2019-03-12 at 17.04.06.png

This made sure that the line didn’t appear on screen until after the finger had passed it.  This made it look as if the finger was finger painting the OwO on the page.

I then went home, and big surprise, I edited it for several hours.

I’m super happy with how this turned out.

Bouncing Ball Animation

Today I learnt how to make a bouncing ball animation in Adobe Animate.

Instead of being a normal, functioning human being, I decided to make it more complicated, so instead of it taking me an hour at most, it ended up taking me around 5 hours.  Yay me…

I started off by making my ball, stairs and background in Adobe Illustrator, and imported it into Animate.

Screen Shot 2019-03-11 at 18.24.18.png

I then made the stairs and ball into symbols.

Screen Shot 2019-03-11 at 18.24.30.png

I proceeded to make a keyframe on the stairs symbol, then one at 20 frames, with the stairs positioned further down, threw a Classic Motion Tween in, and a painful amount of time later I had a flight of stairs that moved up, which made it look like the camera was moving down.  This is what it looked like.

Screen Shot 2019-03-12 at 18.50.13.png

I then made the head symbol into another symbol, so that I had two head symbols.  One would be for the movement, and one would be for the rotation.

Screen Shot 2019-03-11 at 18.35.49.png

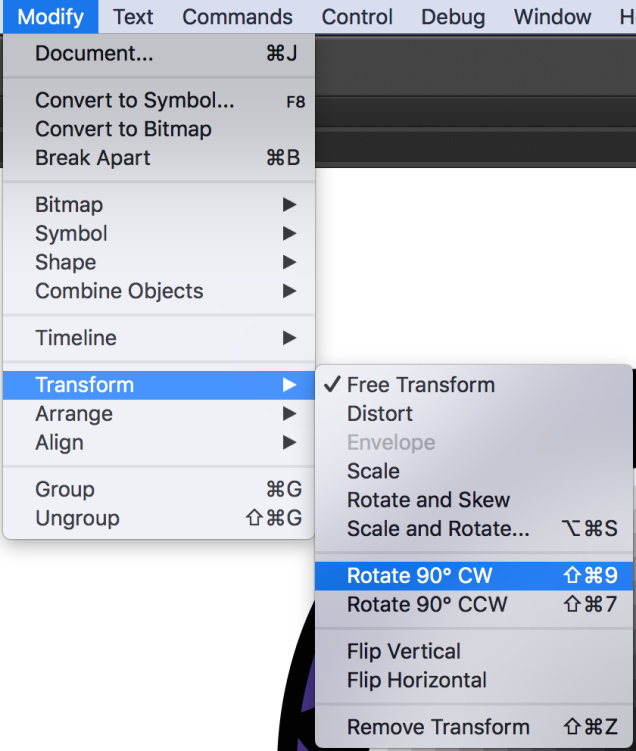
I started with the rotation.  I used the same technique as I did with the clock animation.  I made four evenly spaced keyframes, with the head rotated 90º on each, and added Classic Motion Tweens between each of ’em.

Screen Shot 2019-03-11 at 20.03.23.png

Just realised they kinda look like ._. faces.  Ain’t that cute.

made a keyframe at the start, and then slapped a Motion Tween on it.  I made sure to make it a motion tween, not a classic motion tween because they do very different things.  A classic motion tween interpolates the frames between keyframes and a motion tween lets you control and manipulate a symbol’s movement path.

Screen Shot 2019-03-11 at 19.04.06.png

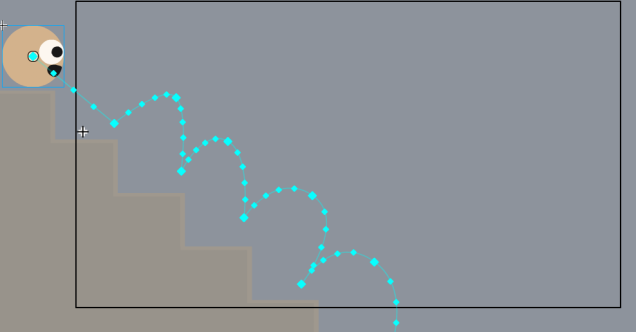
I then dragged my little head guy to the position I fancied, and it automatically created a keyframe at the point on the timeline.  It also created a line showing the movement path.

Screen Shot 2019-03-11 at 19.01.01.png

I then raised the points on the line where I wanted the ball to jump

Screen Shot 2019-03-11 at 19.33.49.png

And made the lines curved by clicking them with this tool selected.

Screen Shot 2019-03-11 at 19.33.37.png

This is what the timeline looked like.

Screen Shot 2019-03-11 at 20.03.31.png

But Adobe Animate was being really annoying and wasn’t complying, by making the ball fly in big infuriating ovals up and down the stairs randomly.  I fought with it for several hours, but it wasn’t going to work anytime soon.  So instead I simply made the ball jump up and down on the same step a couple of times.  Combined with the stairs moving up, this gave it the same effect of bouncing down the stairs but was a lot simpler.  So yay!

Screen Shot 2019-03-11 at 20.03.16.png

So with that palaver out of the way, I moved onto the final stretch.  At each point that the ball hit the stair, I flattened it and made a keyframe.  Then when it was in the air, I made a keyframe and set it back to its original size.

I now had an animation where a rolling head bounced down a flight of stairs.  I went home and began editing it.  I copied and pasted it a couple of times, added some nice fade transitions, downloaded a bunch of free sounds and carefully placed them by hand at the right places and tada!

One really interesting thing I learnt from doing the editing, in particular, was that you can effectively imply action without actually showing it.  Like in the finished video, you can hear the head tripping and falling down the stairs, but it is only a black screen.  It makes you imagine the action, and the effect is still the same, whether I animated it or not.  I also used this technique in the end.  I feel like this is going to prove to be a really useful trick in the coming months.

And without further ado, here’s the finished animation.  I’m completely pooped.


Clock Animation Task

Today I learnt how to animate a clock’s hands spinning around, with Adobe Animate.

First of all, I made a clock in Adobe Illustrator and imported it into Animate, making sure to separate the different parts into their own layers.

Screen Shot 2019-03-11 at 13.08.44.png

I then made each of them into a symbol.  Symbols seem to be pretty similar to compositions in Adobe After Effects, as in they let you animate specific parts of something, which you can then watch in the main Scene window.

Screen Shot 2019-03-11 at 13.10.37.png

This is what they looked like as symbols, in the library window.

Screen Shot 2019-03-11 at 13.11.25.png

I then used this tool.

Screen Shot 2019-03-11 at 13.12.50.png

To move the pivot points of the two clock hands into the middle of the clock, so that when I begin rotating them, they won’t have a fit and fly around, but instead will rotate around the centre of the clock, like the good little hands that they are.  A pivot point is represented by that little white dot.

Screen Shot 2019-03-11 at 13.14.05.png

I then made a keyframe with on the small hand, and went forward 2-3 frames and made another keyframe.  On this keyframe, I rotated the hand 90º clockwise, then I went on to do this four times.

Screen Shot 2019-03-11 at 13.34.06.png

Doing this makes sure the minute hand will rotate 1/4 of the clock for each keyframe.  I then Made a Classic Motion Tween between each of the four frames.  A motion tween basically fills in the gaps between frames, which saves a great amount of time and mental torture.

Screen Shot 2019-03-11 at 13.52.23.png

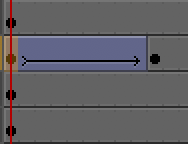
A Classic Motion Tween looks like this.

Screen Shot 2019-03-11 at 13.52.37.png

So now I had one full rotation of the minute hand.  But I also wanted the hour hand to move somewhat realistically, so I started by making 12 keyframes on it, which were spaced at the points on the timeline when the minute hand passed 12.  On each of the keyframes, I positioned the hand on a number, in a linear fashion.  Then I put Classic Motion Tweens between each of them.  This ensured that whenever the minute hand did a full rotation, the hour hand would shift one hour.  I then copied and pasted the keyframes of the minute hand’s full rotation 11 times, spaced directly after one another.  This meant that although fast, the movement of the clock hands would look realistic.  This was what all of that put together looked like.

Screen Shot 2019-03-12 at 17.56.55.png

So that was the clock accounted for.  It should have been done, but me being me, I wanted to add a background.  So I made a fancy swirl and imported it into Animate.  I tried using the same technique to back it swirl, but for some dumb reason it wouldn’t work, So I had to make it into a symbol, then make a keyframe, move it a bit, make another keyframe, move it a bit more, and so on.  This technique of animation is referred to as animating on ones.  The result looked like this.

Screen Shot 2019-03-12 at 17.57.04.png

After that, I was satisfied with it, so exported it.

I then went home and edited it to make it real fancy and show-offy.  This is the final product.  Yay!


Task 1.2 Eadward Muybridge

220px-optic_projection_fig_411

Eadweard Muybridge was a fundamental pioneer in the history of film and animation.  Without him and his ingenious creations, cinema would not be where it is today.  He was a successful luxury bookseller, world-renowned photographer, and inventor that people all around the world are still in admiration of today.  He was truly an incredible individual.

Early Life

Born in Kingston on the 9th of April 1830, as Edward James Muggeridge.  His mum ran a barge business behind their house on the River Thames.  As a child, he was always inventing new names for himself, and toys to play with, which marks the very early beginning of his inventiveness.

Near his house, there is a coronation stone with the name “Eadweard Muybridge” carved into it.  It is thought that this is where he got the inspiration for the unusual spelling of his name from.

coronationstone

Growing up, Eadweard quickly got bored of the plain little town that Kingston was in those days, and decided that he didn’t want to work in the family barging business, but instead wanted adventure, he wanted to experience everything the world outside of Kingston had to offer.  At the age of 20, he set off across the ocean for the exciting land of America.  There are no records of the next five years of his life. No one quite knows how he got there, but in 1855 his name was recorded in the place that is now San Fransisco.  He had finally made it to America.

Just a few years earlier, San Fransisco had discovered gold, and the fast-growing city was a crazy place, filled with hangings, duels and brothels.  It was essentially the wild west.  This place where anything was possible vastly contrasted the life he knew in Kingston, and I imagine that it was albeit a hard and tough change, but a refreshing one.


Adulthood

It was here that he established himself as a luxury bookseller, by the name of Edward Muygridge.  He also started making engravings and taking photographs of celebrities and famous murder victims.  By now he was 30 years old and was vaguely known amongst the general public.  He announced in the newspapers that he was leaving his old career behind, in pursuit of a more serious life in photography.

But after he set off once again on a new adventure, he missed his boat, so instead began the long, arduous nine-day journey by stagecoach.  One day whilst on the journey, he said that “I recollect having supper at a stagecoach station on the road.  We then got on board the stage, which was drawn by six wild mustang horses.  That is the last I recall of those nine days.”  The stagecoach had a major crash, which resulted in Muybridge sustaining a serious head injury, and a near death experience.

Screen Shot 2019-03-04 at 11.13.02

“When I recovered, each eye formed an individual impression, so that looking at you, for instance, I could see another man sitting by your side.”  It is thought that although terrible, this could have been a turning point in his life; for a small period of time, he saw the world through a series of different images from each eye, which could have inspired his major future success in photography, which eventually led on to his historic horse invention.  It is also common that with frontal lobe injuries that people become more disinhibited, reckless and thrill-seeking, which could have helped him in his future daring photograph opportunities.


Photography

After this, he returned to England for six years.  On his return to America, he was a phenomenally good photographer and had changed his name to the name that would be written down in the history books: Eadweard Muybridge.  It was at that point that he embarked on his photography career, which would lead to great things.

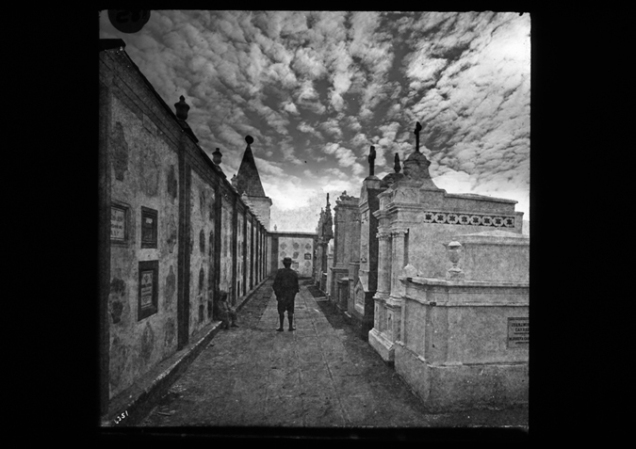
One of the many extraordinary achievements of Muybridge was that he basically created a very early, primitive type of photoshop.  He invented a method of superimposing images onto other images.  For instance, when this picture was originally taken, the clouds were not there, and neither were the people on the lighthouse.  He had another negative photo that he would then print on to the original picture to give the result below.

7f875482d56547c24cd960853ca4d37b-eadweard-muybridge-b-w-photos.

In the photograph below the superimposed clouds create a much more dramatic and striking image, than if the original clouds were used.  This just goes to show how useful this method was.

cemetery-guatemala-em7765

After a while, he adopted the rather grand name; “Helios”, which translates to “the Sun”.  By now he had a very large assortment of photography gear, which he named “The Flying Studio”, which was essentially a portable dark room.   He would lug this around with him everywhere, which would require pack horses, a couple of assistants, and lots of chemicals.  The process of taking these photos was very skilfull and time-consuming.  Muybridge even stated that “every photographer is his own chemist.”

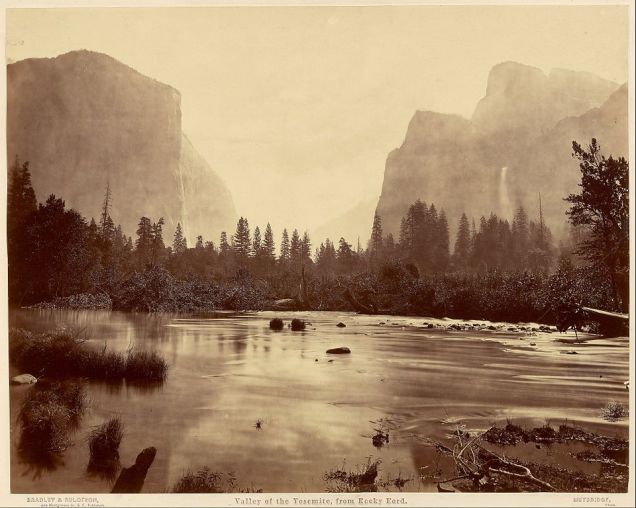
Muybridge became well known for his landscape photographs that he took in the Yosemite Valley in California.

fa90872f9d7a0acf339d2856b79ce0f0

With these photos, he took great inspiration from European photographers and landscape painters.  He wanted to capture dramatic images which were ethereal and had elements of a more fantasy based atmosphere.

muybridge-3

He sometimes went to extreme and even dangerous efforts, to capture the images that he had his mind set on.  He would cut down trees if they interfered with his picture, he would go to places his backpackers outright refused to go, probably like in the picture above.  He was even known to lower himself down crevices by ropes.  He did all of this just to get the perfect shot.

But all of his efforts paid off, as when he published all 20 of his Yosemite Valley photos in 1868, they were regarded to be the “most exquisite photographic views ever produced on this coast.”

In his photographs, you can see that he obviously not just liked pretty landscapes, but also dark themes, chaos, instability, isolation, loneliness and uncertainty.  He often liked to have broken trees and wrecks in his photos.

He knew that these photos of the beautiful wilderness would sell very well back home in America, because most of the wilderness was undiscovered, and regular civilians had never seen views from the photographic perspectives that he provided them with.  After these photos were released, it subsequently became popular to go on holiday to these exotic places shown.  After this, California became a much more popular place, with the population suddenly increasing, and the city also became connected to the great railway that was being built.  California became a much more industrial place.  But the change that he helped catalyse wasn’t all good; natives were pushed out and were subsequently replaced by tourists.

This began to show just how much influence Muybridge’s work would go on to have on the world and the general public.

coffee-plantation-women-workers-washing-clothes-in-a-stream-em7739

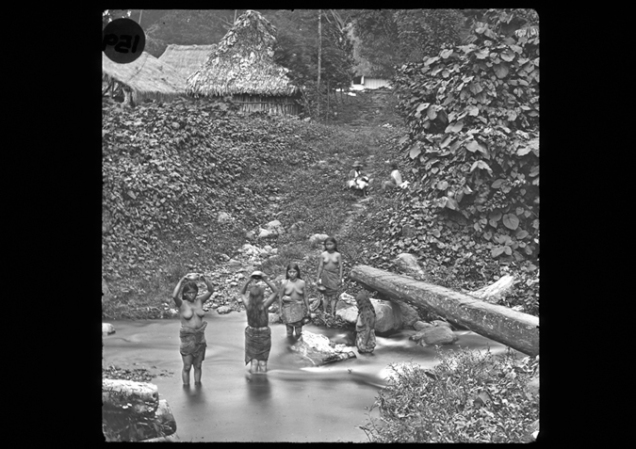
The popular view of the Native Americans at that time was that they were “vermin”, almost inhuman.  But he didn’t photograph them like this, he portrayed them as just humans.


The Start of Something Great

During the year around 1870, he met the flirtatious 19-year-old Flora Shallcross Stone who worked in his studio.  He fell in love with her but she was already married, so he paid for her divorce, then married her.

wife

In that same year, he met the man that would catalyse his most famous and remarkable work; Leland Stanford.  He was most famous for being one of the main Governing forces behind the creation of the railway.  He held a great amount of money and power in his chubby little hands.

amasaleland-stanford-9491951-1-402

He loved horse racing, he saw a horse as a machine, not unlike his trains, and wanted to know how it worked.  He made a bet of $25,000 that when a horse is running, all four of its hooves lift off the ground at once momentarily.  Probably due to Muybridge’s emerging success and evident talent, Leyland chose him to solve the mystery.  Leyland let Muybridge use his prized racehorse Occident.

At first, Muybridge thought that it was an impossible feat to prove, as the technology required to stop motion was way beyond the tech of that time.  But, being the inventive and creative photographer that he was, he agreed to at least try.  Muybridge’s first experiment with Leyland took place on a horse racecourse in Sacramento, California.

He gathered all of the bedsheets that he could find to make a white background, and then covered the ground in a white substance, to make sure that as much light as possible reflected back onto the horse.  The first couple of attempts didn’t work, so he had to invent a mechanism that could increase the shutter speed, which would result in a form of stop motion.  He succeeded and boastfully announced that with a single photographic negative, he had proved that all four of Occident’s hooves did indeed momentarily lifted off of the ground whilst galloping.  But he later admitted that it was shadowy and indistinct.  So he went back to experimenting.  But all of the exciting innovation was interrupted.


Everything Crumbles

They had a baby, who they named Florado Helios Muybridge.    But his home life with his wife, Flora, was starting to unravel. Due to the nature of his work he would often be away from home for weeks, even months at a time.  After a particularly long trip, he returned to discover a handful of letters that made it clear that his wife had had an affair with a certain Major Harry Larkyns, who was also probably the dad of little Florado.

Harry Larkyns was a drama critic and Playwright who was well respected among his peers and had served in the army in a couple of wars.  Muybridge and Larkyns had had an exchanging of fists, to put it politely, about a year before when Muybridge suspected an intimate connection between Larkyns and Flora, but that evidently didn’t put him off the seductive scent.

A friend of Muybridge’s saw him in the street shortly after learning of his wife’s affair, and said that he was “as white as marble, with his lips compressed.”  When he asked him what was wrong, Muybridge replied simply “You’ll find out soon enough.”

Muybridge found out That Larkyns was staying at the Yellow Jacket Mine Inn near Calistoga, and almost immediately began the long journey.  Muybridge arrived at 11pm.  When Larkyns got to the door, Muybridge was standing outside with a revolver pointed straight at him.  He said one single sentence; “there is the answer to the letter you sent my wife.” and shot him once in the heart.  He stumbled into the parlour and fell down a corpse.


The Trial

Muybridge stood accused of first-degree murder.  Seeing as one of the most famous photographers of that time was on trial for murder, it became a major news story.  Claims that Muybridge was mentally insane were made.  They claimed that the stagecoach accident that left him with a serious orbitofrontal cortex injury, was at least partly to blame.  They used his own photographs against him, saying that only a madman would hang off of cliff edges just to get a photograph.

muybridge-3

Muybridge pleaded guilty.  But because this land was essentially still being developed, so too was the jurisdictional system.  Sexism was a major issue at this point in history, and the jury decided that killing someone for sleeping with your wife was a completely reasonable response.  The jury rejected the claims of insanity and found Muybridge not guilty, on the grounds of “justifiable homicide”.


History Being Made

A free man, Muybridge soon returned in full force to his horse experiments and photography.  In 1878 he took 13 photographs side by side and produced a 7 metre-long photograph which showed a 360 degree, panoramic view of San Fransisco.

panorama_of_san_francisco_by_eadweard_muybridge2c_1878

Later that year, he wanted to properly prove his horse hypothesis.  So on a horse racecourse, he set up a long line of cameras that were each triggered by a separate taught piece of string that was stretched out over the race track horizontally.  When the horse ran, it triggered the string, which in turn made its corresponding camera take a picture.  Each camera was able to take photographs with a shutter speed of one-thousandth of a second.  When all of the photos were put together in a series, these images showed how the horse moved.  For the first time in history, human beings had stopped time.

muybridge_large

The photos proved in tantalising detail that all four of a horse’s hooves do indeed lift off of the ground at once.  But these movements portrayed by the images looked so strange to the general public, that they originally thought that they were faked.  Some of the popular cartoonists produced drawings that made fun of the pictures and showed just how unrealistic Muybridge’s pictures looked to them.  This cartoon was made by Henry Stull in 1883.

stullmuybridge18april1883d1

Muybridge set out to prove them wrong.  He invented the Zoopraxiscope, which was a hand crank-operated, moving picture projector.

muybridge2-d01ef4d70e1aae8ace4b13e019a93502a97572f4-s800-c85

He hired artists to painstakingly paint each picture of the horse onto a 16″ glass disk, which he would then put into the Zoopraxiscope.  The horses had to be painted vertically elongated, to compensate for the distortion caused by the projection.  The result was the first ever moving picture projection.  The Zoopraxiscope paved the way for every film, ever made, ever; and the likes of Thomas Edison.

220px-muybridge_race_horse_animated


The Homestretch of His Career

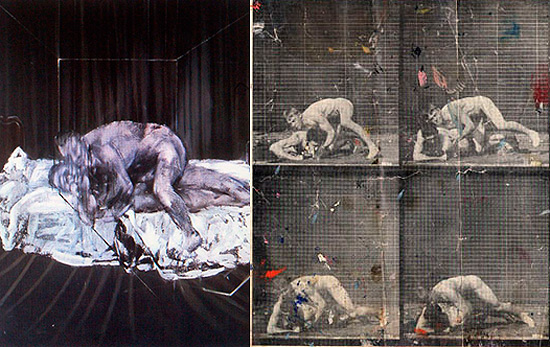
After the success of his running horse, Muybridge was sponsored by the University of Pennsylvania to continue his motion studies.  He took thousands of photographs of animals and people.  These studies greatly influenced the world and society.  Muybridge’s influence can be seen in many artists’ works.  For instance, his work had a great effect on the way that Francis Bacon portrayed human movement.  This Francis Bacon painting clearly shows just how greatly he was influenced by Muybridge.

muybridge_bacon

But Muybridge’s influence on the world wasn’t all good.    The photos that he took of women showed them doing what was considered to be womanly activities at the time, like carrying buckets of water, playing with children, doing house chores etc.  Some photos also how women in sexualised poses.  It is thought that these photos could have helped to enforce female stereotypes, which had a detrimental effect on the lives and power of women in those days.  They were also mostly photographed nude, or with very thin and loose clothing, which suggests that they were also made partly for titillation, and might not have been for 100% scientific purposes.  Although most of the men are nude as well, I still think that this is a point worth mentioning.

em1067-woman-turning-in-surprise-and-then-running-away-collotype-image

3c30279u

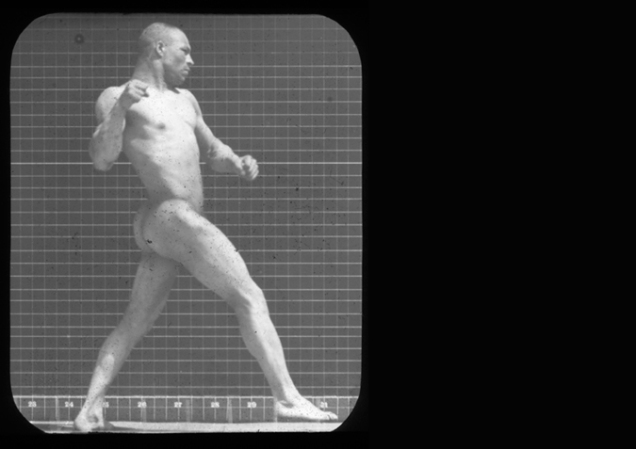
The portrayal of men in these series of photos showed them doing very “manly” activities, like horse riding, hammering, boxing etc, and always looking very strong and powerful.  There are also a lot of photos of men doing lots of sports.  At this time in history, Universities were known for the majority of their students not getting out much, so therefore being pretty out of shape.  Since these series of photographs were commissioned by the University of Pennsylvania, they probably told Muybridge to portray muscled, healthy men doing physically exerting activities – in an effort to change the public’s view of Universities and their students.

muybridge-fencing

34634d9c493e87b87b2a21ba5bbba6dc

The difference in activities being performed by each gender shows generally how society at that time thought about the difference between women and men.  Men were shown to be very strong an athletic, doing powerful activities.  Whereas women were shown to be less strong, doing maternal and household activities.

Interestingly, his only non-white subject was Ben Bailey, who was a mixed race man.  Sadly, enhanced musculature on black men can be understood to have helped reinforce negative racial stereotypes such as aggressive primitivism.

man.-punch.-bill-bailey-em6079

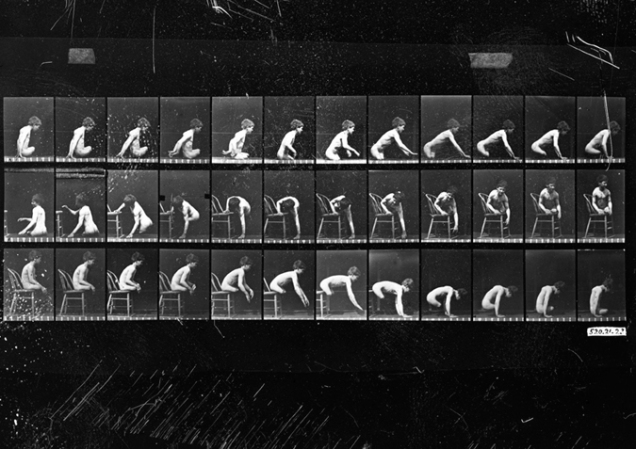
Muybridge also photographed a handful of disabled people. In his book Animal Locomotion, He organised each category of photographic subjects into distinct chapters; the hierarchy seemed to signify the importance of each category to Muybridge.  It is interesting that he positioned the chapter about disabled people below the healthy and able-bodied people, and just above the animals.  It is almost as if Muybridge as society at that time saw them as less human or valuable then regular people.

boy.-child-without-legs.-getting-off-a-chair-em6332

Muybridge himself was also photographed doing a couple of activities.  One was flailing a pickaxe around.

129006308337267736_33ab9940-629c-4d82-a414-41ff1f94c656_10862_570

As well as all of this, Muybridge gave many lectures at prestigious institutions, and in front of royalty, artists, scientists and the general public.  He also published books.  The most famous of these are; Animals in Motion (1899) and The Human Figure in Motion (1901).


The Death of a Legend

He left his entire personal collection of his work to the Kingston Museum in London.  Rather poetically, he died in the place of his birth and childhood; Kingston upon Thames in 1904.  He left a nobody, and he returned a world-famous celebrity, scientist, murderer and artist who had made history.


Research

Motion Studies by Rebecca Solnit (2003).

Animals in Motion by Eadweard Muybridge (1957).

Kingston Museum.

The Eadweard Muybridge leaflet from Kingston Museum.

https://en.wikipedia.org/wiki/Leland_Stanford

https://en.wikipedia.org/wiki/Eadweard_Muybridge

https://cdnc.ucr.edu/cgi-bin/cdnc?a=d&d=RRF18741022.2.19&e=——-en–20–1–txt-

https://cdnc.ucr.edu/cgi-bin/cdnc?a=d&d=LAH18741022.2.15&e=——-en–20–1–txt-txIN——–1txIN——–1

Eadweard Muybridge: moving picture-maker and murderer – or not…..

Professor Abridge’s cartoon capers

Cityscape Illustration Task

http://www.nineteenthcenturydisability.org/items/show/19


Rotoscoping Animation

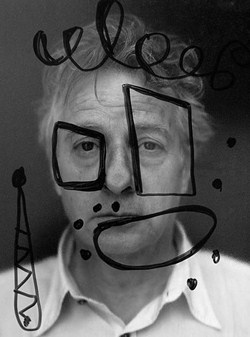
We are learning different 2D animation techniques and software.  We were introduced to a technique called rotoscoping, which also served as an introduction to Adobe Animate.

Rotoscoping is where you record a video of yourself, or use a pre-made one, then you trace around the figure on each frame of the video, which, when played back, creates an illustrated version of the person in the video.

For this task, we had to draw on ones.  So as you can probably imagine, seeing as one second of most films and videos are is 24 frames per second (24fps) it would take a tediously long time to make a rotoscope animation of any significant length.  For example, a mere 5 seconds would be equivalent to 120 individual drawings.

So once we had our video imported into Animate, we had to move it from here into our main project.

Screen Shot 2019-02-28 at 09.35.15

When first imported into the timeline, it would have a little grey or black dot at the start.  This dot is what is called a keyframe.  A grey dot means that it is a keyframe without any drawings on it, and a black dot means that there is are drawings on it.


This is the difference in appearance between a keyframe (Left) to a frame without a keyframe (Right).

Screen Shot 2019-02-28 at 09.37.15

So that is the basic premise of rotoscoping with Adobe Animate.  As with most of these little animation tasks, my imagination runs a mock, and the whole thing normally takes a weird turn.  But that’s what makes animation so fun, the creative freedom is awesome.

So after around 18 ish hours, I had drawn 56 frames with the Pencil Tool, coloured them with the Fill Tool, drawn a background that I thought was perfectly fitting (you’ll see what I mean), edited it so that it looped for more than 2 seconds, which was the original length of the animation, and added sound effects and music.

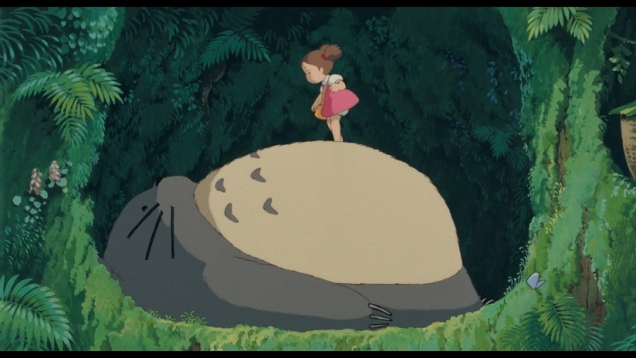
I used the following picture as a reference whilst drawing the background.  It is a frame from the film My Neighbour Totoro (1988) by Studio Ghibli.

my-neighbor-totoro-blu-ray-screenshot-0047773-i-824

I’m really happy with how it turned out, because I got to incorporate one of my favourite characters from one of my favourite films and put myself in one of my favourite scenes, with some of my favourite music, whilst I did my dumb little dance.

Now let your eyes roll over my questionable imagination.

Bee Animation

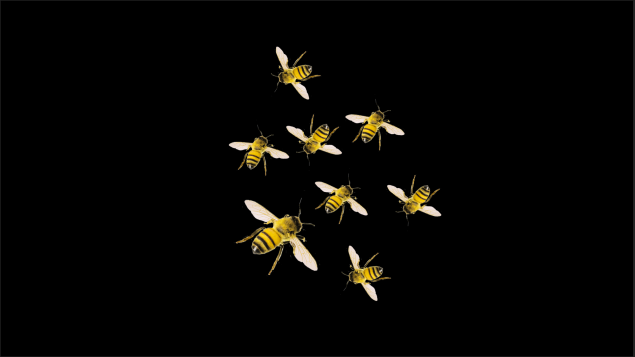
Today we were introduced to Adobe After Effects.  We were given the task of creating an animation of a swarm of bees flying across a picture of a sunflower.

We started out with a pre-made folder of AE goodies and made sure that everything in the project was part of the master composition so that it would be easier for the organisation of files.  We then made another composition specifically for the components of the bee animation.

Screen Shot 2019-02-25 at 14.42.45

We then dragged out some bee PNGs into the composition panel.  We used PNGs for this as opposed to JPEGs because PNGs have a transparent background, which looks way better in animation, than having a big ugly white box around the picture.  We then played around with them until we were satisfied with our bee swarm.

Screen Shot 2019-02-25 at 14.42.23

We then learnt how to use the stopwatch feature.  Each graphic of the animation has its own set of stopwatch options for each of the three transformations; scale, rotate and position.  When one of them is turned on, it turns blue and creates a keyframe for the selected transformation at the point on the timeline where the slider is.  When it is blue, anything that you do to the graphic makes another keyframe.  Keyframes are represented by little grey diamond shapes.  For example, if you had the position stopwatch turned on, and you moved its graphic across the screen, it would create another keyframe where you put it.  If you played it back, then the graphic would fly across the screen in the path that you moved it.  The speed of it depends on how close the keyframes are to each other; If they are close, then the animation will be faster, but if they are farther apart, then the animation will be slower.

If you hold down shift and click on multiple keyframes, then you can select more than one.  If you then press the keyboard command CMD + D, then the keyframes you selected will be duplicated.  This allows you to repeat animations, which saves you the time and mental torment of having to make them manually.

The above is the basic idea of how to animate with Adobe After Effects.  It was with this information that we went about making our own dumb little bee animations.

Screen Shot 2019-02-25 at 14.42.30

I made repeating animations of the bees twitching, which I hoped would make them look like they were flying when I moved them across the screen.

Up till now, everything has seemed pretty reasonable, logical and straight forward.  But after this point, I got really into my animation and went ever so slightly crazy with it.  So crazy, in fact, that I forgot to take any screenshots of my process.  So I’m afraid that I can only show the end result.

Seeing as this was my first proper go at AE, I’m actually pretty happy with the result.  With every little animation I make, I always try to add at least one itsy bitsy bit of narrative, because it just makes the process way more fun.

17vghthdjndsljpg


So grab a tiny packet of popcorn for the next 20 seconds and enjoy my dumb animation!


The 12 Principles of Animation

As an animator, you need to understand how people and objects move, and how to emphasize those movements, so that they fit the narrative that you are working within… and also a couple hundred truckloads worth of other information and skills.  But fear not!  Because the legendary Disney animators Frank Thomas and Ollie Johnston created the 12 principles of animation, for us to stick our artistic teeth into.  These were first talked about in their book, The Illusion of Life: Disney Animation (1981).  Whether you are just starting out with animation, or have been doing it for decades, you need to know these 12 simple principles.

So metaphorically open up that mushy brain of yours, and prepare to learn some important stuff.


1. Squash & Stretch

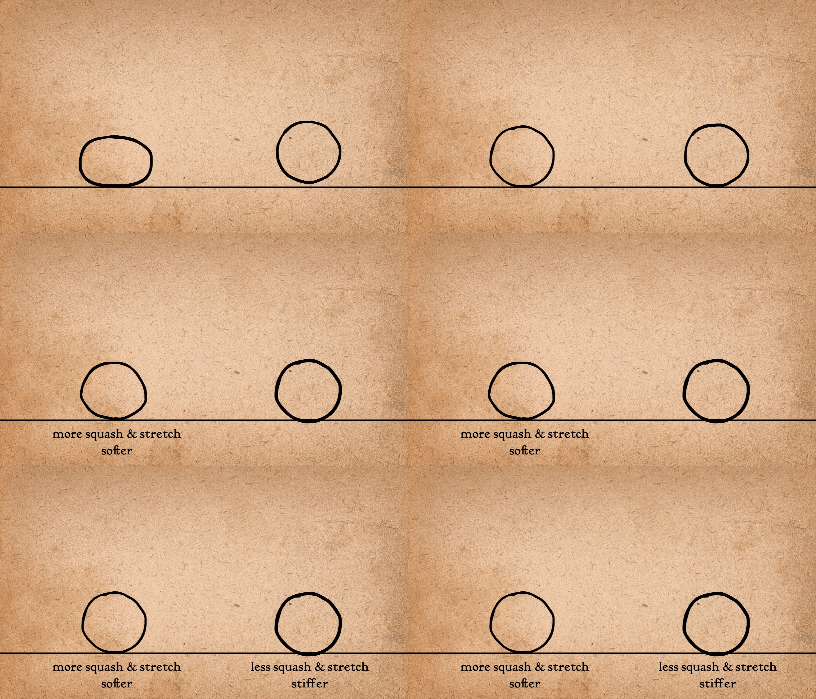
This is the principle that animated objects and characters will become longer and shorter to emphasize their speed, momentum, weight and mass.

This idea can be used to visually communicate what an object is made out of.  For example in the animation below, one ball has a lot of squash and stretch, which makes it look a lot more light, bouncy and cartoony, which makes it seem like a water balloon.   But the other ball has much less squash and stretch, so it appears hard, heavy and solid, which makes it look like a bowling ball.
squash-and-stretch01

Squash and stretch can also be used for other types of falling objects, like characters; when the character is falling, the poor fellow could be stretched out vertically to highlight the speed at which he is falling, and when he lands, he could squash horizontally, to accentuate how hard he landed.

When squash and stretch are used excessively, it can make the subject seem unrealistic, which gives it a very cartoony look.

But this principle doesn’t just apply to bounce balls and other falling objects; it can also be used to accentuate facial expressions.

animate-blaise-test-1

See how it is used here to emphasize his shock?  His face squashes as he prepares for the action, then his face stretches, which really highlights his horrified shock.

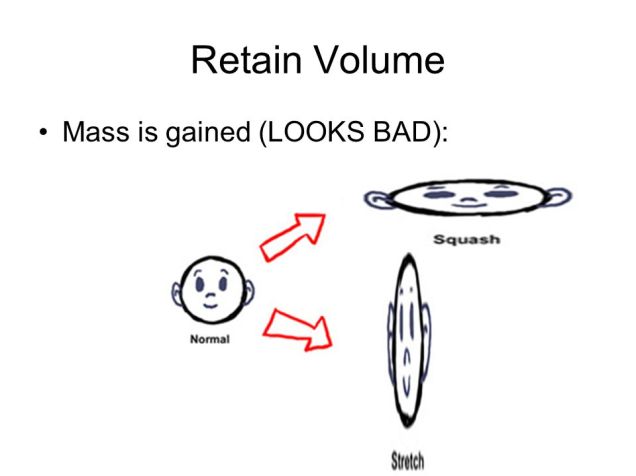
When using this technique, you have to always keep in mind that the object or character needs to always keep the same volume when changing shape.  It needs to retain its volume.  You can’t have a bouncing ball increase in volume as it stretches out, then decrease in volume when it squashes.  It would just look really bad an unprofessional.
slide_37


2. Anticipation

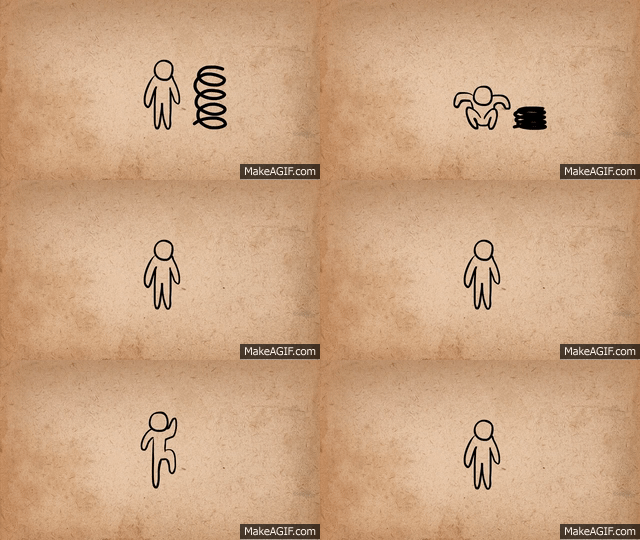
This refers to when a character prepares for an action.  This gives the audience time to understand what is about to happen next.  It also helps the movement appear more realistic.   An example of this would be a character jumping into the air.  With anticipation, the character bends down, preparing for the jump, then he jumps.  This action is like a spring squashing down, then bouncing back up with much more force.  But without anticipation, the audience isn’t given any time to understand that the little guy is about to jump.  It also just looks very unrealistic.
9sdzzo

Anticipation is also very useful for drawing the audience’s attention to certain aspects of an animation.  In the example below, it illustrates how the animation draws attention to the dog’s hand, then to his pocket.  This lets the viewer understand what’s about to happen.  But if no anticipation is used, the viewer wouldn’t notice his hand go into his pocket to retrieve the candy, which would make it look as if he had pulled the sweet from thin air.

sillyajarlamprey-size_restricted

But additionally, you can use anticipation to draw the audience’s attention to one spot, then suddenly surprise them by making something happen in a different spot.  An example of this would be if the dog in the gif above anticipated the reach, then reached into his pocket, but couldn’t find anything, so searched deeper, then the lollipop suddenly appeared on the other side of the screen.  It is essentially used to trick the audience.

A deeper, more complicated level of anticipation would be an action that anticipates for the anticipation action, that is then followed by the action.  Or the movement format; Start, pre-anticipate, anticipate, pre-action and then lastly, the action.


3. Staging

Staging is the presentation of an idea so that it is completely and unmistakably clear.  It is a very broad concept, so can apply to multiple areas of animation, including acting, timing, camera angles & position, and setting.

By using staging correctly, you are able to direct the audience’s attention to certain areas of the scene.  You are essentially telling them when and where to look.  Everything works together to make the scene understandable.  Bad staging is when too many things are happening at once and are competing for attention.  The audience’s eyes are onslaught with visual information and they don’t know where to look.

rir5ud

The camera and its angles are like a window into the world of the animation and are therefore very important for good staging.  Having the camera close to the subject is good for showing facial expressions, and having the camera far away from the subject is good for big actions, like acrobatics, or battles and all that jazz.  You need to remember to always keep the main actions in the middle of the screen, or in one of the thirds.

The main action of the scene needs to be unmistakably clear and simple.  For example, you shouldn’t have other things going on in the scene that draw attention from the main action.  To achieve this, it helps to let one action finish before the next one starts, so that the audience has time to process what is happening in the narrative before the next action starts.  If there is text, then you need to keep it on screen for at least the amount of time that it takes to say it out loud three times.

But The concept of staging isn’t just about manipulating the audience’s attention to further immerse them in your narrative, it is also about communicating ideas.  If a character is sad, then highlight and exaggerate it as much as you can, so that the audience really understands and feels it.  You could do this by giving them a sad expression and making them stoop over sadly when they walk, with a raincloud over them.  If you are trying to create an environment that says something meaningful about the characters that inhabit it, then really push the metaphorical artistic boat out, and add as many details that build on that meaning, and try not to add anything that subtracts from that.

For example, if you are drawing the home of a wealthy millionaire, you could add things that illustrate their wealth, like fancy furniture and a swimming pool, but you shouldn’t add, let’s say, an old broken tv, or a wall with its plaster peeling off.  You can also use the camera for this effect; like you could have a close up of a pile of money, or even have the millionaire using a wad of flaming money to light his cigar.

Basically, when thinking about staging, just use everything at your disposal to visually tell the audience everything they need to know.


4. Straight Ahead & Pose To Pose

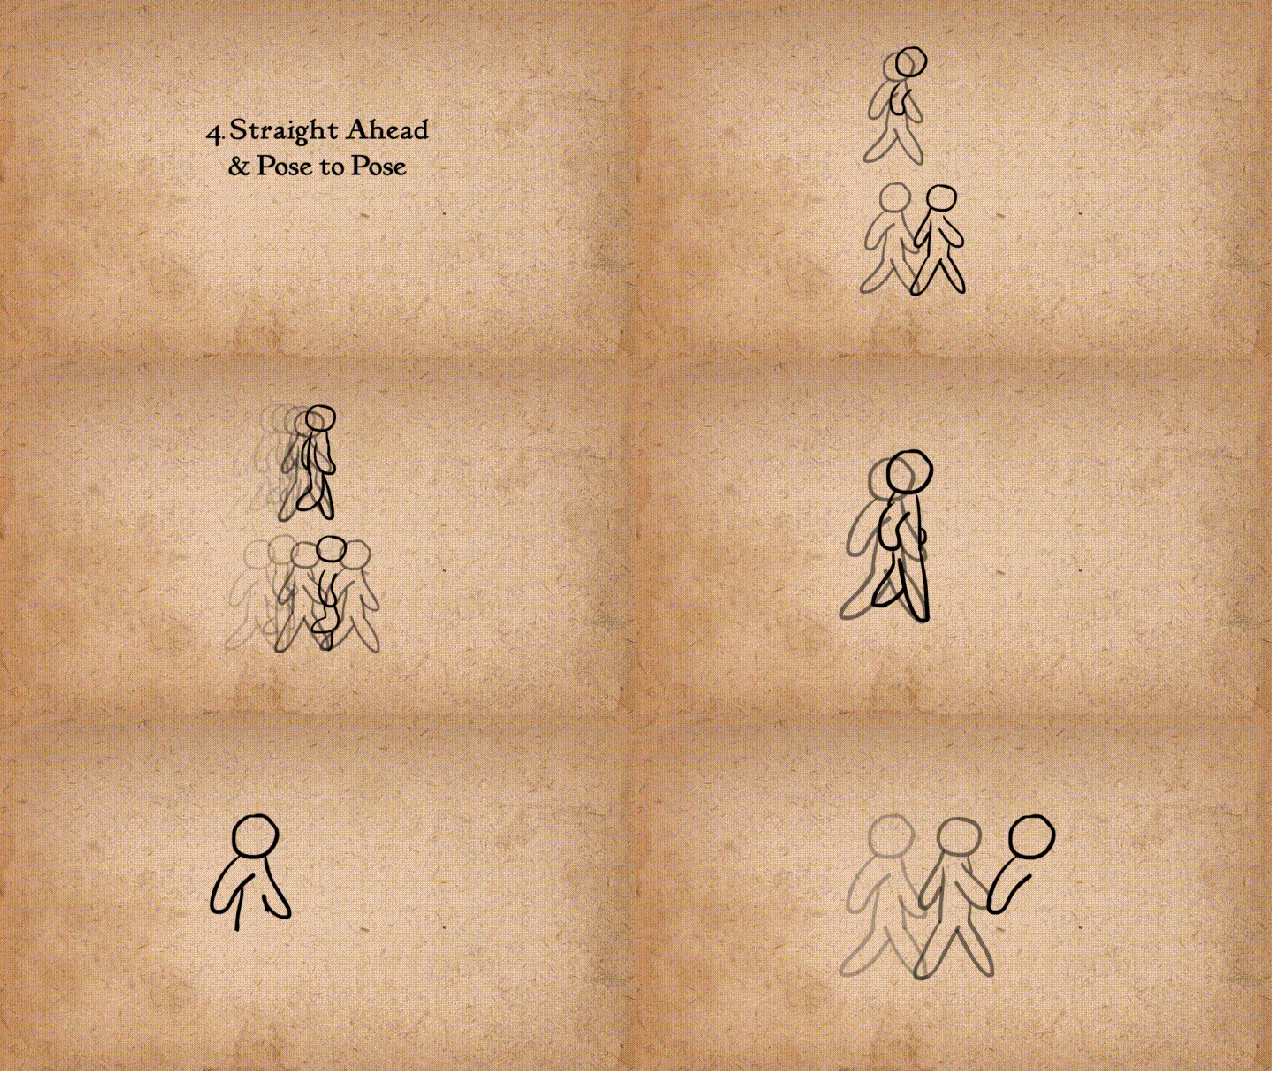
This concept describes the main two ways to animate.  Straight ahead is where you draw the 1st drawing, then the 2nd, 3rd, 4th and so on.  It is essentially animating as you go.

With Pose to Pose, you draw the first and end frames, then the middle frame, then you go back later to fill in the drawings in between.
ckskkfm

Pose to pose is good for animating bigger actions, as you can go back and make adjustments later, and you get an early image of how the animation will play out.  This means that you have a clear beginning and end frames.  One of the problems with straight ahead is that the size and volume of the animated subject can easily change as you animate it if you’re not careful.

Pose to pose can save you a lot of work and mental stress.  If you use straight ahead and at the end, you realise that one frame isn’t right, then you’d have to go back and redraw multiple frames to amend your artistic sin.  But with the pose to pose, you can see how everything will look, and catch problems early on.

When using pose to pose, the first and end frames are called “keys”.  The secondary frames are called “extremes”, and the frames in between those are called “breakdowns”, and the frames in between THOSE are called “inbetweens”.

You first draw the keyframes and perfect them, then draw how far the character will go in each direction using extremes, then decide how you want the extremes to connect, using break downs.  It is at this point that you use inbetweens to connect everything together and make everything smoother.

But straight ahead is very useful for animating unpredictable things, like splashing water, fire and explosions etc.  Because there are laws of physics that they abide by, you can guesstimate how the animation should look as you go along.  But it would be hard to guess their visual outcome with pose to pose.  However, you can still use pose to pose to make the general shapes, then fill it in later to make the animation run smoother.


5. Follow Through And Overlapping Action

This is the technique of having body parts and appendages drag behind the rest of body when it moves, and continue to move when the body stops.  Basically, when the main body moves, the tip of the appendege or body part should be the last to catch up, and when the body stops, the tip should follow through the farthest before settling back.

The terms follow through, overlapping action and drag all essentially mean the same thing, but are just slight varients of each other.

Follow through is when the appendage or body parts continue to move after the body has stopped.  Sometimes the extra flabby skin on a charcter can be treated as a seperate entity with this technique.
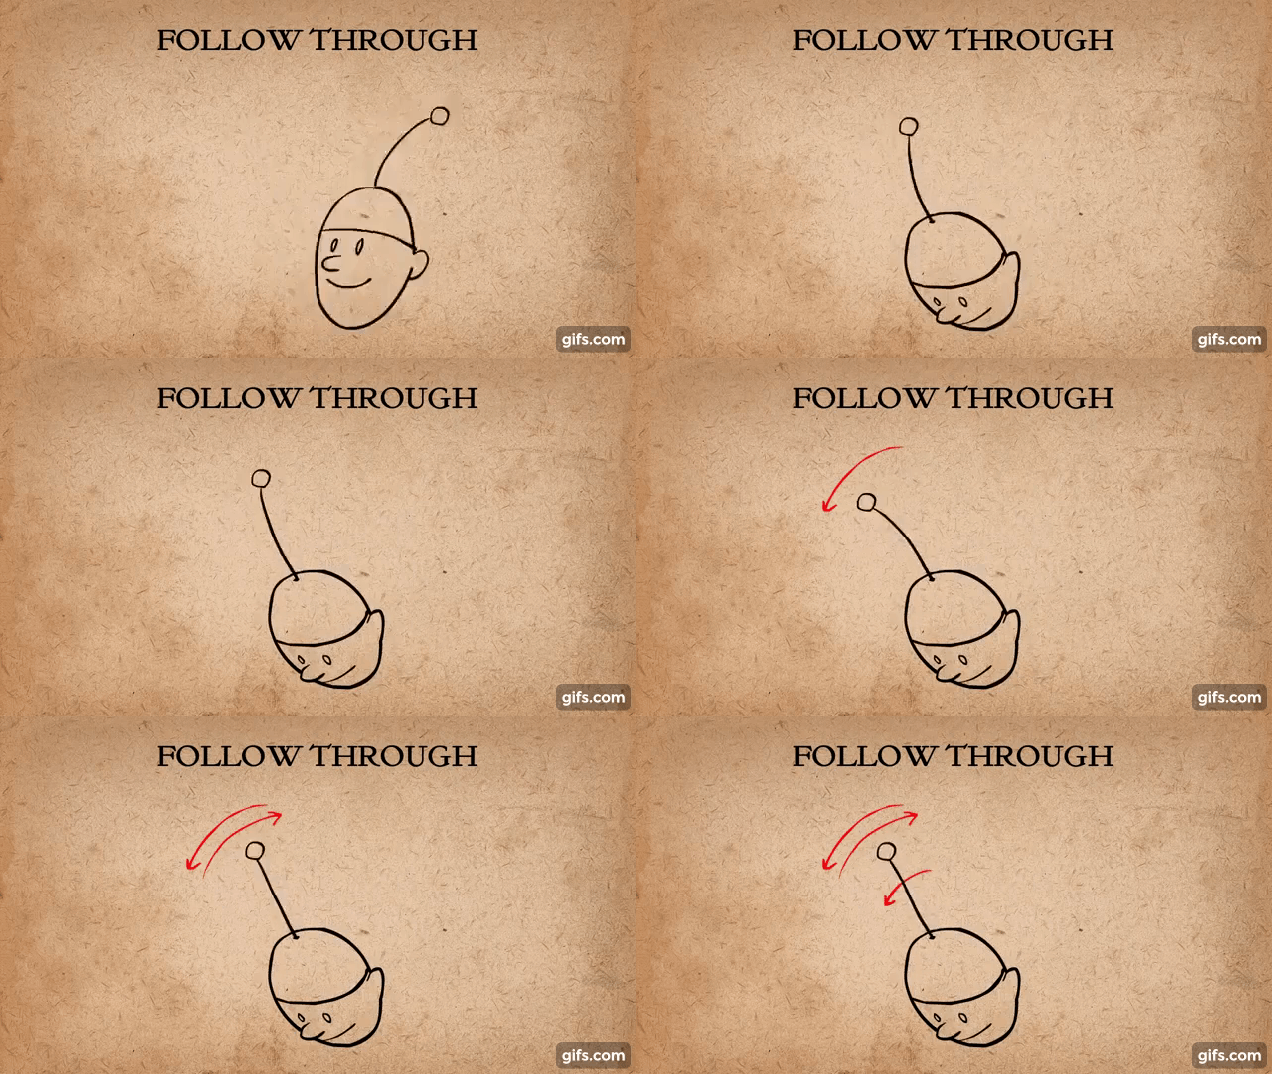
nx6rvk

Overlapping action describes the offset between the timing of the main body and its other parts.
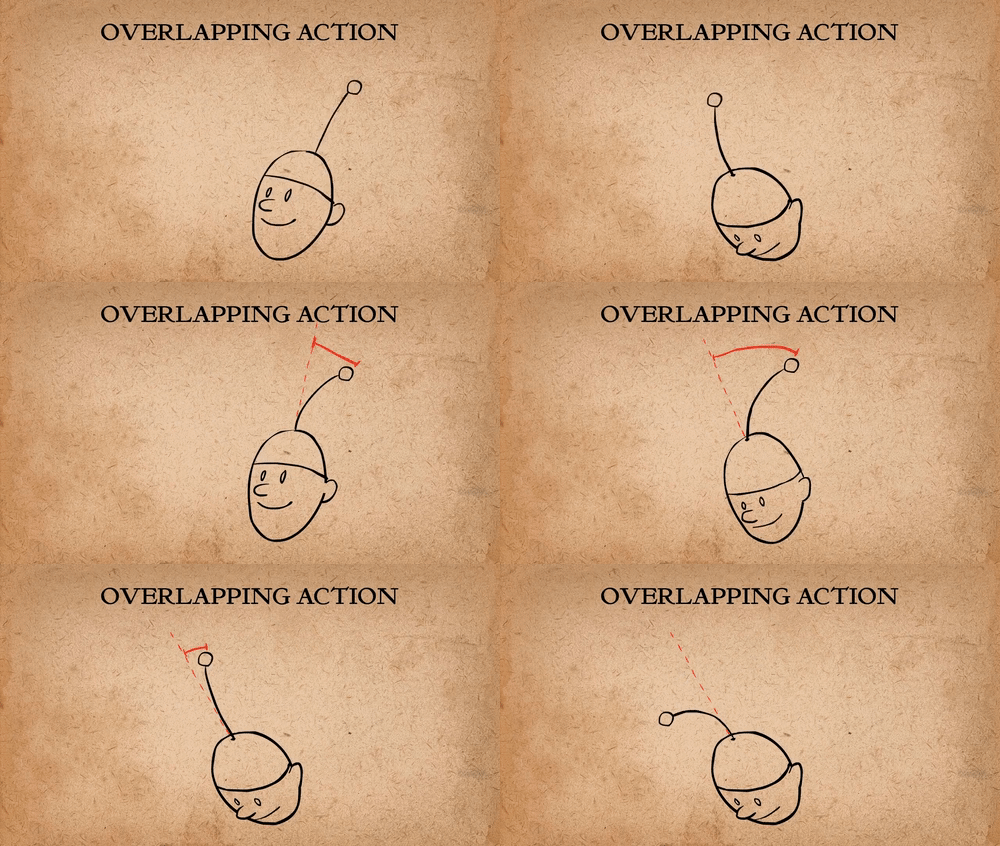
cheerybestgalapagosmockingbird-size_restricted

And finally, drag describes the technique of delaying the movement of body parts in relation to the main body.
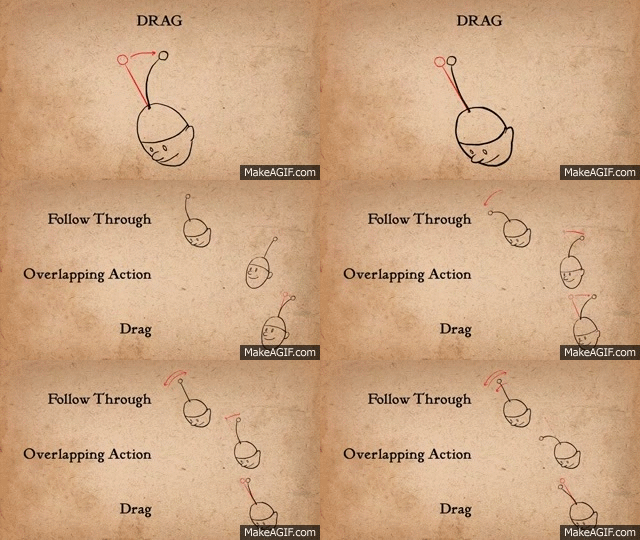
gs3ql7

Follow through an overlapping action add a whole bunch of realism to a character.  The amount of drag you give an object can say a lot about its mass.

when animating an appendage, it is often easier to add it after you have animated the main body, because its movement allows you to interperate how it should act when drag is applied, and then follow through when the body has stopped.  When doing this, straight ahead animation is good to use.

Overlapping action helps to break up an animation, to make it more interesting.


6. Slow In And Slow Out

This technique refers to how almost all movement starts slowly,  gets faster, and ends slowly.  This concept is of utmost importance if you want to achieve lifelike motion, because, without it, movements are at a constant speed, and just seem bland and mechanical.

knobbyheavenlybernesemountaindog-size_restricted

If you wanted to use slow in and slow out with 2D animation, then you would need to draw the two keyframes, then draw a couple of inbetweens.  The amount of inbetweens needed depends on whether the action is quicker or slower.  If quicker, fewer inbetweens are needed.  If slower, then more inbetweens are needed.
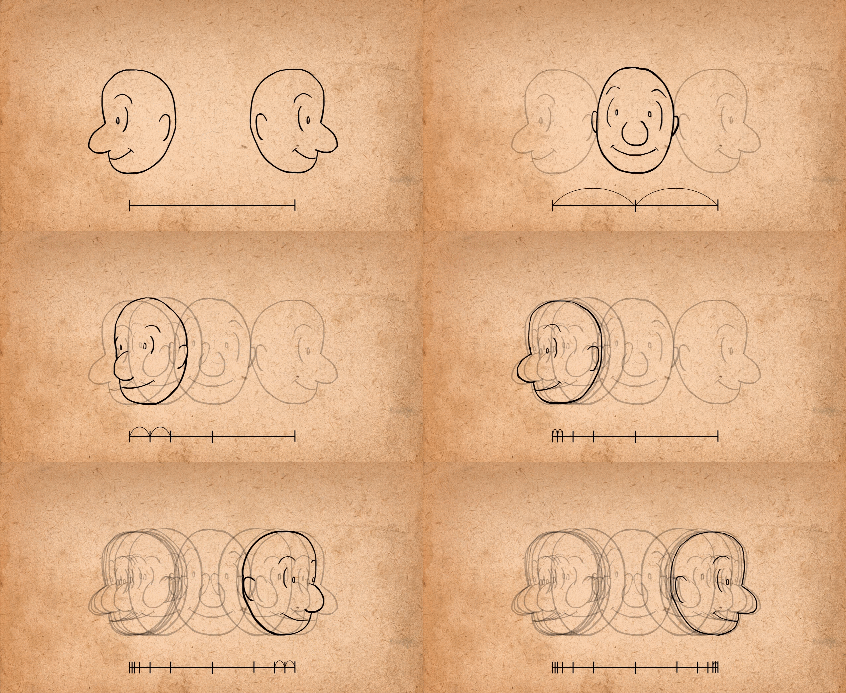
slow-in-and-slow-out3

If you notice that your animation is choppy, then you need to analyse the spacing of the frames.  They should be evenly spaced, with the frames closer together at the beginning of the action, and at the end of the action.


7. Arcs

This concept is all about the idea that most living creatures mostly move in a circular fashion, otherwise known as an arc.
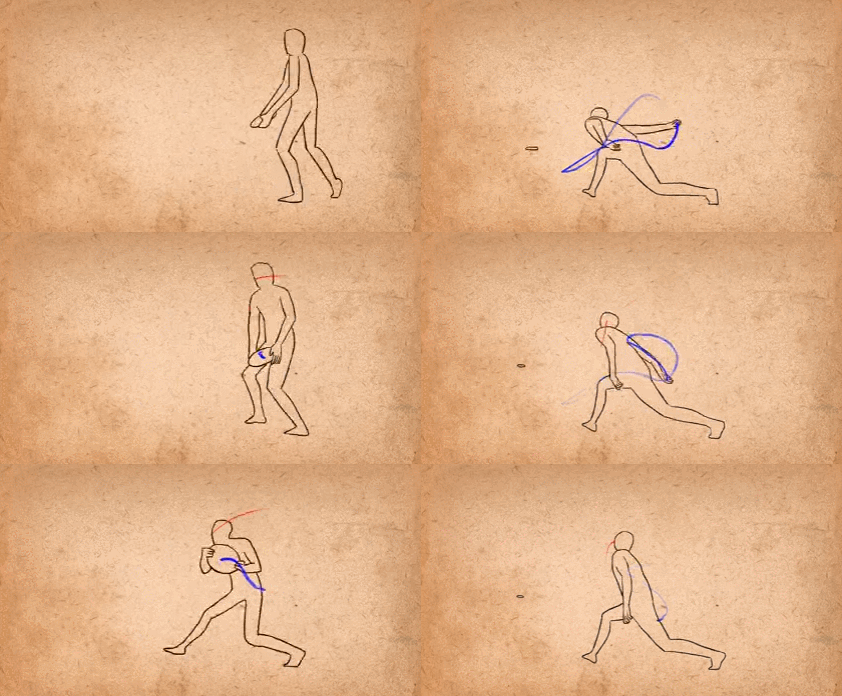
ark

Using arcs is useful for making objects following a circular path more realistic, and adding character and personality to character’s movements.  Arcs can be added to almost any character movement.
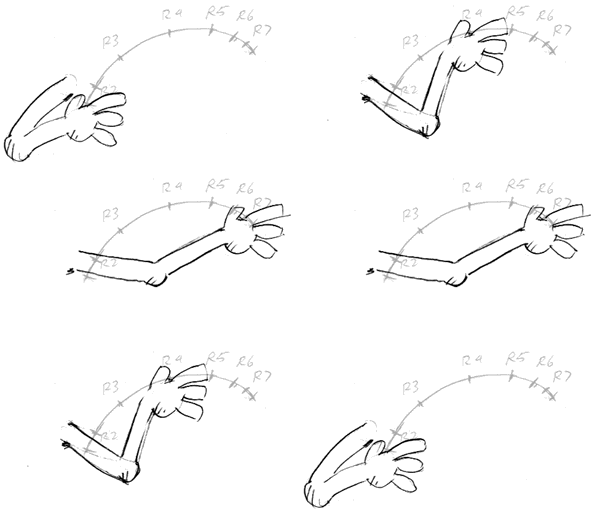
arm_rightanim

When there is a fast movement, you can add an arc in the form of a motion blur, like so.
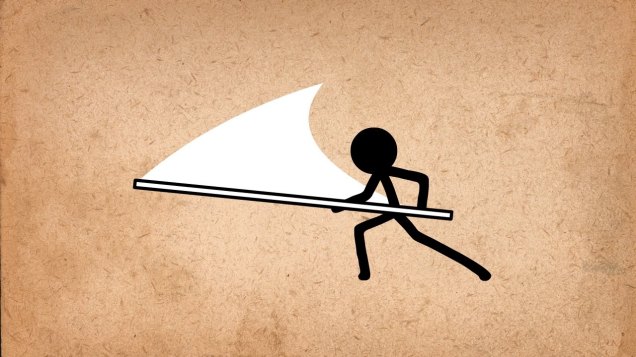
maxresdefault


8. Secondary Action

This principle is basically all about gestures that support the main action to add more dimension to the character animation.  The secondary action can exaggerate the character’s feelings, and add more meaning to the animation.

For example in the animation below, a guy is looking worried.  The secondary actions are the foot and hand tapping, and these make it very clear to the viewer that he is worried because, without them, the meaning of the animation might not be as clear, like it could be interpreted that he was feeling other emotions, like sadness.
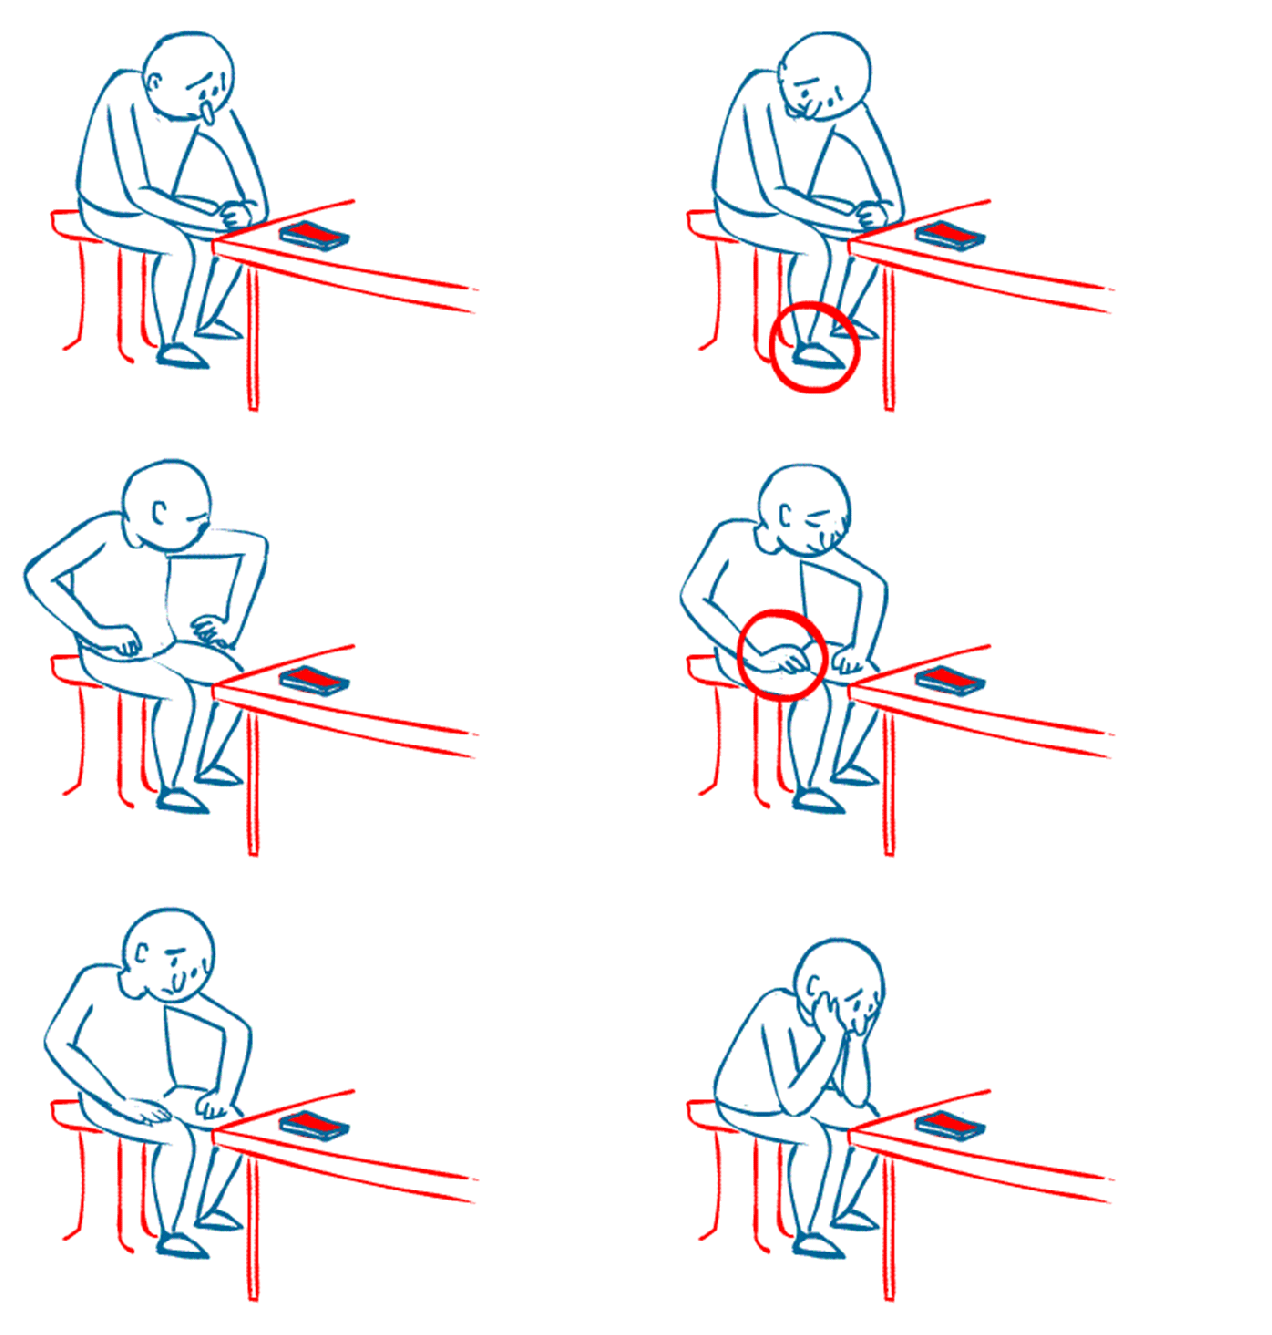
05-mobile-pick-new-698

But it is important to keep in mind that the secondary action shouldn’t detract from the main action.  It should compliment it.  For example, if you had an animation of a man crying, the secondary action could be him putting a tissue to his face, but in doing so, the main action is obscured by it, and the original meaning could be lost.
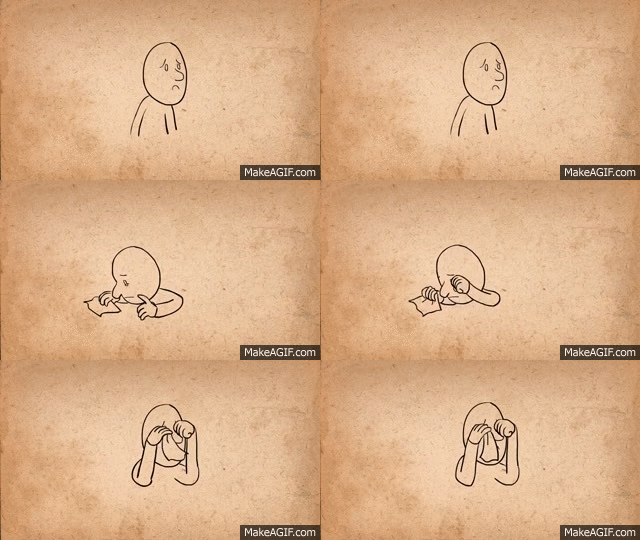
mui0o_

But in addition to this, you also need to remember that the secondary action needs its own time on screen, so that the audience has time to notice it, and process it in relation to the main action.  This shows that the principle of staging is very important for secondary actions.


9. Timing

This principle is basically the idea that the personality and nature of an animation is greatly affected by the number of frames inserted between each main action.

In layman’s terms, this means that an animation with lots of frames in between each main action will be much slower than an animation with a couple of frames set far apart from each other, which will be very fast.
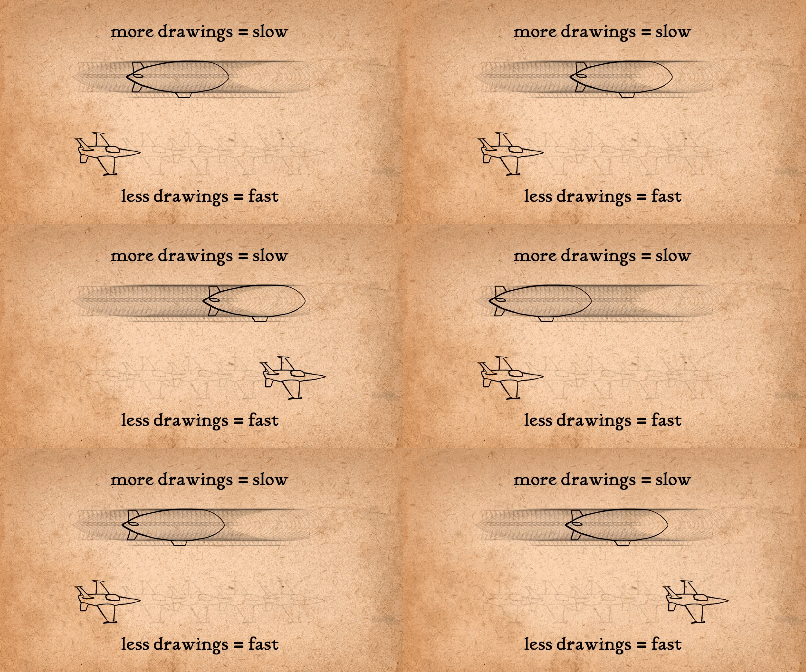
timing

The number of inbetweens between two keyframes can greatly impact the meaning of the animation, as seen below.  With each addition of a frame, the speed of the head turn becomes less and less severe, which alters the meaning of the movement.
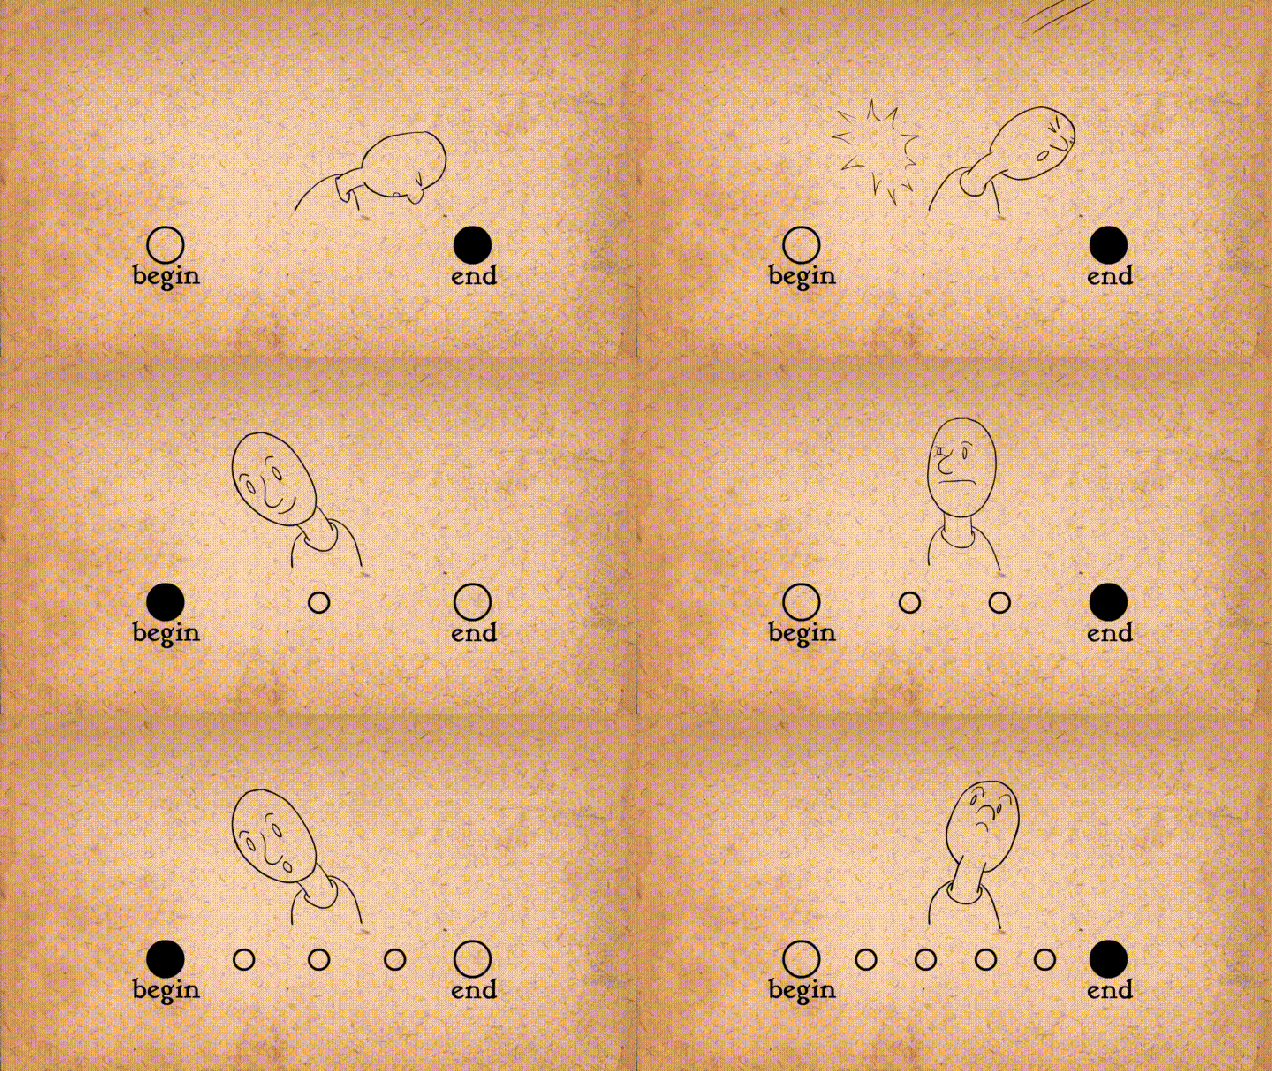
6j8waqs

Most films and animations are made with 24 frames per second (24fps).  If you drew an animation with 24fps, then it would be defined as “drawing on ones”, because you are making drawings on every frame.  If you draw a frame every other frame, then it is called “drawing on twos”, and every three drawing is “drawing on threes”, and so on.

mediumexaltedeyra-size_restricted

Drawing on twos as opposed to ones is very common, as it halves the amount of work, and therefore money that goes into the animation, and it actually makes slow actions look smoother.  This is because the amount of precision needed to draw a slow action on ones can lead to the action being jittery, which makes it look unprofessional.

Some people think that drawing on twos is actually better for fast animations as well because they say it gives the animation a human, more authentic animated touch, instead of it being very smooth and polished, which would be achieved by drawing on ones.

But drawing on ones is also necessary when there is a very fast animation, as every detail needs to be smooth and clear so that it is easy for the eye to see everything.

It is also noteworthy that an animation can be drawn on ones and twos, depending on the movement, which gives the animation a very dynamic and artistic feel.

At the end of the day though, it is ultimately the animator’s choice on how many frames they want to put into the animation, based on style, preference, deadlines, and so on.


10. Exaggeration

Essentially, this principle means that every action can be exaggerated to have a more powerful impact on the viewer.  If you ever took drama classes, then this concept should be familiar to you.

So if a character has a sad face, make it sadder.  If it has a happy expression, make it happier.  If it is worried, make it more worried, and so on.
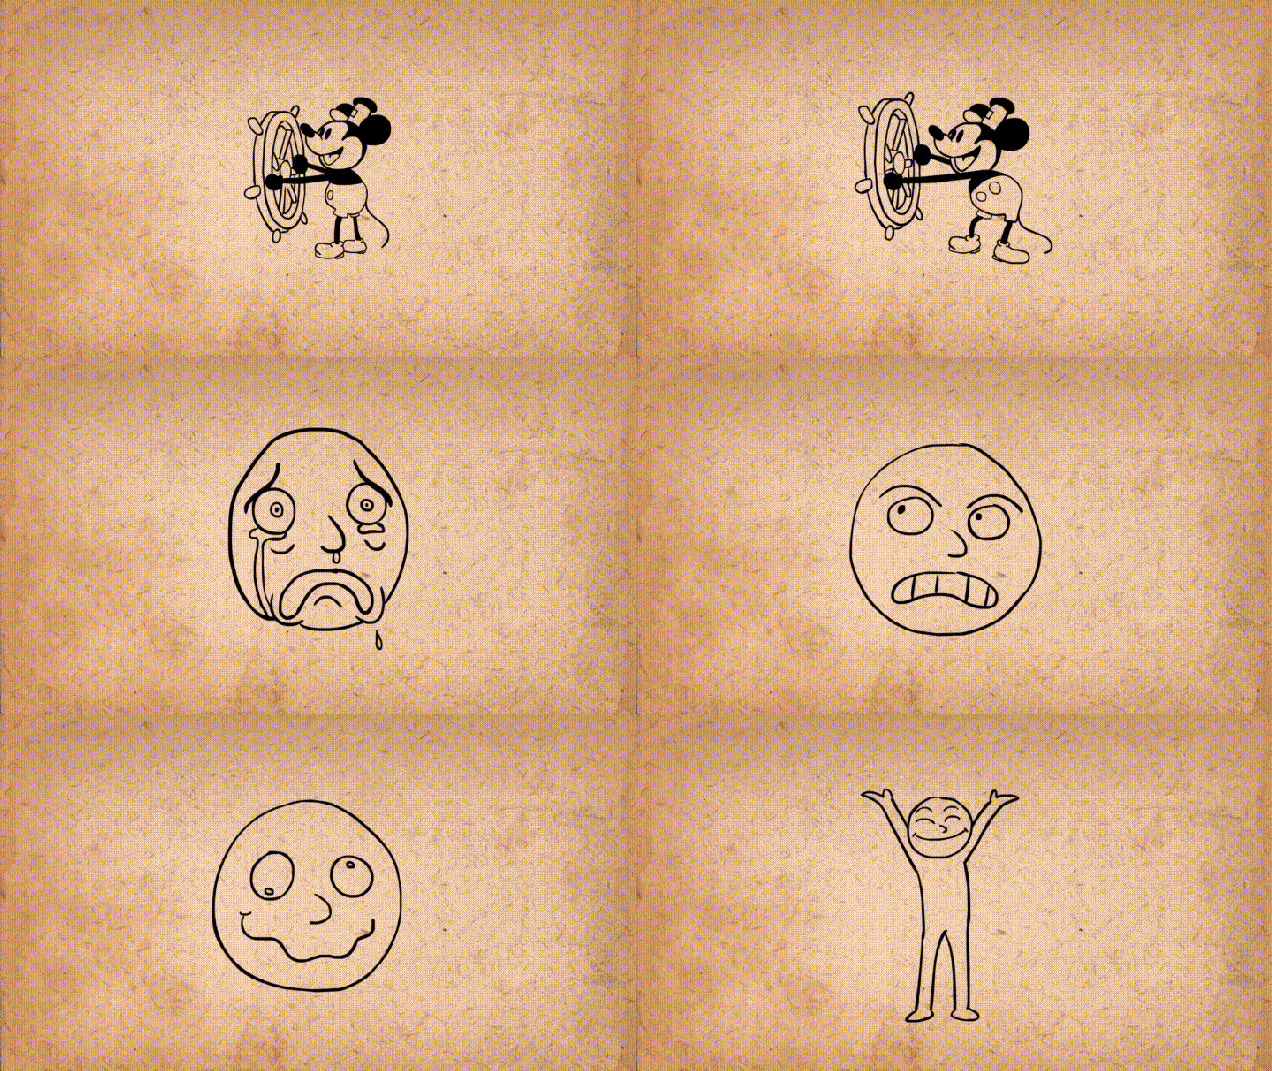
lavy6hi

When you have a fast movement, the exaggeration needs to have at least one unrealistic frame, one frame, that if paused on it, would look way too long, and just not right.  This boosts the exaggeration’s presence.  An example of this is below on the right.  See how the frying pan bends unrealistically?  If you paused it on that frame, it would look weird, but because it is in motion, it looks completely fine.

anguishedthreadbareirishwolfhound-size_restricted

A good rule of thumb for knowing when an exaggeration is too much is to push the exaggeration to the max until it becomes very unrealistic, then tone it down a bit, until it looks good.  By doing this, you are able to see the full range, instead of randomly shooting in the dark, and hoping for the best.


11. Solid Drawing

This principle is about making characters and objects feel like they are in a 3D space and environment where they have volume, weight and balance.

A skill that comes in very handy when using this principle is knowing how to draw a character from all angles and sides, but this requires a lot of knowledge about 3-dimensional drawing.  When trying to draw a character in 3D, use basic 3D shapes to construct them, like cubes, rectangles and spheres, like so.
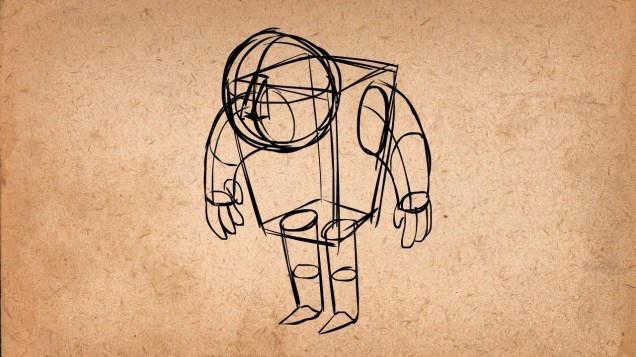
maxresdefault-1

When drawing in 3D, it can also be very useful to draw perspective lines, so that you can tell how big to draw the character in relation to how far away from the camera they are.
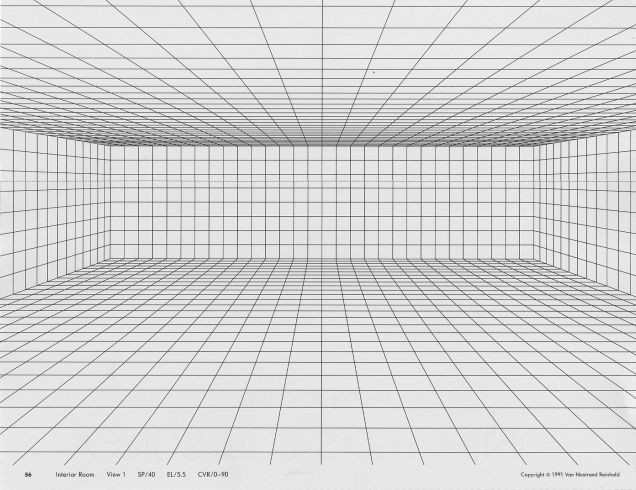
5402eee0042ad8763fe481042c64e46d

When you move onto drawing the final lines of your character, try to remember that using overlapping lines can really make the character pop, and make it feel like it’s in a 3D space.
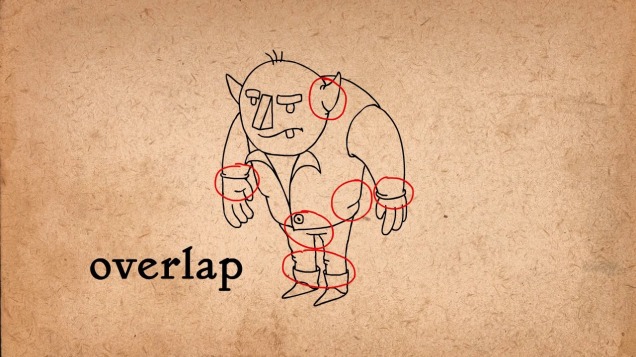
maxresdefault-2

These concepts apply not just to 3D drawings, but also to 3D animations.  They help to convey the pose of a character and give them a sense of weight and balance.  When animating, try not to do what is called “twinning” which refers to when a character’s limbs are both doing the exact same thing on each side.  To avoid this, actively try to think about other things that the adjacent side of the body could be doing, like make the character slouch to one side, or make them try to keep their balance.  Anything to show that they are abiding by the laws of physics in a 3D space.
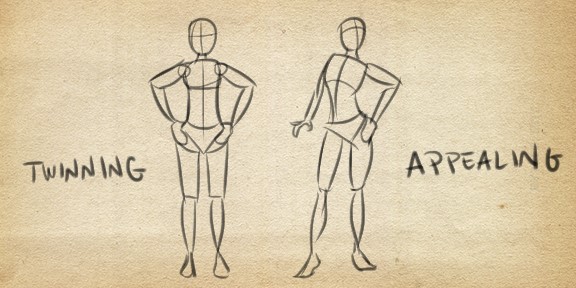
ani12


12. Appeal

And finally, the last principle of animation basically says that any character that you draw needs to be visually appealing.  They should have some charismatic aspect or some kind of visible personality in their design.  The appeal doesn’t just apply to the hero, but it should also apply to every other character in the animation.  The appeal doesn’t mean that they need to be good looking, they just need to be interesting to look at.

A three-step process to helping you develop appealing characters is to firstly use a variety of shapes, because there is no limit to the combinations of crazy configurations that characters can have, and every good character design starts with a clear shape.
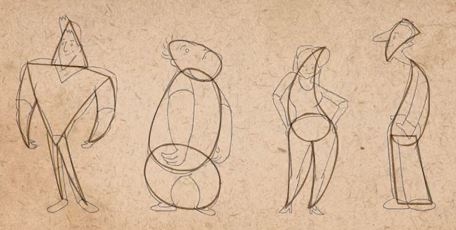
principles_12appeal

The second step is to play with proportions.  Try to find the aspects of a character define their nature, and exaggerate them.  Make them bigger.  This can help to make a character more appealing.  For example, if you had an old, hunched over witch-like woman, you could blow up her hunch, to accentuate her visual design personality.

And lastly, the third step is to keep the design simple.  Don’t add a ton of detail to the character design, just pick and choose which details are important enough to keep, as it will make animating it a nightmare, because you are going to have to draw everything hundreds of times, over and over again.


Phew…

And that concludes the 12 principles of animation!  If you managed to read all of it, well done you!  You get an invisible gold sticker.  Hope that makes your ordeal feel worthwhile now.

s-l640


P.S

This blog post was made with a couple million truckloads of reference to Alan Becker’s video on the 12 principles of animation.  You can find that video by clicking right here 🙂
Task 1.3 Animation Industries And Jobs

Key Animation Job Roles

Animator – They create animations for an unlimited amount of different creative projects, including film, TV, video games, advertisements, websites, cartoons, music videos, and so on.  The list goes on and on.

3D Modeler – They build 3D characters and environments that are based on the concept art.  They can also create character digital skeletons, which animators then control.

Art Director – They oversee the production of animations and their animators and the rest of the artistic staff, who they direct artistically.

Graphic Designer – They can make pretty much any graphic an animation project would need, and they can even design film credits.

Background Painter – They draw, paint or create backgrounds manually, by computer or both for animated productions.

Character Animator – They create and design characters that use movement to tell a story, whether it’s for film, television, video games or mobile applications.

Concept Artist – They create visual ideas and concepts for anything from character designs to environment designs.

3mwusic

Concept art for Sallyface

Script Writers – They write the scripts for narrative-driven productions.

Storyboard Artists – They make storyboards for animations, which present the “action” in a series of scenes (panel by panel), which allows filmmakers, advertisers, and producers to evaluate the project before beginning production. Storyboards are also used to provide direction during production.


Industries That Use Animation

Medicine – This industry often uses educational animated films, which are usually based around a physiological or surgical topic.  They are mostly used as an instructional tool for medical professionals or their patients.

Architecture – This industry uses architectural animations created digitally. A computer-generated building can be made, along with landscaping and sometimes moving people & vehicles.  This helps companies visualise how their future buildings are going to look.

Mechanics – This industry uses computer modelling and animation to create virtual models of products and mechanical designs.  This helps companies envision how their creations are going to function.

Forensics –  This industry uses animated recreations of incidents which are created to aid investigators & help solve cases.

Education – Many educational institutions use educational animations to help their students understand subjects, like for example, scientific visualisations.

Advertisement – Most, if not all big advertisement companies use animations to help sell their products, because it appeals to wider audiences, and makes their products seem more interesting.

Gaming – This industry heavily relies on animation, as the vast majority of games use one form of animation or another.

Film and TV – This industry uses animation extensively, whether it be for animating an SFX explosion in a live action film, or creating a whole animated cartoon series.  The list goes on indefinitely.


Research And References

https://www.animationcareerreview.com/careers-animation/types-jobs

The Complicated History of Sally Face

Use of Computer Animation in Industries other than Media and Entertainment

https://mapsystemsindia.com/resources/various-uses-of-animation.html