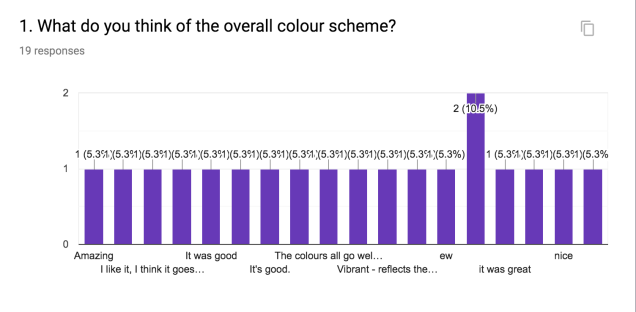
I made a peer feedback form for my Eadweard Muybridge animation, so here are the results.
I’m happy that people liked the colour scheme, I tried to make everything nice to look at.
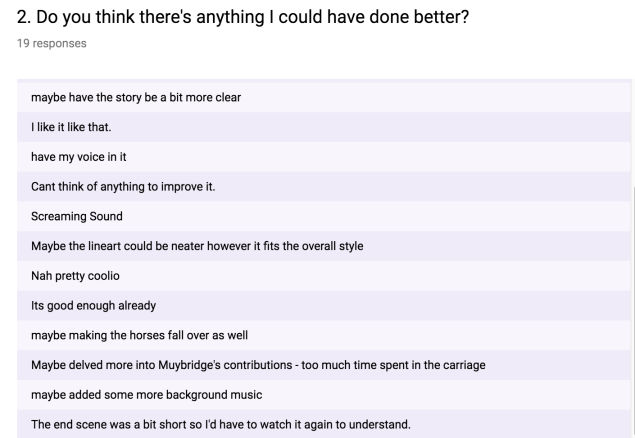
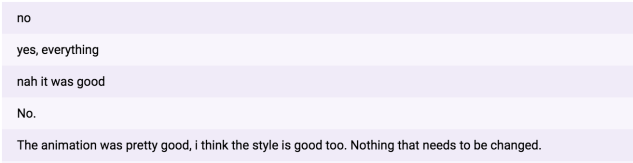
All of the feedback is pretty positive which is good! However, the constructive feedback is also really helpful.
I agree that the screaming sound could have been better. It’s true that it would have been way better if the horses had fallen over too, and I’m annoyed that I didn’t bother to do that. I probably should have shown more of Muybridge’s life, but that would have been a different kind of animation – I wanted it to just be a snippet of his life that I could play around with. I also agree that the ending shot was too short, I originally wanted to have a more drawn out shot with roses being thrown at Muybridge, but I ran out of time.
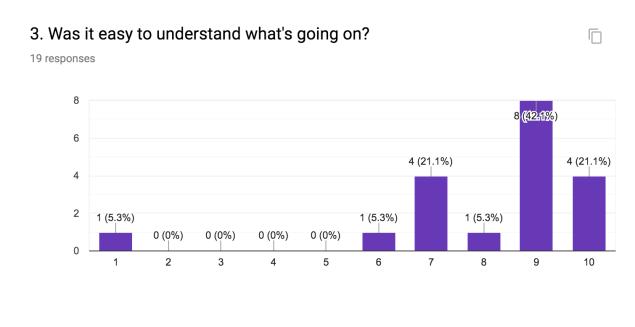
This is relieving because I wasn’t sure how well people would be able to understand the plot.
This is good, as my main focus whilst making it was for it to be entertaining.
I’m happy with this, I wanted all my characters to be cute and fun to look at.
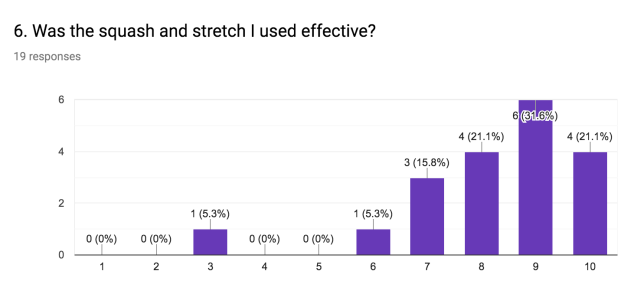
I’m happy about this because I really tried to use squash and stretch wherever I could, to increase the motion of the movement, and to add a more comedic edge to everything, Especially the little boy in the carriage.
I’m really happy that people liked it 😀
Thanks, Dia.
Overall, pretty positive feedback for the music! Yay! I was unsure whether to add music or not, as I was worried that it would clash with the sound effects that I had grown fond of by that point, but when I found the vintage music, I was so happy with it.
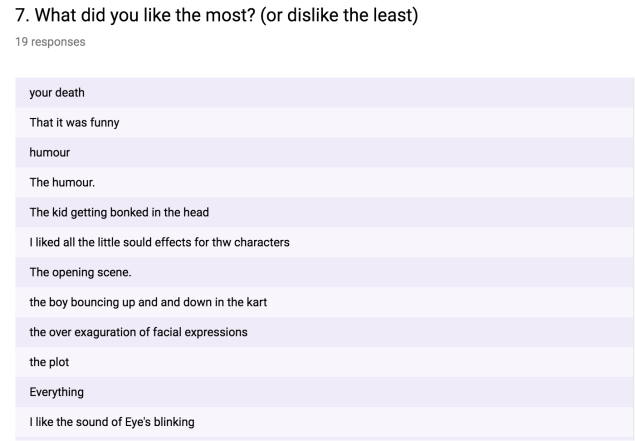
Almost all of the feedback from this one was positive. But I acknowledge the more constructive responses, as they make good points.
From the very beginning, I knew the art style I wanted to use for the faces, as for years I have been doodling faces in this very same way. I also knew that I wanted a pastel colour scheme so that none of the colours were very bright and in your face.
I began this gigantic task of an animation by creating five different character designs that I would use here and there for different things, and I could always duplicate them and change the colour of each character’s hair and clothes if I needed a bigger selection of people if they started to repeat too much.
I drew them out in my sketchbook, then drew them in Photoshop. Here’s my little family of blobby people.
As I’ve explored in my sketchbook, I drew inspiration from cartoons such as Adventure Time, Powerpuff Girls, and from the Youtuber TheOdds1sOut. The design of the Powerpuff Girls’ bodies heavily influenced the design of my characters’ bodies. I wanted the designs to be cute, and for each one to be full of personality. The Odd1sOut also greatly influenced my idea for a pastel colour scheme.
I’ve just realised that I haven’t designed the star of the badly animated show, Muybridge himself! I need to design a young and an older Muybridge. I found this picture of him when he was a young, glum-lookin’ lad.
I then began researching what colours men of that time would have worn. I want him to have slightly more striking colours than the rest of the people, as I want him to stand out as the main character. I found this picture and decided to give him a dark blue suit, as he was relatively well off by then, and his attire should represent that. Blue feels like a fancier colour than the bog-standard greys and blacks.
Here’s the result. He looks pretty gosh darn snazzy.
Now last but not least, I need to design old Muybridge. I found this picture of him, which shows what type of clothes he wore in his later years.
Here is what my version of him looks like.
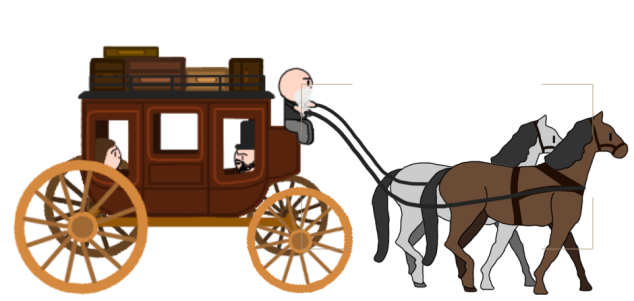
Next, onto the horse and stagecoach. I started by opening up Adobe Animate, and rotoscoping one of Muybridge’s photographic sequences of the walk cycle of a horse pulling what I assumed was probably a stagecoach.
But since the quality of the pictures was so low, I had to infer parts of the horse, so the end result looked terrible.
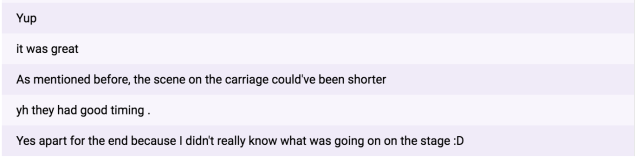
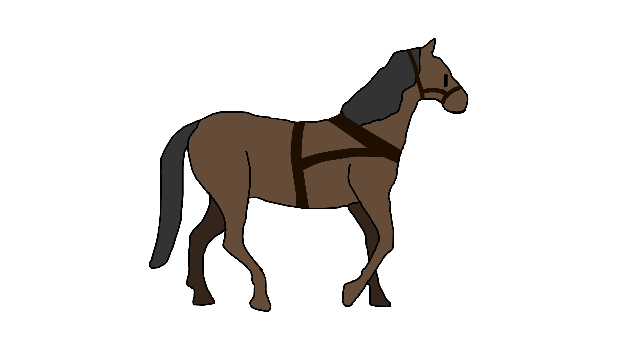
Ashamed of my monstrosity of a horse, I went back to the drawing board and found a video of a 3D horse walk cycle on Youtube made in Maya, and downloaded that for the new and improved horse rotoscope. Here’s that video.
I have now started rotoscoping that. I’m not animating the whole video, however, as I’m just going to animate one cycle and loop that to save time. I’m much happier with the appearance of my new horse. Here’s a handsome fella.
I’ve decided to animate this striking fellow on twos, instead of ones, to cut the number of drawings and amount of time I need to spend on this by half. I could, however, animate on threes to save even more time, but I want the animation to be somewhat smooth.
Here’s the result. He’s adorable, ain’t he?
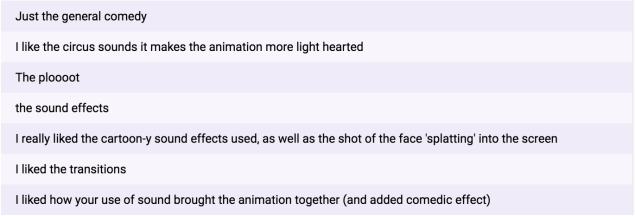
But I’ve just realised that the little fella is going to be pulling a stagecoach, and that would require him to wear a harness, so now imma go do that. I want a simple design for the harness because I don’t have the patience for anything more detailed. I found this design from the cartoon South Park, which I’m going to use because of its simplicity.
I used this for reference as I re-created it, then shifted its position on every other frame to match up with the horse’s movements. Here’s how he now looks.
I then duplicated this handsome laddie and recoloured him on each frame to make a separate horse, because stagecoaches are normally pulled along by at least two horses. So here’s his sister.
Now it’s time to add in the stagecoach. I found this image, and I’m now going to draw a simplified version of it in Photoshop.
I’ve put each wheel on a different layer because I want to animate the wheels separately from the rest of the coach.
I wasn’t quite sure how to go about making the driver’s seat, so I found this image which helped me.
This is the result. I wanted to make it nicer to look at, so I added some luggage and extra decorative lines, and I’m pretty happy with the result! Yay!
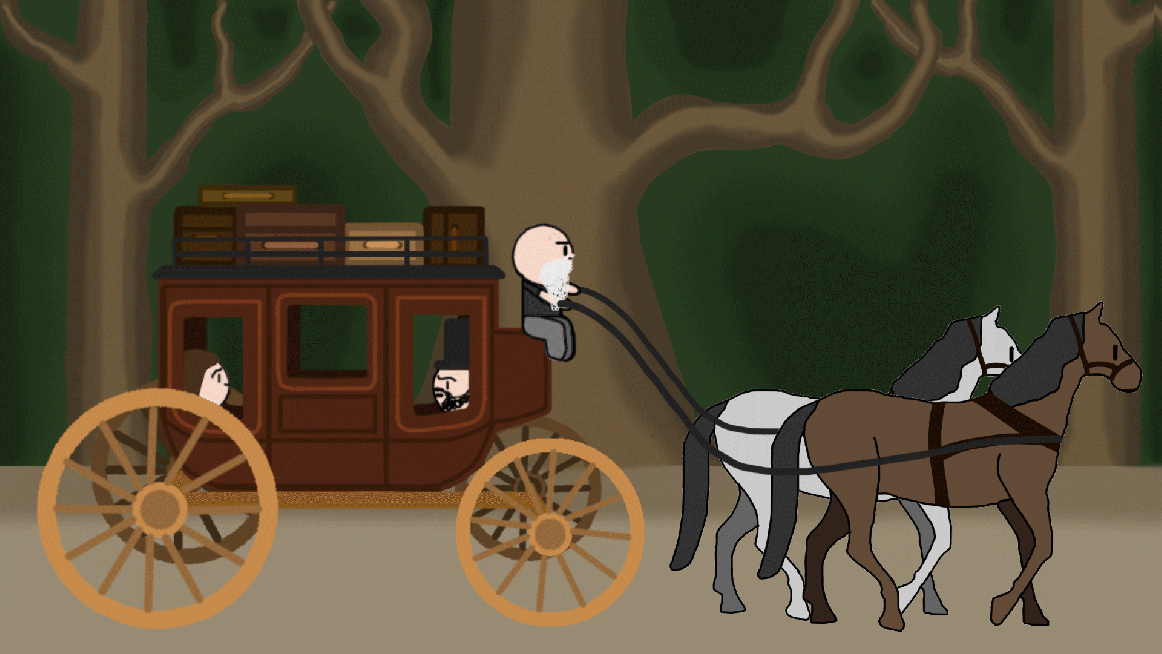
Next, I want to smoosh it all together into one nice big animated scene. I used Adobe After Effects for this.
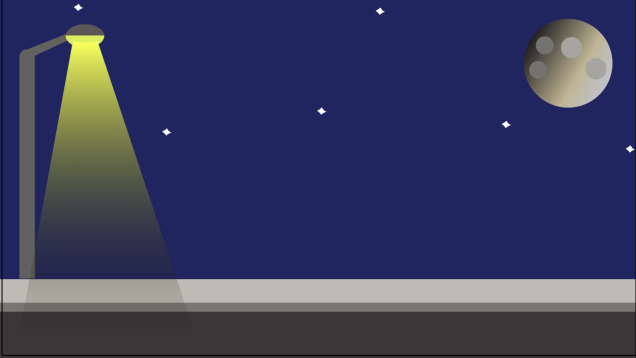
I then added the background. I had fun messing around with the brush tools until I was satisfied with it.
Then I put everything together and animated the wheels rotating, and duplicated the background a couple of times to have them slide across the screen, to make it look as if the cart was moving. Here is a gif of the result, I’m really happy with it!
My teacher suggested that I add a little bump every now and again to the coach because roads at this time in history were nowhere as smooth as this makes it look. I don’t have a gif of it, so just imagine a little bump every second.
With that shot done, I’m now going to work on the previous scene. I want Muybridge to be standing on a stage, showing off his newest animation, which will start with the above gif. I want the curtains to open dramatically, so I found this video on youtube, which I’m now going to rotoscope.
Here are all of the keyframes that I drew.
And here’s the final result! Ain’t that cool?
I’m now making a zoopraxiscope to accompany Muybridge on stage. I want it to be from the back, here’s my reference picture.
Here it is.
I then smooshed all of the assets together in one awesome little image.
I’m now going to smoosh everything together even further in After Effects and animate it. My plan was to have the zoopraxiscope turn on, and the animation of the coach and horses would then appear on the screen behind, and the camera would zoom into it, and the animated accident would commence. But the simple act of making the camera zoom the way I wanted it to but it became so unnecessarily difficult and complicated because when I thought I was moving the camera up, I was actually moving the point of view up so that it would then distort the animation earlier on. After many hours of confusion, I finally worked out that if I scale up the whole scene as well as moving the camera forwards, it would work perfectly! Yay! Even He’s happy about it.
But I then encountered another problem that set me back way too many precious hours. For some bizarre reason, a little baby horse kept flickering in and out of existence in the stagecoach animation. I became certain that I was being haunted by a baby ghost horse, as it completely disappeared when I zoomed out and it didn’t appear to be selectable. In the end, I had to delete everything and put the scene back together again.
I can now safely say that I think I’ve exorcised it with the power of After Effects, and I hope never to encounter such an abomination again.
With that all done, I’m now going to move onto the next shot of my REALLY time-consuming animation. For this bit, I’m going to draw the interior of the stagecoach, so I found these images for reference.
This is what it ended up looking like.
I then drew a background and some trees. I will make the trees fly past the window, to make it seem like the coach is moving.
I then put the young Muybridge in the coach and smooshed all the assets together. I purposefully didn’t show his legs, because I wanted him to look like he was sitting down, and the asset I made was standing.
I imported everything into After Effects and started animating it. I made the trees move past the window, and every now and again I bounced Muybridge and the coach up and stretched him out, to make it look as if they hit a bump in the road. I did this to make it more realistic and interesting to watch. In case, by some miracle, you’re interested, here are all of the animated keyframes for this shot. I also made him blink occasionally because it looks really cute, and it makes him feel more alive.
I then made the front of the inside of the coach. I duplicated the coach, trees and background. Then I added a window for plot purposes, with the driver’s little legs hanging down to make it more immersive.
For plot purposes, I made a cut-down tree that would cause the accident. The stagecoach that Muybridge was travelling in apparently crashed into a tree after the brake broke and the horses went out of control. So I’m going to make the coach try to brake before hitting the fallen tree, but the brakes snap and they collide, which sends Muybridge flying into a tree head first.
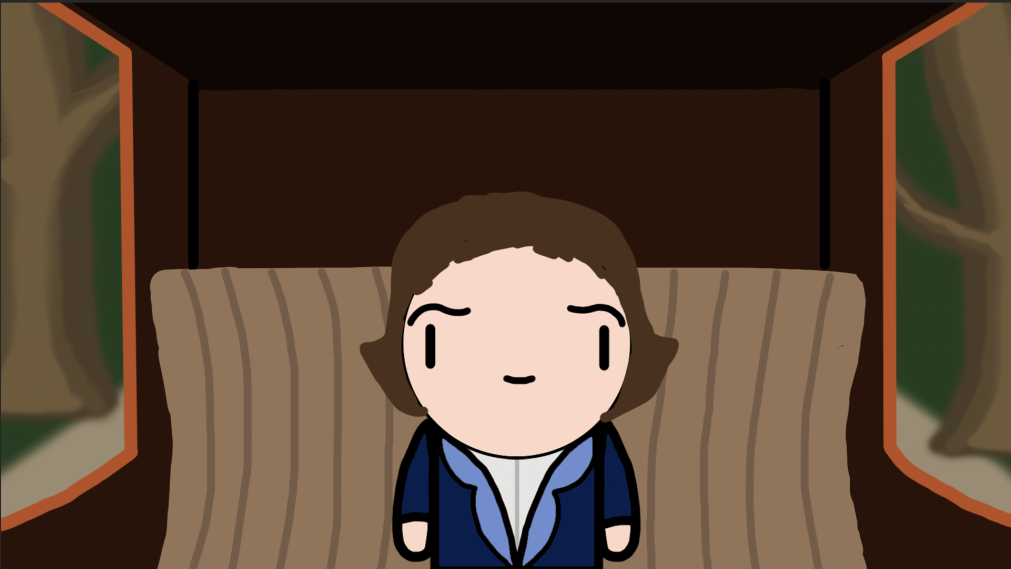
I then added some passengers to make the scene more interesting, and it all turned out like this.
I once again animated the trees flying past the window, but I reversed them this time because we are looking forward instead of backwards this time. I once again animated bumps, and I made the little boy fly because of his small body mass. I tried to add some squash and stretch to the little fella.
I then made a duplicate file of Muybridge in the coach and modified it slightly and animated it. Here is the general gist of it.
At this point, the brakes are going to snap, but I’ve just realised that I haven’t made a break, so I’m going to get on that. I found this picture, which I am going to use for reference.
I think it would be cool to have sparks flying off as the driver tries to break, Si I found this video which I am going to use for some kind of vague reference.
Here’s what it all looks like. Because I am running short on time, I animated about 3 frames of yellow blobs flying away and looped it.
I then drew a log in Illustrator and Photoshop.
I put the log it in the scene, and it looked like this.
I then animated the log moving on screen from the right, and made the horses jump over it. But the stagecoach wasn’t so lucky, as it had a 90-degree angle crash, which sent Muybridge flying.
I drew a quick version of Muybridge from the side and stretched him out, using the squash and stretch principle to enhance the movement. Try to ignore the fact that his original head stays in the coach. At this point, the deadline was in a couple of hours, and I just simply did not have the time or patience.
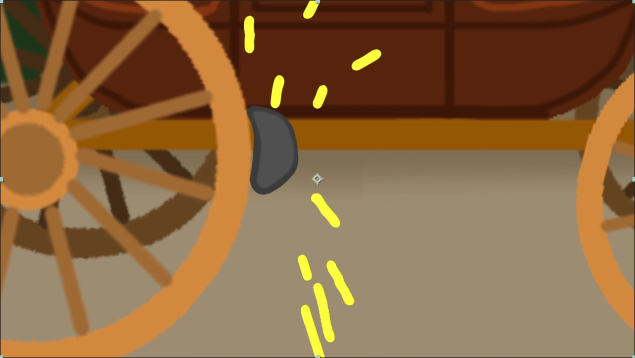
For the next shot, I took the head from the screaming Muybridge from earlier and quickly animated it getting bigger, which made it look as if he was flying closer and closer to the camera.
When he supposedly “hit” the camera, I squashed his face, as if his face was pressed against a pane of glass, and also drew some cheeks, to add to this effect.
After this, I mad his face slowly slide down the screen, as if his face was slowly sliding down a pane of glass, then froze the last frame and added a black dissolve effect. Here’s what that looked like in the timeline.
And that was the end of that scene. Onto the next!
After Muybridge’s accident in real life, he travelled back to England where he spent about 5 years recovering. During this time, he studied photography, so I thought that it would be neat if I showed him in bed with a bandage on his head, to indicate a head injury, and he would then pick up a book of photography for dummies.
So to begin with, I needed a hospital and a hospital bed for Muybridge to lie in, so I found this picture for reference. It is perfect because it is the exact camera angle that I imagined! Yay!
I then copied it in Photoshop, and drew lighter and darker tones of the objects to give them depth, and also just because it’s fun. I then used the angle of the lines of the table for perspective reference, so that I could draw a book lying down. Next, I brought in the Young Muybridge asset and deleted everything except for his head and arms, then I drew a head bandage and a grey outfit on him. I also played around with the colours of the background. To show that he went to England after the accident, I added a little sign that said England on it, and as a bonus little easter egg, I wrote the number of the college room I’ve spent many a day and night making this animation. Here is the result.
Next, I animated his eyes looking at the book, using the principle of staging to show the audience where to look, and to indicate what’s going to happen next. I then made his arm extend out and grab the book. After this, I zoomed in and removed the front bedpost to make sure that nothing was obscured, and drew an open book of photography for dummies. I used this picture for reference.
I drew a quick camera for the front of the book, although now looking back at it, I’m not sure how relevant it is for the time period, but since it is only a very trivial bit of the animation, and it is just to enhance the idea of the book, I don’t think it matters enough to redo it at this point in time. I wrote “Ye Olde Photography”, to enhance the light-hearted comedy element of the animation, and to make sure that the audience remembers that this is set in the past. Ye Olde is “suggestive of a Merry England, Deep England or “old, as in Medieval old feel.” – Wikipedia.
I animated his eyes moving from right to left, to make it look as if he was reading the book.
And finally, I cut to a shot of the stage from earlier and drew a bowing Muybridge.
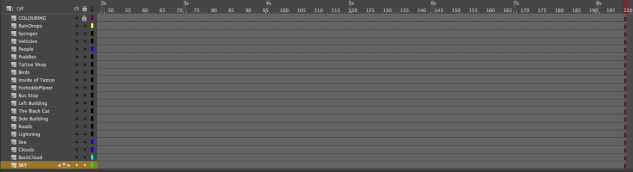
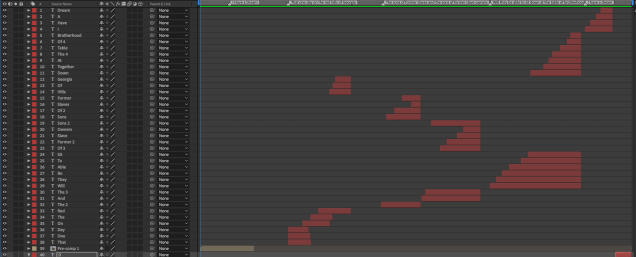
And last but not least, Here is how the whole animation looked in the timeline. I’m not going to show all of the keyframes, as I could not show them all in a single picture, and it would just be so unnecessary.
ANDTHAT WAS THE END OF MY ANIMATION!!!! YE OLDE HURRAH!
But I wasn’t completely out of the hand-drawn-woods yet, as I still needed to add music and spot effects to it in Logic Pro X.
At this point, I was several hours past the deadline, so I didn’t have the time I would need to record the foley sounds myself, so I used the website Freesound (https://freesound.org/) for the sound effects. The process of finding the right sounds, and placing them in the right spot took me about 4 hours. Here are some of the many sounds I used.
After all the foley sounds were added, I went onto the final stage of the animation process, which was to add music. I found the perfect sound file of a vintage news-like song and some other neat bits of music, by using the in-built sound library in Logic Pro X which I accessed by clicking this little guy in the top left-hand corner of the screen.
I then exported everything, and now, I am completely finished!!!!!
We were given the task of creating an animation with a previous illustrator project of a high street. We had to make the scene come to life, with moving vehicles, walking people, and day/night cycles.
I began by importing my age-old (5 months old) high street made in Adobe Illustrator, and making about 200 odd frames, to give me enough time to goof around in.
I made the Sky layer into a symbol. I then created a keyframe at around frame 10. On that keyframe, I gave the sky a Tint, then fiddled around with the sliders to make the sky a light blue, so that the scene looked like it was in the middle of the day, not the middle of the night.
I created a Classic Motion Tween between the two keyframes, which animated the sky into changing from a dark purple, into a light blue, which simulated the change from day to night time.
I then made the clouds move across the screen with a classic motion tween, and I also made the rain fall down the screen by making it into a movie clip, and, well, moving it.
After this, I moved on to animating the sun and moon. I started by gathering some reference pictures that I would use to design them. During this, I realised that it would be unbelievably cool if, instead of having the sun and moon move separately, I could combine them into a solar eclipse, which I thought would make the whole scene way more interesting to look at.
Having animated the dark sky turning light, I decided to reverse that by swapping the two keyframes around, so that the sky went from light to dark, which would suit the eclipse way more. I found this gif which really helped me to visualise how the eclipse would begin.
To rotate the image if needed, go to Image, then Rotate, then rotate however much you want.
Use the rectangular marquee tool, and select one of the panels.
Press CMD J which makes the selection its own layer.
Make each panel its own layer, but don’t put the layers into folders, because it messes up in After Effects.
If there are parts that I want to animate later in After Effects, then make them into a new layer and organise the layer behind the original layer, and replicate everything on it.
Name each panel, like Panel 1, Panel 2, Panel 3, etc.
Press CMD L to bring up the levels windows, which you can use to make the pictures brighter or darker.
Using the Brush Tool, you should add colour to it, but only black, grey and white tones. Can also add more definitive lines.
Import it into after effects.
Create a new composition called master.
Create a new composition for each layer.
Make simple animations for each storyboard picture, like rotating a ball or what not.
Play around with the camera on the storyboards.
Line up the pictures in their respective order in the master, so that when one picture finishes, the next one starts.
Today we were given the task of making a 2D robot run across the screen a couple times.
So first of all, I had to design my robot in Adobe Illustrator, but I couldn’t think of a cool design. I then remembered a drawing that I and my Girlfriend had made, of a humanoid being controlled by a Furby inside of them. So I began drawing inspiration from googling pictures of Furbies and different types of robots. Here are the pictures that inspired me the most.
So I started off by designing my Robot. I tried to make him seem kind of lanky and tall, giving him a youthful air. I exaggerated this aim with those cute little booties. For animation purposes, I made each limb into its own group in illustrator, before I put it into Animate. I wanted him to look slightly sad, giving him a little slouch; as if he isn’t too happy about being controlled by a Furby.
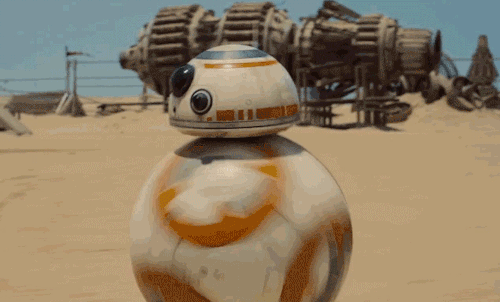
I added balls at every joint so that it would look more realistic if he were to wildly move his limbs around. I imagined the movement being kind of like how BB-8 moves from Star Wars
Because none of my animations can ever be straightforward, I then made a simple background in Illustrator for my little robot guy to run in.
I imported them into the Stage in Animate, and made each grouped limb into its own symbol, and also made the whole robot into a symbol as well. This would allow me to animate each limb individually. Making the whole robot into a symbol allows me to move the robot and all of its animations at once on the main stage. I quickly made up a naming convention for my symbols, so that I could easily tell one from the other. It was as follows; Limb_Left/Right_Top/Bottom.
I then came up with the dumb idea to have the robot be chased by a mob of sentient Furbies. I figured a cool story could emerge out of this little scene. What story is that you probably didn’t ask? Well, the answer that you probably don’t want is That I have no idea, I just thought that this was a short little interesting bit of narrative. So I then made four Furbies and made each one into a symbol, as you can see above.
So I double clicked on my little robot boy, which made it so that I was animating the robot and nothing else. I selected the Bone tool, which allows me to create the “bones” of an illustration. I clicked on the top of his chest, then dragged out to the head. Then I continued dragging and making these points for each limb.
These are what allow you to animate specific limbs. You could just move the limbs independently, and animate that way without the bone tool, but this tool is very useful because it makes sure that the limbs are confined to the movements of an actual limb, like for example it makes sure that your head can’t fly away into the night’s sky.
When you use the bone tool to make the moveable limbs, it automatically creates an “Armature” layer on the timeline. This layer holds all of the bones. It also has green frames, to help you discern it from the other types of layers.
Next, I started actually animating the little robotic chum. I positioned him in a running stance (pictured above). Then I copied and pasted the same keyframe about 20 frames later, then in the middle of my two keyframes, at around 10 frames, I made a keyframe and positioned my little robot fellow into a running stance which made him look like he had already run a bit.
I made the left leg extend to the right, and the right leg extend to the left, and so on. This made it look like my little robot acquaintance was running on the spot. Yay! This is what the timeline looked like.
I then copied and pasted these three frames about 20 times, so that he kept doing his little run cycle for the foreseeable future, which gave me the time to mess around with the animation for about 400 frames. I went back to the main stage, and on the little robot guy’s layer made a keyframe at frame 1, and made one at about 70 frames later. At frame one I positioned him just off the digital canvas to the left, then I shifted my red timeline slider thingy to the second frame. Holding down shift, I moved the robot across the canvas and left it just off the canvas to the right. I then created a Classic Motion Tween between those two frames.
Because I had already animated his run cycle in his symbol, this made him run across the screen! Whoop!
I then did the whole of the last step again, but instead of making him from left to right, I made him run from right to left. This made him run across the screen twice!
Next, I animated my little cute, but equally terrifying Furbies. I gave each Furbie their own layer.
Then I did the exact same thing I did with the robot but made sure that they ran across the screen in the time when the robot was off-screen. I also made the distance between their keyframes different, so that their movement would look slightly more authentic, as in they all wouldn’t just float across the screen all at once, at the exact same pace.
And Ta Da!! I now had an animation where a robot ran across the screen, which was being chased by a mob of terrifying Furbies! 😀
I then went home, and wowie, surprise surprise, messed around with it in the editing software, Lightworks. I added some fitting sounds that made it more interesting, which I found on Freesound. I also gave the whole shebang some fancy fade effects.
Something my teacher told me after I’d made it was that I could have made the light flicker, and the stars twinkle, which would have given the animation a lot more depth, so that it didn’t look so 2D and flat. It’s the little details that count.
FUTURE ME! REMEMBER THIS TECHNIQUE FOR FUTURE ANIMATIONS!!
Today I learnt how to animate words in Adobe After Effects. We were given the task of putting on-screen lyrics to a Martin Luther King speech.
We were given a pre-made composition with the audio, and the first part of the speech already animated. We dragged out a text box with the Text tool and wrote each word in the speech in their own dinky little text box.
We then arranged the words into a visually appealing format on the screen with the Move tool.
Then we manipulated the words’ properties, like position, scale, rotation and what not. I animated the words so that they would fly onto and off the screen by clicking the position stopwatch, then creating keyframes at the specified places.
The keyframes are represented by those cute little white diamond shapes down there. I then chose when I wanted the Words to appear and when I wanted them to disappear by holding “Alt” and pressing the “}” key. This trimmed it to the place I wanted it on the timeline.
1:What did Javier Mariscal give to the director Fernando Trueba as the starting point for the animated film Chico and Rita? in 2007, Javier Mariscal gave his sketchbook from his trip to Cuba to Fernando Trueba, the director of Chico and Rita. The colourful drawings within it clearly show a passionate love for the architecture and interiors of Cuba. Looking at some of the art, you can almost see the beginning of the ideas for Chico and Rita.
2: This is Fernando Trueba first animated film. What was he surprised to be working with? As this was Fernando Trueba’s first animated film, he had assumptions about animation; he thought that he would only be working with drawings, and animated characters, but to his surprise, he actually collaborated with real-life actors.
3:What are the benefits of working this way? He realised that working with actors “is a really good idea because it’s the best way to keep the film under control”, otherwise when the director tells the animator to make something, there could be a million different outcomes. Working with actors allows the director to make exactly what they want, so then when the animators come to animating the sequences, there is no deviation from the director’s original cinematic vision.
4: Why did the director feel it was important to use Cuban people? To represent the Cuban characters more accurately.
5: Where was most of the film filmed and how and what was filmed differently? Almost all of the film was filmed on set, except for exterior shots with cars and such. But when filming outside, they had to make sure that everything was “Marked up”, which involved putting striped balls on everything, so that they could go back and digitise all of the camera movements.
6: How many animators worked on the film? Around 200 people.
7: What was their biggest challenge? Making the 200 animators seem like just one person because they all needed to draw in the exact same style for continuity in the film.
8: What locations are described as also ‘the star of the film’? Havana and New York.
9: How did Javier Mariscal visually record Havana? By drawing the backdrops and backgrounds in great amounts of details. They evoked the characters, the feeling of Havana, and New York.
10: How does colour support and enhance the story in the film? Two different colour palettes are used for Havana and New York. Havana has very warm colours, with lots of sunshine, and New York has much more muted colours, with rain and shadow. This makes it easier to distinguish one place from the other.
11: What other story does the film try to tell? The story of all of the other Cuban musicians at that era. How they moved to New York and influenced Bebop there.
12: Why did the director decide to recreate the music rather than use the existing original recorded music? They were going to use the original music, but then Fernando Trueba realised that musically speaking, it would turn the film into some kind of compilation disc. Instead, he was much more excited at the idea of recreating the music for real, by “getting the musicians to play other musicians.” He wanted an original, contemporary produced soundtrack.
Rotoscoping
The animation technique used in Chico and Rita is called “rotoscoping”. It is where the animator uses a pre-recorded piece of real-life video, with real actors, then they trace around them on every single frame. This allows them to artistically, but accurately translate the video into an animation.
Javier Marisca
He is a Spanish Artist, Designer and Director. Among his best-known works are Cobi, the mascot for the 1992 Olympic Games in Barcelona. One of these latest works is Chico&Rita (2010), an animated film directed together with Fernando Trueba. The film was nominated for an Oscar and received the Goya award for the best-animated film.
Here are a bunch of animation art style mood boards from a small selection of games, films, animations and music videos that inspire me. They are for my research on what I want my upcoming Muybridge animation to look like.


 .
.