Today we were given the task of making a 2D robot run across the screen a couple times.
So first of all, I had to design my robot in Adobe Illustrator, but I couldn’t think of a cool design. I then remembered a drawing that I and my Girlfriend had made, of a humanoid being controlled by a Furby inside of them. So I began drawing inspiration from googling pictures of Furbies and different types of robots. Here are the pictures that inspired me the most.


So I started off by designing my Robot. I tried to make him seem kind of lanky and tall, giving him a youthful air. I exaggerated this aim with those cute little booties. For animation purposes, I made each limb into its own group in illustrator, before I put it into Animate. I wanted him to look slightly sad, giving him a little slouch; as if he isn’t too happy about being controlled by a Furby.

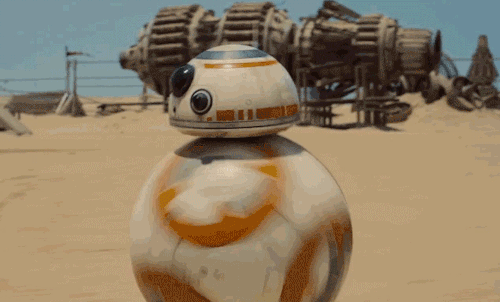
I added balls at every joint so that it would look more realistic if he were to wildly move his limbs around. I imagined the movement being kind of like how BB-8 moves from Star Wars
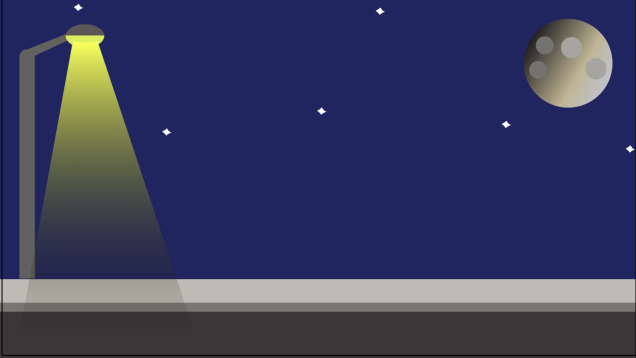
Because none of my animations can ever be straightforward, I then made a simple background in Illustrator for my little robot guy to run in.
I imported them into the Stage in Animate, and made each grouped limb into its own symbol, and also made the whole robot into a symbol as well. This would allow me to animate each limb individually. Making the whole robot into a symbol allows me to move the robot and all of its animations at once on the main stage. I quickly made up a naming convention for my symbols, so that I could easily tell one from the other. It was as follows; Limb_Left/Right_Top/Bottom.

I then came up with the dumb idea to have the robot be chased by a mob of sentient Furbies. I figured a cool story could emerge out of this little scene. What story is that you probably didn’t ask? Well, the answer that you probably don’t want is That I have no idea, I just thought that this was a short little interesting bit of narrative. So I then made four Furbies and made each one into a symbol, as you can see above.
So I double clicked on my little robot boy, which made it so that I was animating the robot and nothing else. I selected the Bone tool, which allows me to create the “bones” of an illustration. I clicked on the top of his chest, then dragged out to the head. Then I continued dragging and making these points for each limb.

These are what allow you to animate specific limbs. You could just move the limbs independently, and animate that way without the bone tool, but this tool is very useful because it makes sure that the limbs are confined to the movements of an actual limb, like for example it makes sure that your head can’t fly away into the night’s sky.

When you use the bone tool to make the moveable limbs, it automatically creates an “Armature” layer on the timeline. This layer holds all of the bones. It also has green frames, to help you discern it from the other types of layers.

Next, I started actually animating the little robotic chum. I positioned him in a running stance (pictured above). Then I copied and pasted the same keyframe about 20 frames later, then in the middle of my two keyframes, at around 10 frames, I made a keyframe and positioned my little robot fellow into a running stance which made him look like he had already run a bit.

I made the left leg extend to the right, and the right leg extend to the left, and so on. This made it look like my little robot acquaintance was running on the spot. Yay! This is what the timeline looked like.

I then copied and pasted these three frames about 20 times, so that he kept doing his little run cycle for the foreseeable future, which gave me the time to mess around with the animation for about 400 frames. I went back to the main stage, and on the little robot guy’s layer made a keyframe at frame 1, and made one at about 70 frames later. At frame one I positioned him just off the digital canvas to the left, then I shifted my red timeline slider thingy to the second frame. Holding down shift, I moved the robot across the canvas and left it just off the canvas to the right. I then created a Classic Motion Tween between those two frames.
![]()
Because I had already animated his run cycle in his symbol, this made him run across the screen! Whoop!
I then did the whole of the last step again, but instead of making him from left to right, I made him run from right to left. This made him run across the screen twice!
Next, I animated my little cute, but equally terrifying Furbies. I gave each Furbie their own layer.

Then I did the exact same thing I did with the robot but made sure that they ran across the screen in the time when the robot was off-screen. I also made the distance between their keyframes different, so that their movement would look slightly more authentic, as in they all wouldn’t just float across the screen all at once, at the exact same pace.
And Ta Da!! I now had an animation where a robot ran across the screen, which was being chased by a mob of terrifying Furbies! 😀
I then went home, and wowie, surprise surprise, messed around with it in the editing software, Lightworks. I added some fitting sounds that made it more interesting, which I found on Freesound. I also gave the whole shebang some fancy fade effects.
Something my teacher told me after I’d made it was that I could have made the light flicker, and the stars twinkle, which would have given the animation a lot more depth, so that it didn’t look so 2D and flat. It’s the little details that count.
FUTURE ME! REMEMBER THIS TECHNIQUE FOR FUTURE ANIMATIONS!!
Anyway, hope ya enjoy 🙂
